
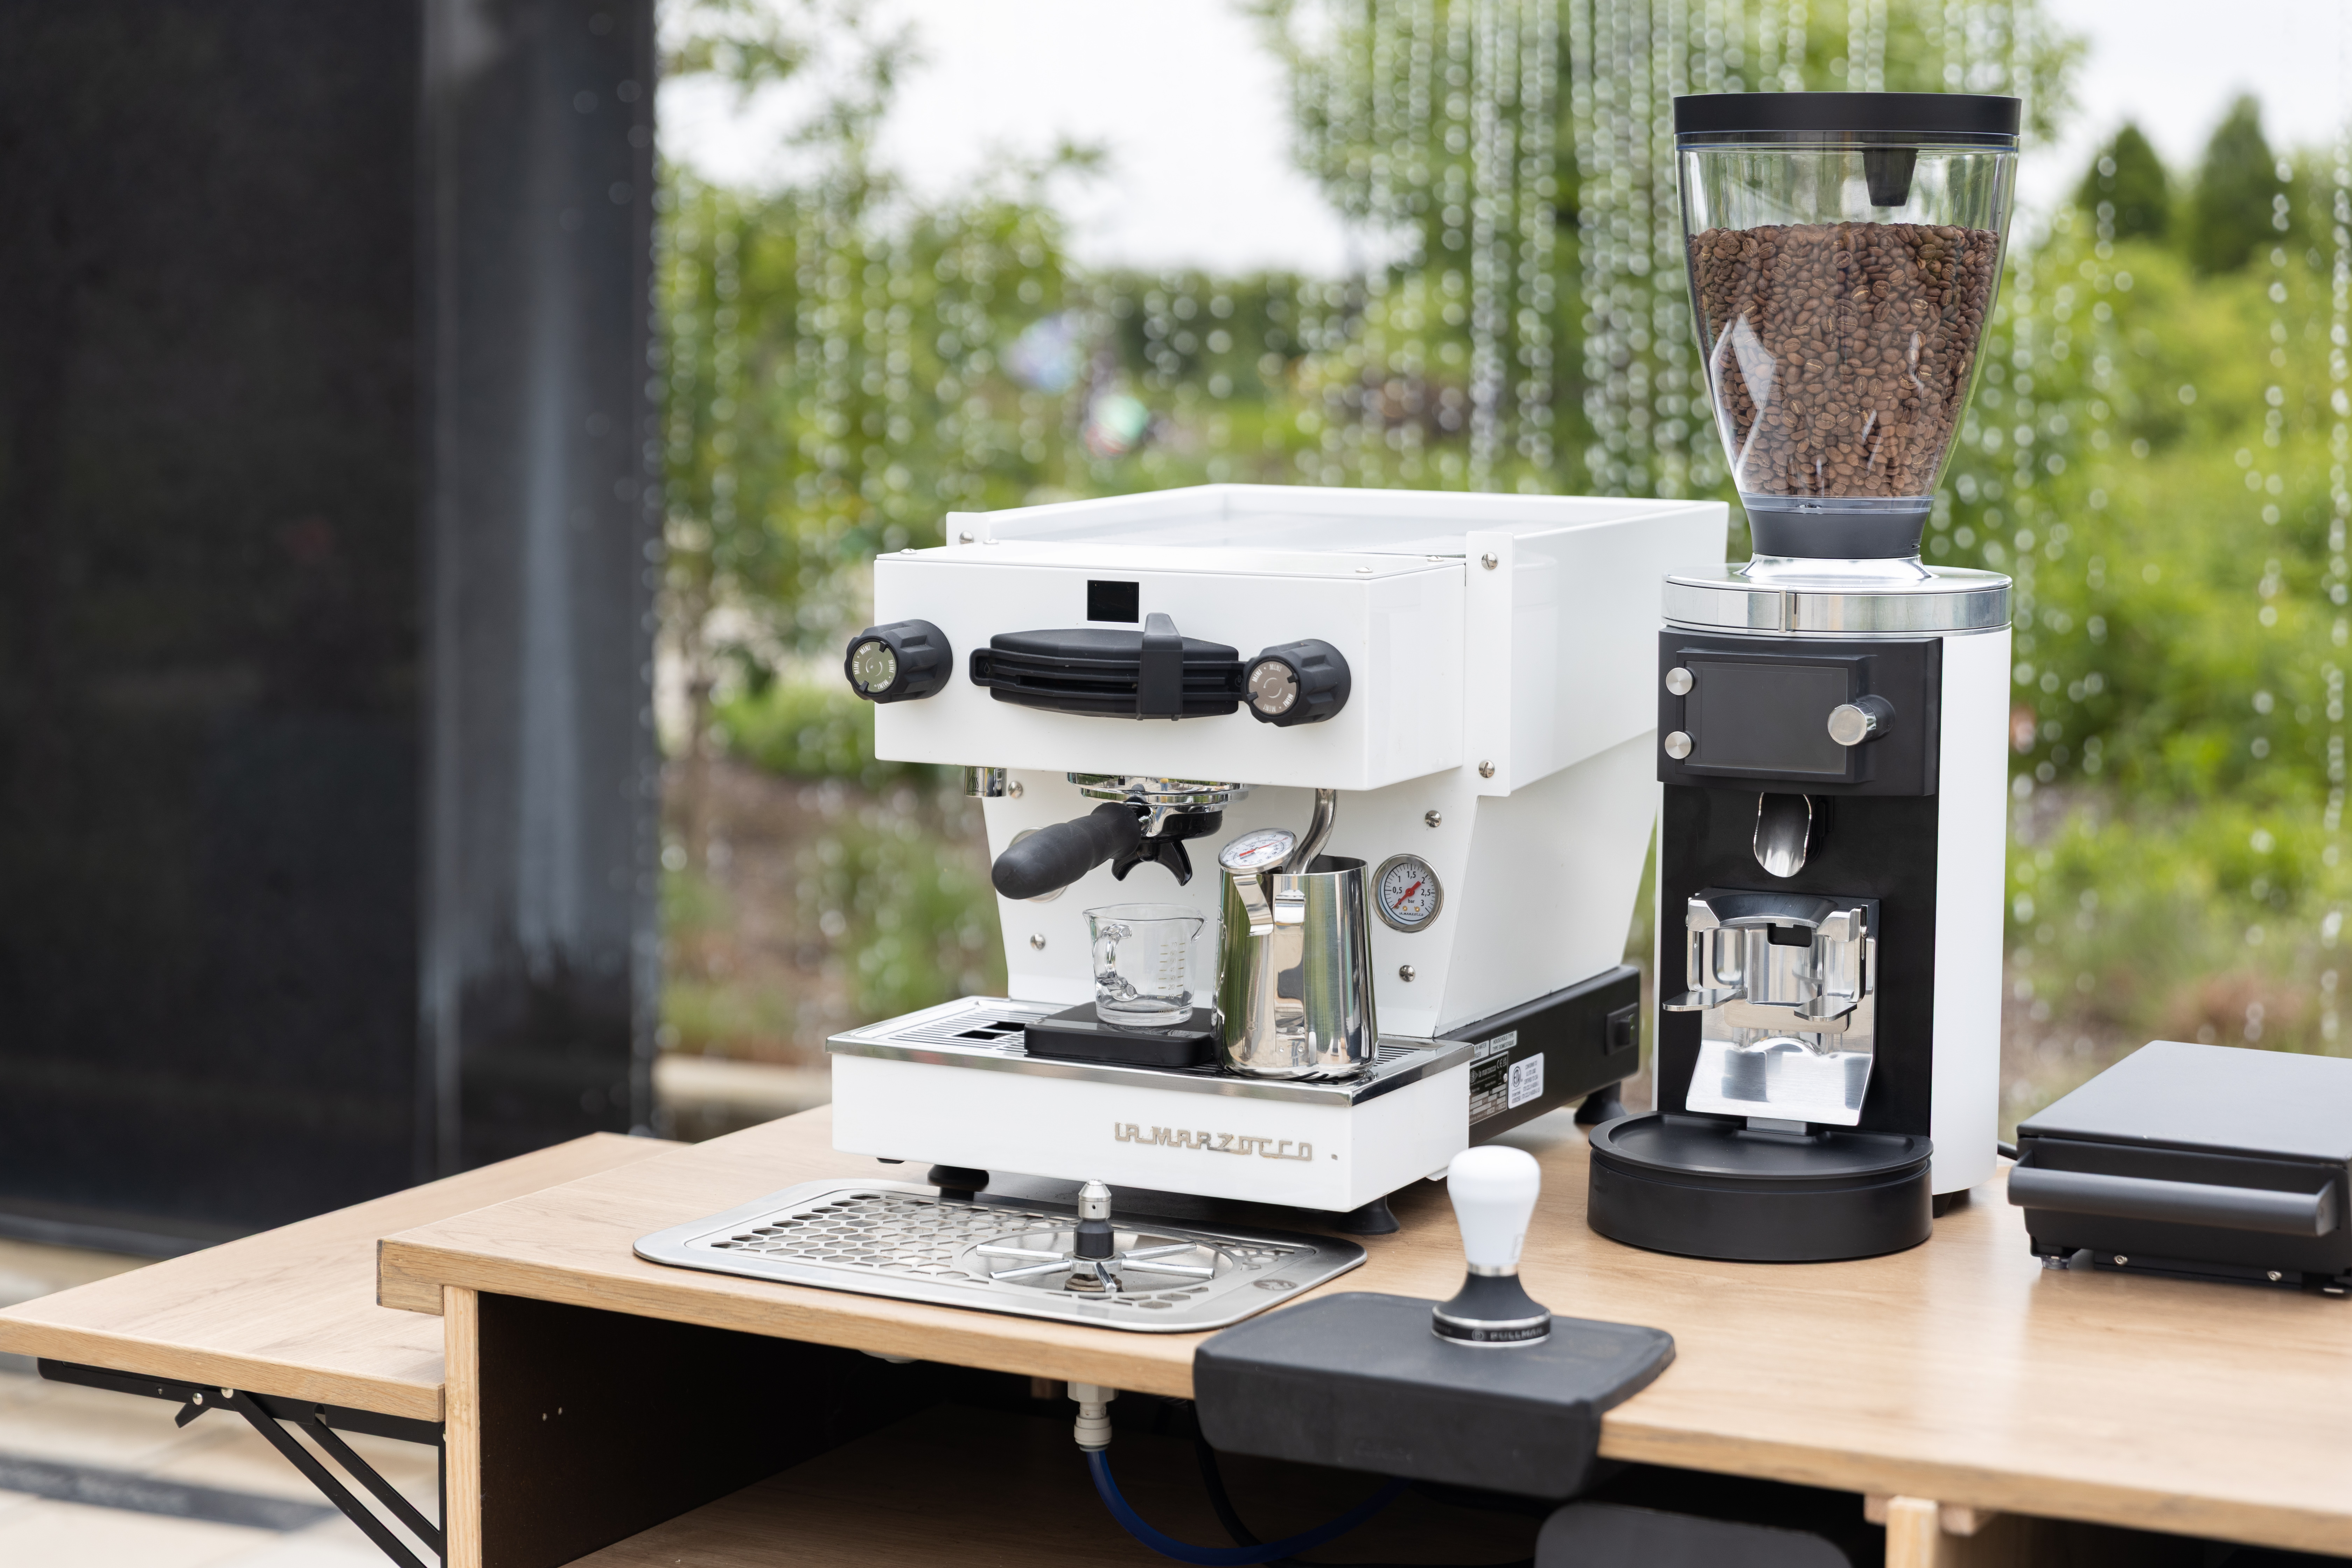
How To Cut Holes In Your Coffee Cart Countertop
How to Cut Clean, Accurate Countertop Holes
Cutting holes in your coffee cart countertop is one of the most nerve-wracking steps in a cart build. Once the saw touches the surface, there’s no going back, and a sloppy cut can blemish an otherwise beautiful build.
Whether you're installing a sink, knock box, cord pass-through, or plumbing access, the key is good prep work. Follow the process below to get reliable results without damaging your countertop.
Tools You’ll Need
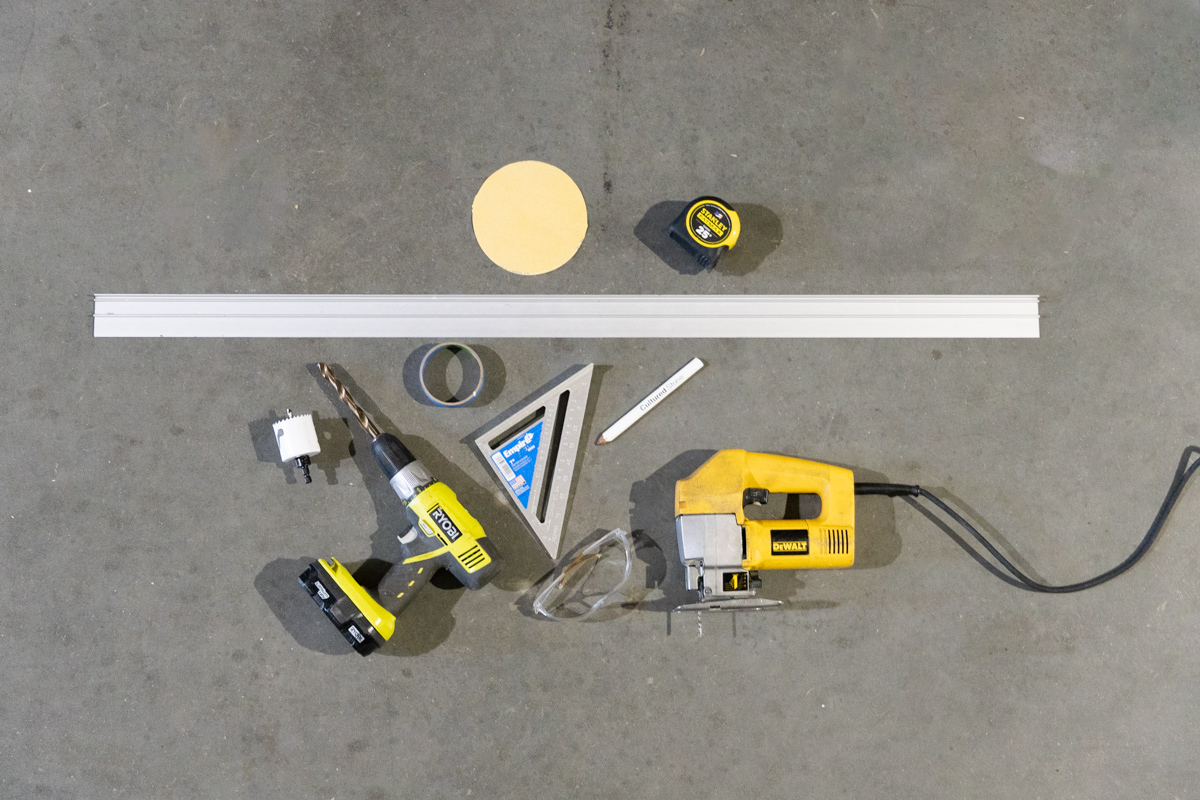
Before you begin, gather a few basic tools:
• Measuring tape
• Pencil
• Painter’s tape
• Drill
• Hole saw and/or jigsaw
• Straight edge
• Sandpaper
• Safety glasses
Step 1: Confirm What You’re Cutting For
Before touching any tools, confirm the exact cutout specifications for the component you’re installing.
• Use the manufacturer’s cutout template or spec sheet whenever possible.
• If you're measuring the object yourself, measure the actual required opening rather than the outside dimensions.
• Decide whether you want a tight fit for appearance or slightly more clearance for hoses and cords.
Tip: If the countertop is already installed, check underneath for braces, framing, or drawer slides that might interfere with the cut.
Step 2: Protect the Surface with Painter’s Tape

Cover the entire cut area with painter’s tape before marking anything.
• Overlap strips slightly to cover the full cut zone.
• Draw your cut lines directly on the tape.
This simple step helps reduce tear-out and splintering, especially on plywood, veneered tops, and laminated surfaces. It also makes your layout lines easier to see.
Tip: If you can access the underside of the countertop, taping that side as well helps prevent splintering even further.
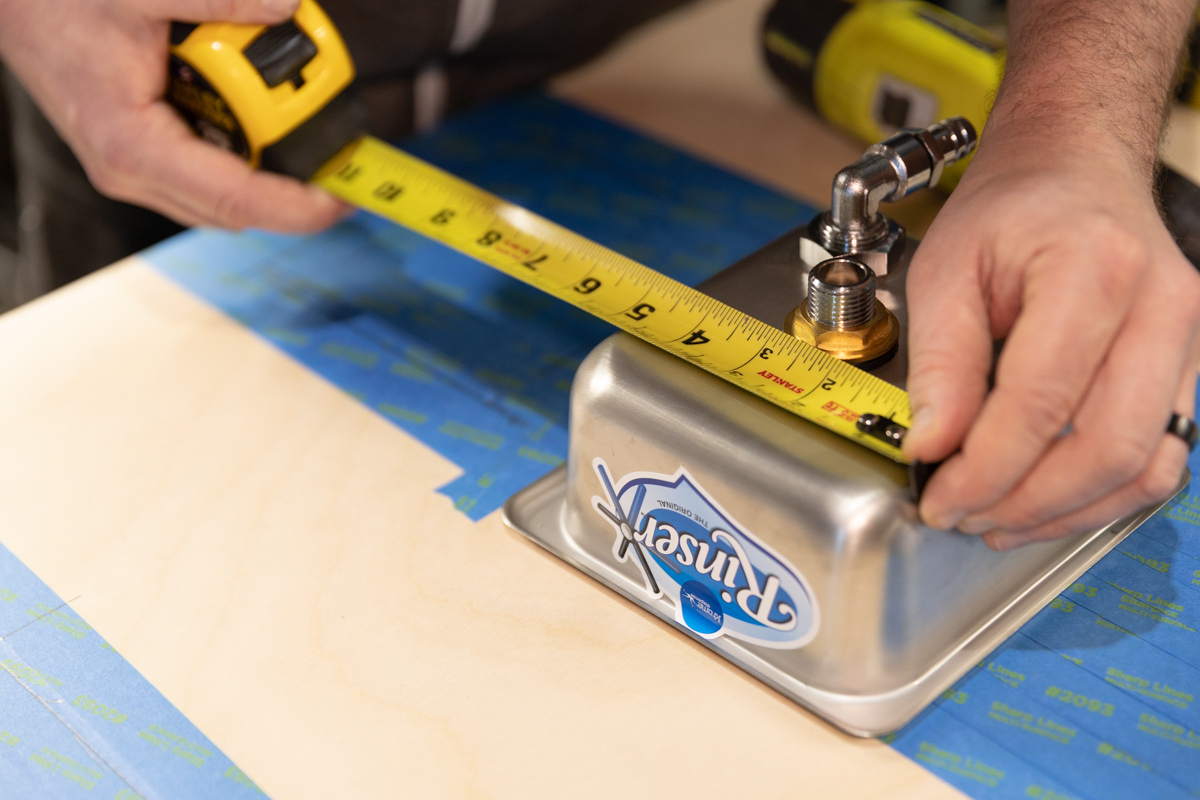
Step 3: Measure and Mark Your Cut Lines Precisely
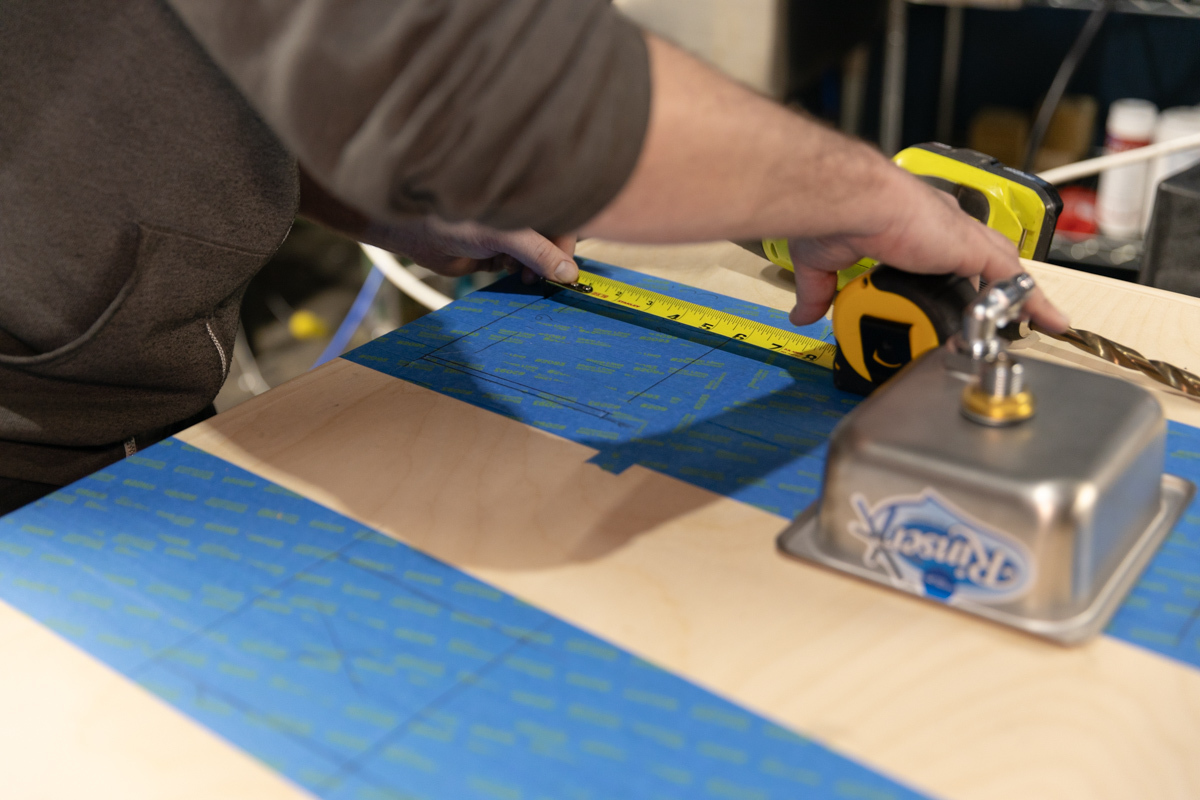
Now it's time to mark the actual opening.
• Use measurements or a manufacturer template to draw the cutout.
• Use a straight edge for clean, accurate lines.
• Mark the center point clearly for circular holes.
Always measure from multiple reference points like the front edge, side edge, or other fixed features to ensure the cutout lands exactly where it should.
Tip: If you're cutting a rectangular opening, measure diagonally from corner to corner. If the diagonal measurements match, the opening is square.
Step 4: Choose the Right Cutting Method

Most coffee cart countertop cutouts fall into two categories:
Round holes (cord pass-throughs, drains, grommets):
Best tool: a hole saw attached to a drill.
Rectangular or irregular openings (knock boxes, sinks, access panels):
Best tool: a jigsaw.
You’ll typically drill starter holes first so the jigsaw blade can enter the material.
Use the correct blade for your surface:
• Wood or plywood: clean-cut wood blade
• Laminate or veneer: fine-tooth blade to reduce chipping
Step 5: Drill Starter Holes
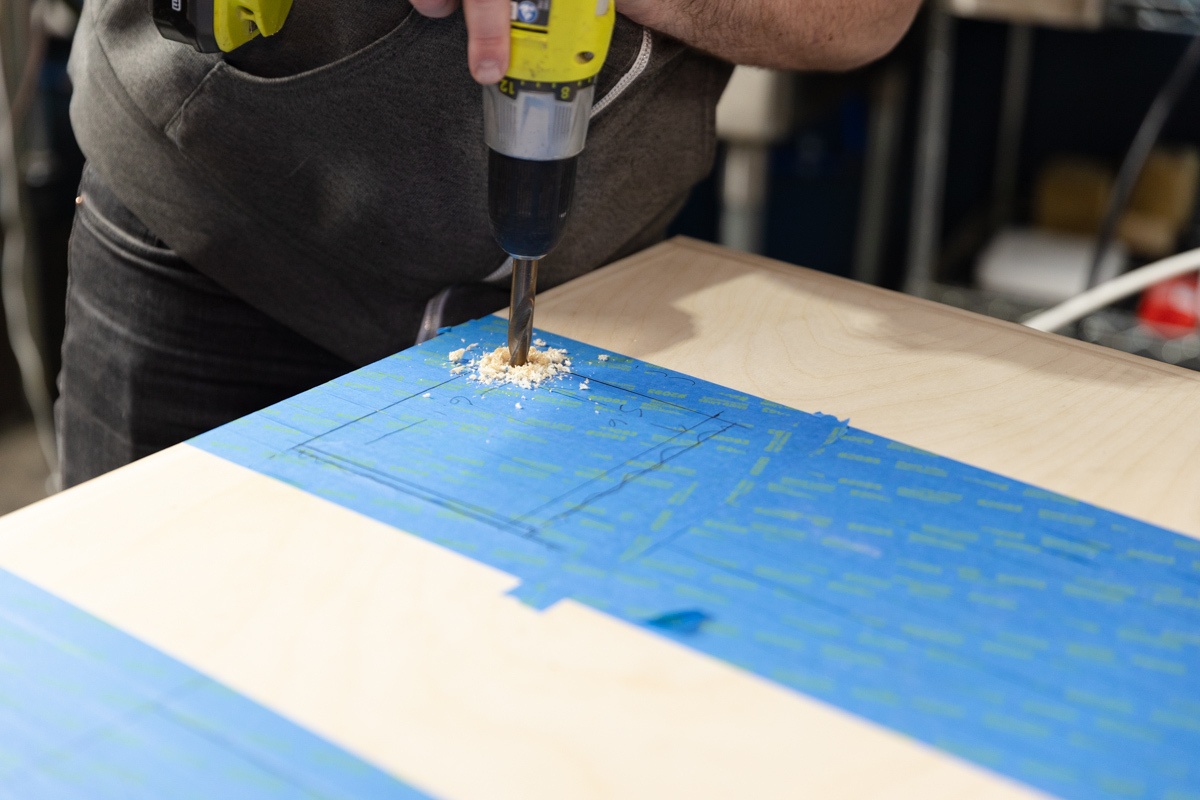
If you’re cutting a rectangular opening:
• Drill a starter hole inside each corner (or at least one corner).
• Keep the hole inside the cut line so you don’t overshoot the final opening.
This gives the jigsaw blade a clean entry point and helps you make controlled turns at the corners.
Step 6: Cut Slowly and Stay Inside the Line
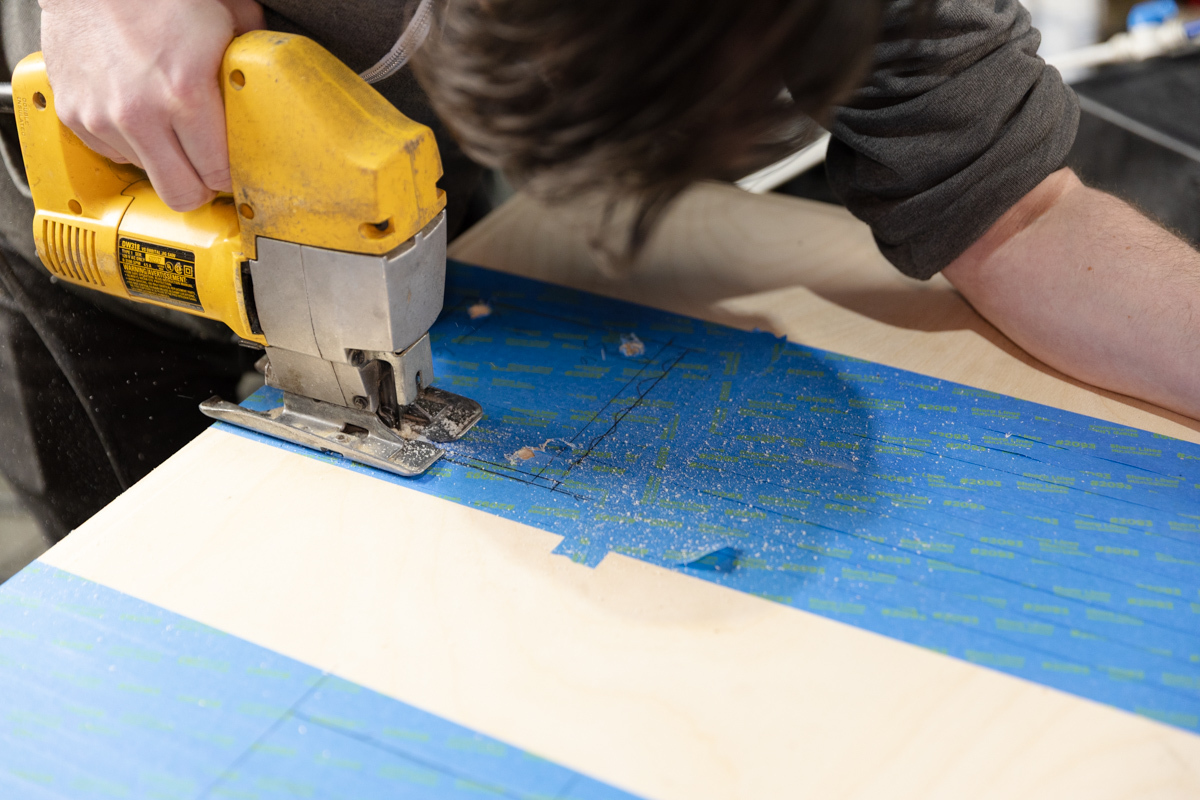
For hole saw cuts:
• Start the drill at a slow speed.
• Let the saw bite gradually and maintain steady pressure.
For jigsaw cuts:
• Follow the cut line slowly.
• Stay just inside the line so you can fine-tune the opening afterward.
You can always sand or trim a little more material later, but you can’t add material back.
Step 7: Test Fit Before Finishing
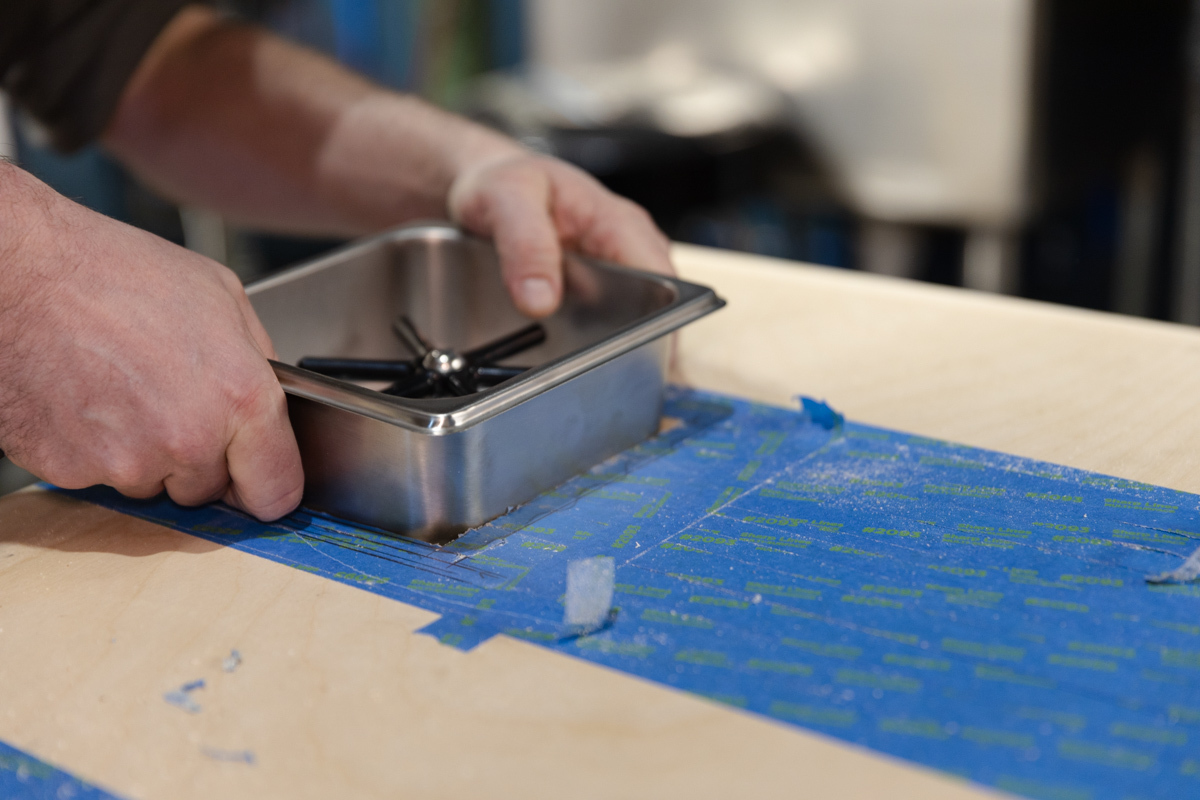
Before sanding or sealing anything:
• Remove the cutout piece
• Vacuum away dust and debris
• Set the equipment into the opening
Check for:
• Smooth drop-in fit
• Proper alignment
• Adequate clearance for cords and plumbing
If the opening is tight, mark the contact points and adjust gradually.
Step 8: Clean Up the Edges
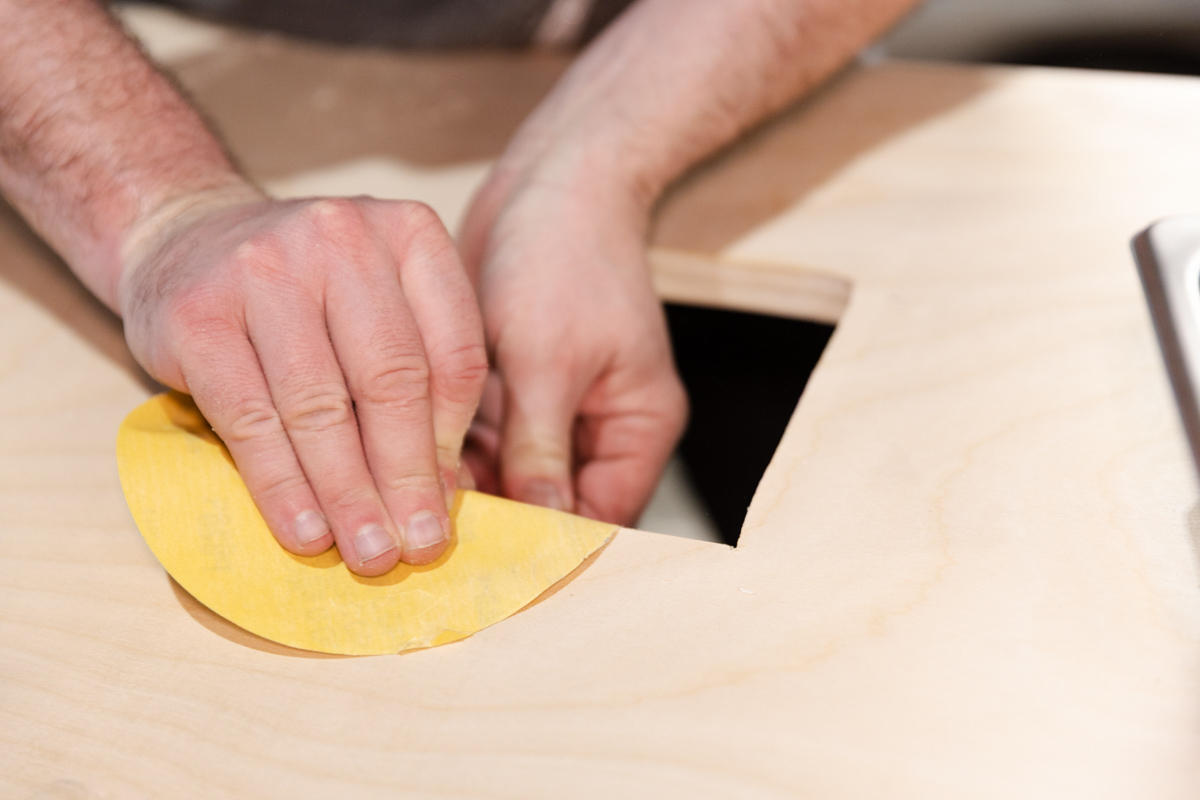
Now refine the cutout so it looks intentional.
• Remove painter’s tape carefully
• Sand the edges lightly to remove splinters and burrs
• Slightly ease sharp corners to reduce future chipping
Step 9: Seal Exposed Wood
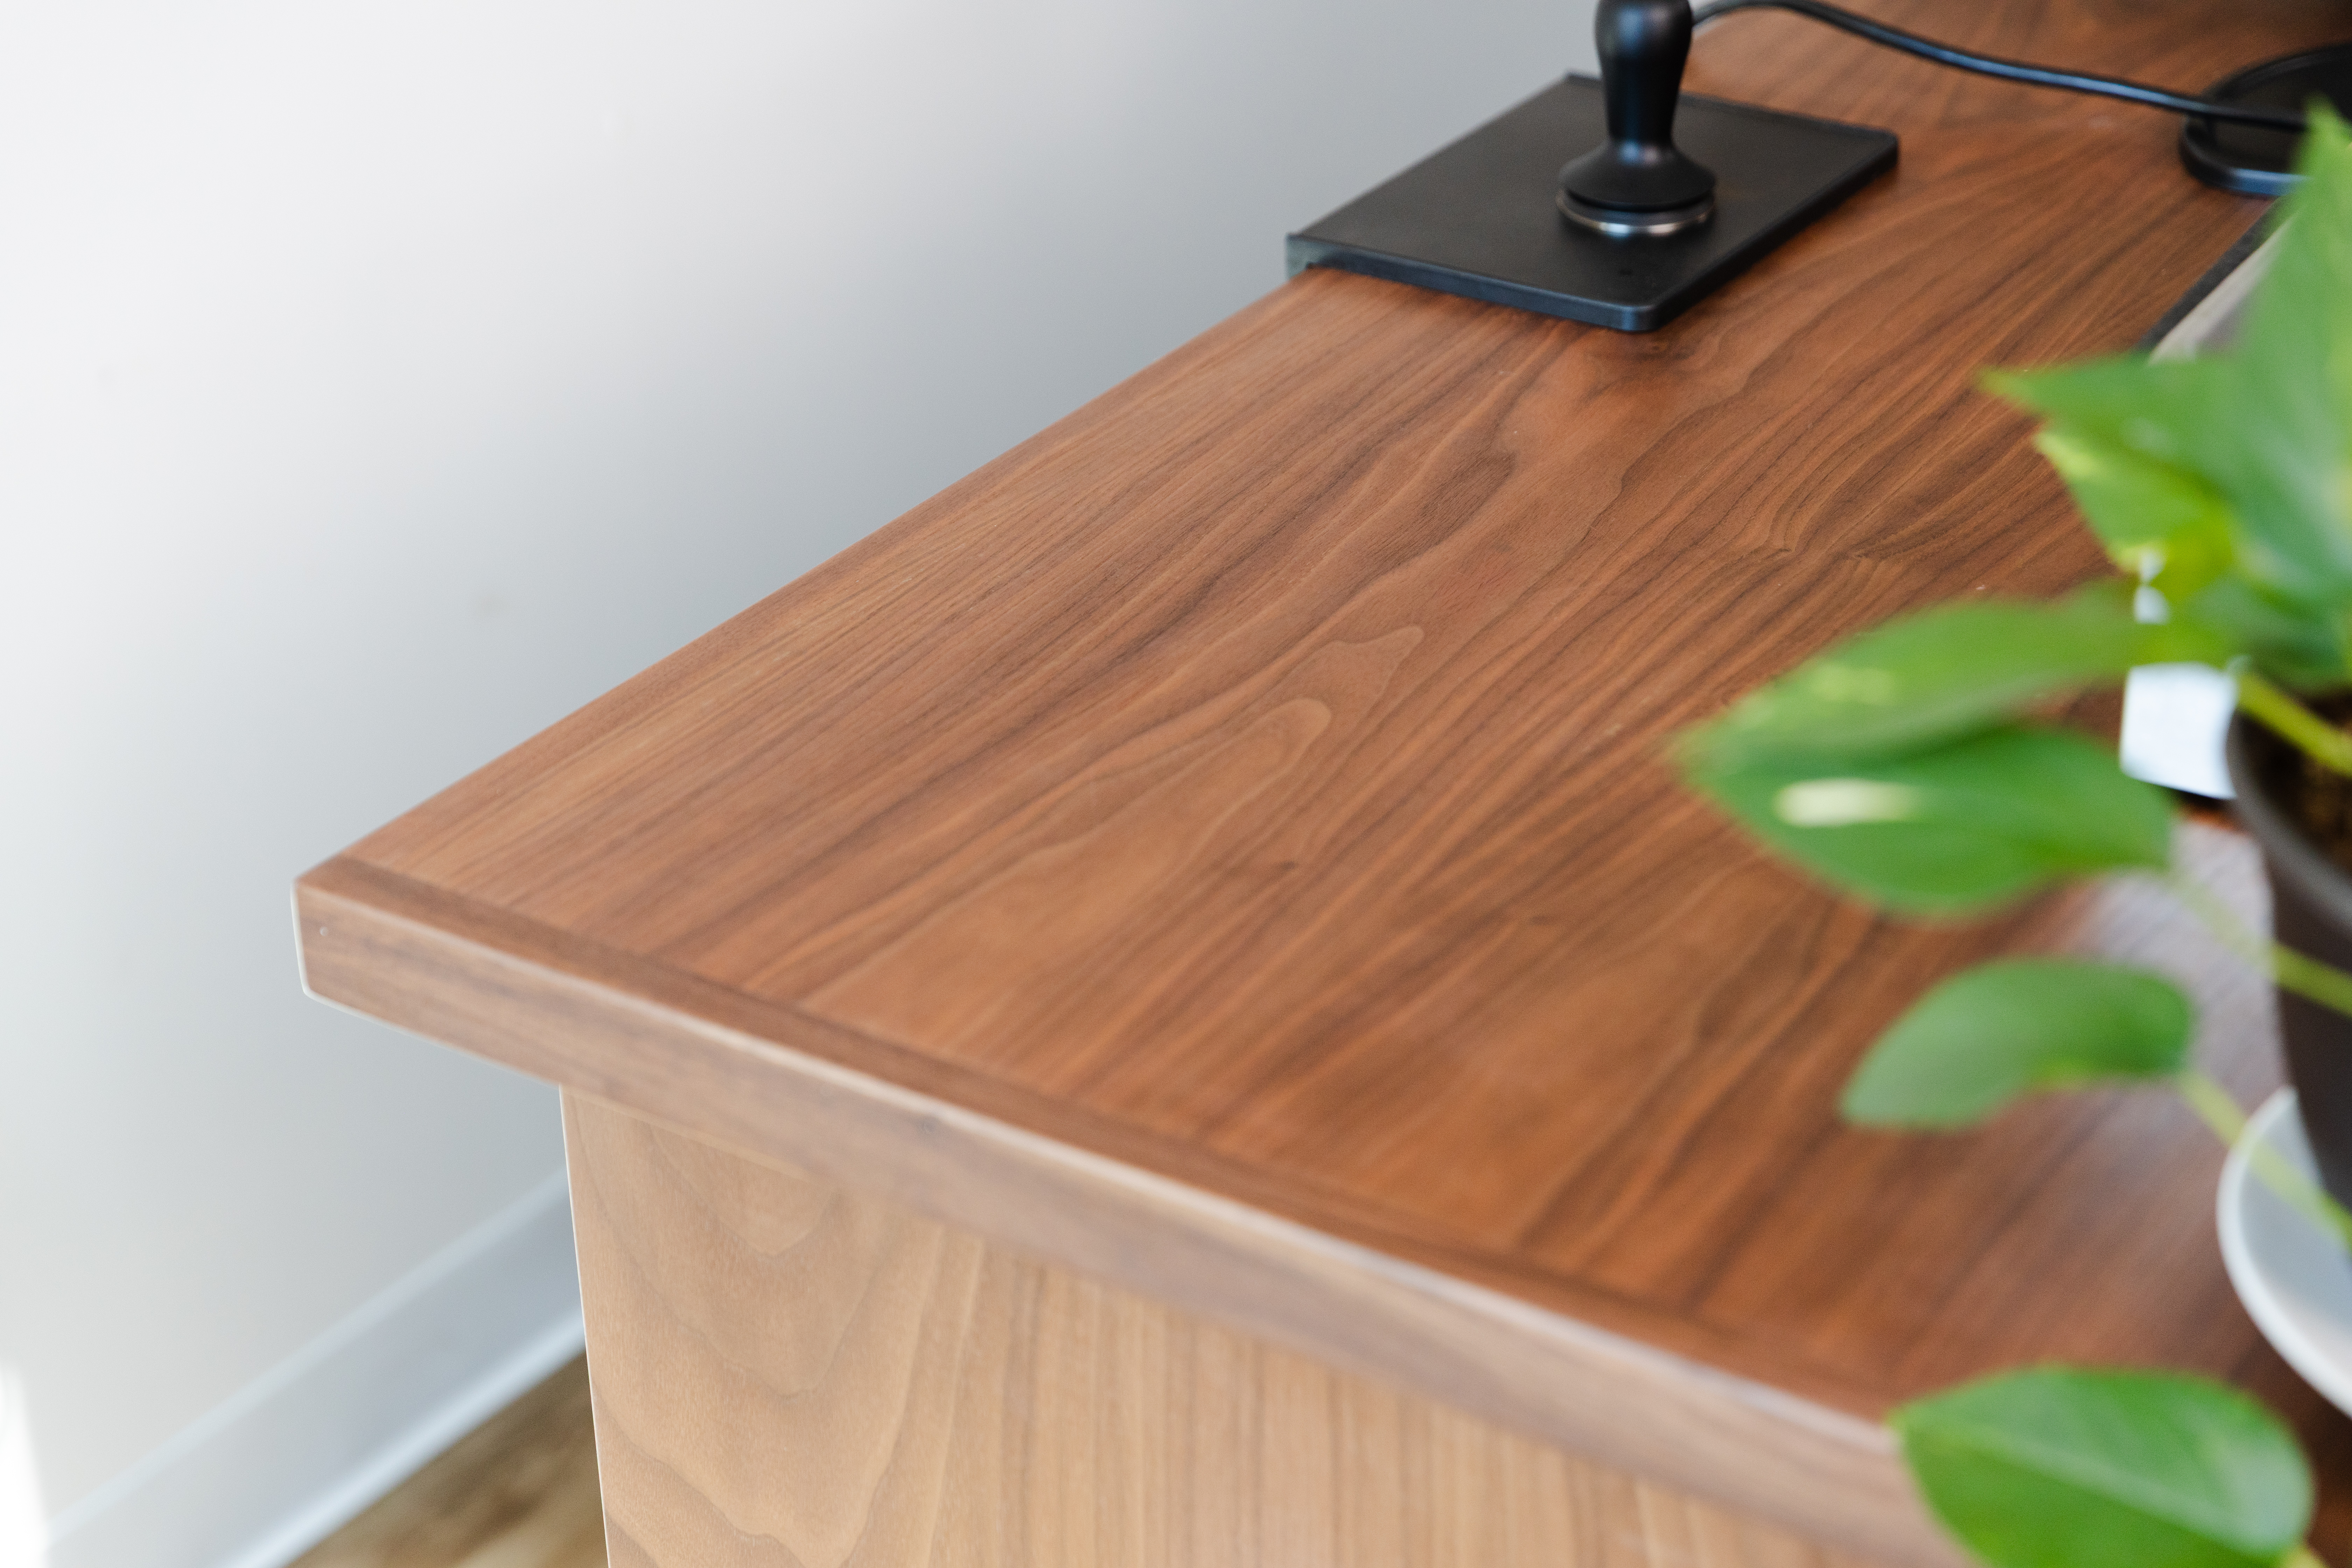
Coffee carts are constantly exposed to water, steam, and cleaning chemicals. Any exposed wood from the cutout should be sealed.
Depending on your countertop finish, use:
• A compatible wood sealer
• The same polyurethane or topcoat used on the countertop
• Waterproofing or silicone around sink cutouts
This protects the exposed edges from moisture damage over time.
Step 10: Final Installation
Install the component and confirm everything fits properly. At this point, your countertop cutout is complete and your coffee cart is one step closer to being ready for service.

Feeling inspired to start your own mobile coffee journey? Hear how Prima helped Michael LeFavi build The Loyal Cup coffee cart and bring his vision to life.
Looking for more practical advice before you get started? Check out 7 Things I Wish I Knew Before Starting a Mobile Coffee Cart.
If you're planning your own cart build and want expert help choosing equipment or mapping out your setup, book a call with James Weiler, Prima Coffee’s Commercial Sales & Services Manager.
We also invite you to join the Prima Coffee Community to connect with other coffee professionals, explore exclusive content, and keep learning as you build.
As always, from the Prima family to yours, Happy Brewing!


