
Video Overview | Flair 58
The Flair 58 is the company's entrée into the serious home espresso market. Upgrades from the Pro 2 include a 58mm grouphead and portafilter, wood accents, and, the most practicable move, a heated grouphead designed to keep the brew temperature stable. The latter has three temperatures--low, medium, and high--that correspond with the roast profile--dark, medium, and light. In addition, a puck screen, which disperses water over the puck, makes cleanup quick and easy.
Transcript
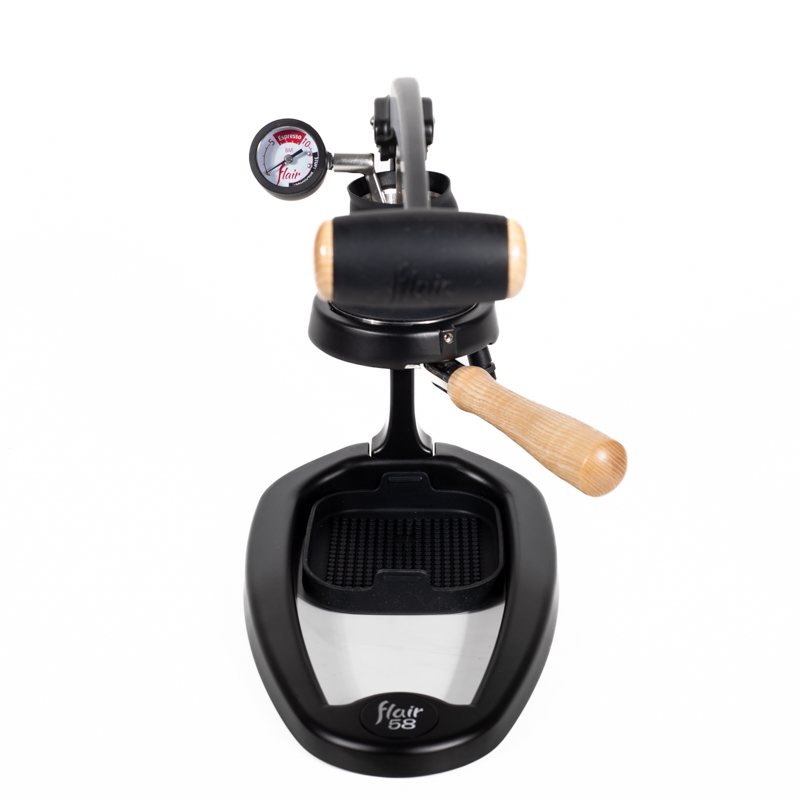
Hey, it's Steve here with Prima Coffee and today, we're going to take a look at the Flair 58. So,Flair, in the past, has made the manual home espresso maker in the affordable range. This one here is the company's move into the more prosumer end of espresso makers. So, this is still just an espresso maker. You can see there's no steam wand or anything like that. So, this is really more for the espresso purist. And it sits there in the range around some of those entry-level espresso machines, so electric espresso machines, that have espresso and steaming milk capabilities. The two things that set this apart from the previous Flair models is the 58-millimeter portafilter, and that's where it gets its name, and the heated group head. This is nice because it does allow you to upgrade on the accessories so you can get precision baskets. The basket that comes with it here is about 16 to 20, 22 grams, but you can upgrade with VST baskets or Pullman precision baskets. You can also upgrade with any tamper, any precision tamper that you want. It comes with a tamper here. But if you have tampers or if you like the design of other tampers, you can do that with the Flair 58. You couldn't do that with the other ones. The heated group head, on the other hand, is the company's kind of responding to some of the criticisms of the original Flair Pro, Flair Pro 2, in that the group head acts as a kind of a heat sink. So, if you're using light roasted coffees and you pour your boiling water into that group head, even if you have pre-heated it, the metal there is still going to act as kind of a heat sink. So, the temperature may not be exactly what you want. So, on this, they've added this sleeve here, which has a heating element in it, and it allows you to choose one of three temperatures. And you do that with a remote control. So, it's pretty simple to use. By just holding the remote or holding the button, it'll turn it off or on. When the first light is on, that is saying it is at 85 degrees Celsius. Click it again, you get the second light. You can see it's blinking, that means it's heating. That's 90 degrees Celsius. The third light, if that one is on, it means you have 95 degrees Celsius. So, what does that mean? So, in layman's terms, that basically just means that you can choose the temperature based on the kind of coffee that you're brewing. So, lighter roast, you want the highest temperature, so you want all three of those lights. And darker roast, you may only want one of those lights. So, the things that come with it, you have your portafilter here, you have your pressure gauge, which does come out. You can lift this up and go ahead and twist and pull that out, if you want. You don't need to take this out when you're adding water because this has a one-way valve in it. So, you can leave this in, you can add water. And then when you lift up, the water will go down into the group head. I will show you that here in a second. It has this dispersion screen.
So, this is a puck screen that you're going to add on top. So, it's a little different than the original models of the Flair 58 where there was a dispersion screen built into the group head. That's no longer there. So, you will need to add this on top of that puck to make sure that it doesn't… the puck is intact when you're adding the water. It also comes with a tamper here and the tools necessary to put this together. So, when this comes in the box, you're going to need to assemble it. You have a drip tray here that fits a Lunar scale perfectly. If you want to use other scales, you may have to just leave that out, which...it worked totally fine that way. And if you do use the Lunar, make sure that it's not touching the side of this mat because you'll get a false reading. So, make sure you fit it in there perfectly. So, again, this is your heater group head. It has a heating element on there. So, here's your wood accent here on the lever, and then kind of a wider heavier base than on that original Flair so that when you're pulling this down, it makes it a little easier. So, those are all the components. We've got 18 grams of coffee here. Go ahead and use the tamper. Add the dispersion screen or the puck screen right on top there. I'm going to bring this down. So, you need to add water when this is down, on top of the one-way valve there. Put this in. All right. Raise up a little bit. Go ahead and get our cup. And our water. Right there. And then as we raise the lever, our water will be pulled into the brew chamber. All right. Now, we can go ahead and start applying pressure. And at this point...I mean, you can, as with any manual maker, create your own pre-infusion. You can decide how high you want to go here on the pressure. So, we've got some drips. I'm going to continue applying pressure. I'm going to go all the way up here to about seven. It's hard to do at this angle, so bear with me. So, that's the basic idea. And then when you're done with your shot, you can pull up on this. It should stop the flow. And then you can press out the rest of that water here into another cup. So, the puck screen makes cleanup easy. You can see, the puck there is intact. On the previous Flair models, of course, it was a little bit messy. There was a lot of water still left inside, but by pressing that out, and because of that screen there, usually, make cleanup pretty easy.


