Product Maintenance | Setting Up Your Kegerator For Nitro Coffee
With the Javarator nitro coffee kit, you can serve delicious nitro coffee at your cafe or home, entirely on demand. To see the complete process of putting your kit together, watch along as Steve walks through each step involved, so you can get right on your way to serving creamy, tasty nitro coffee.
Transcript
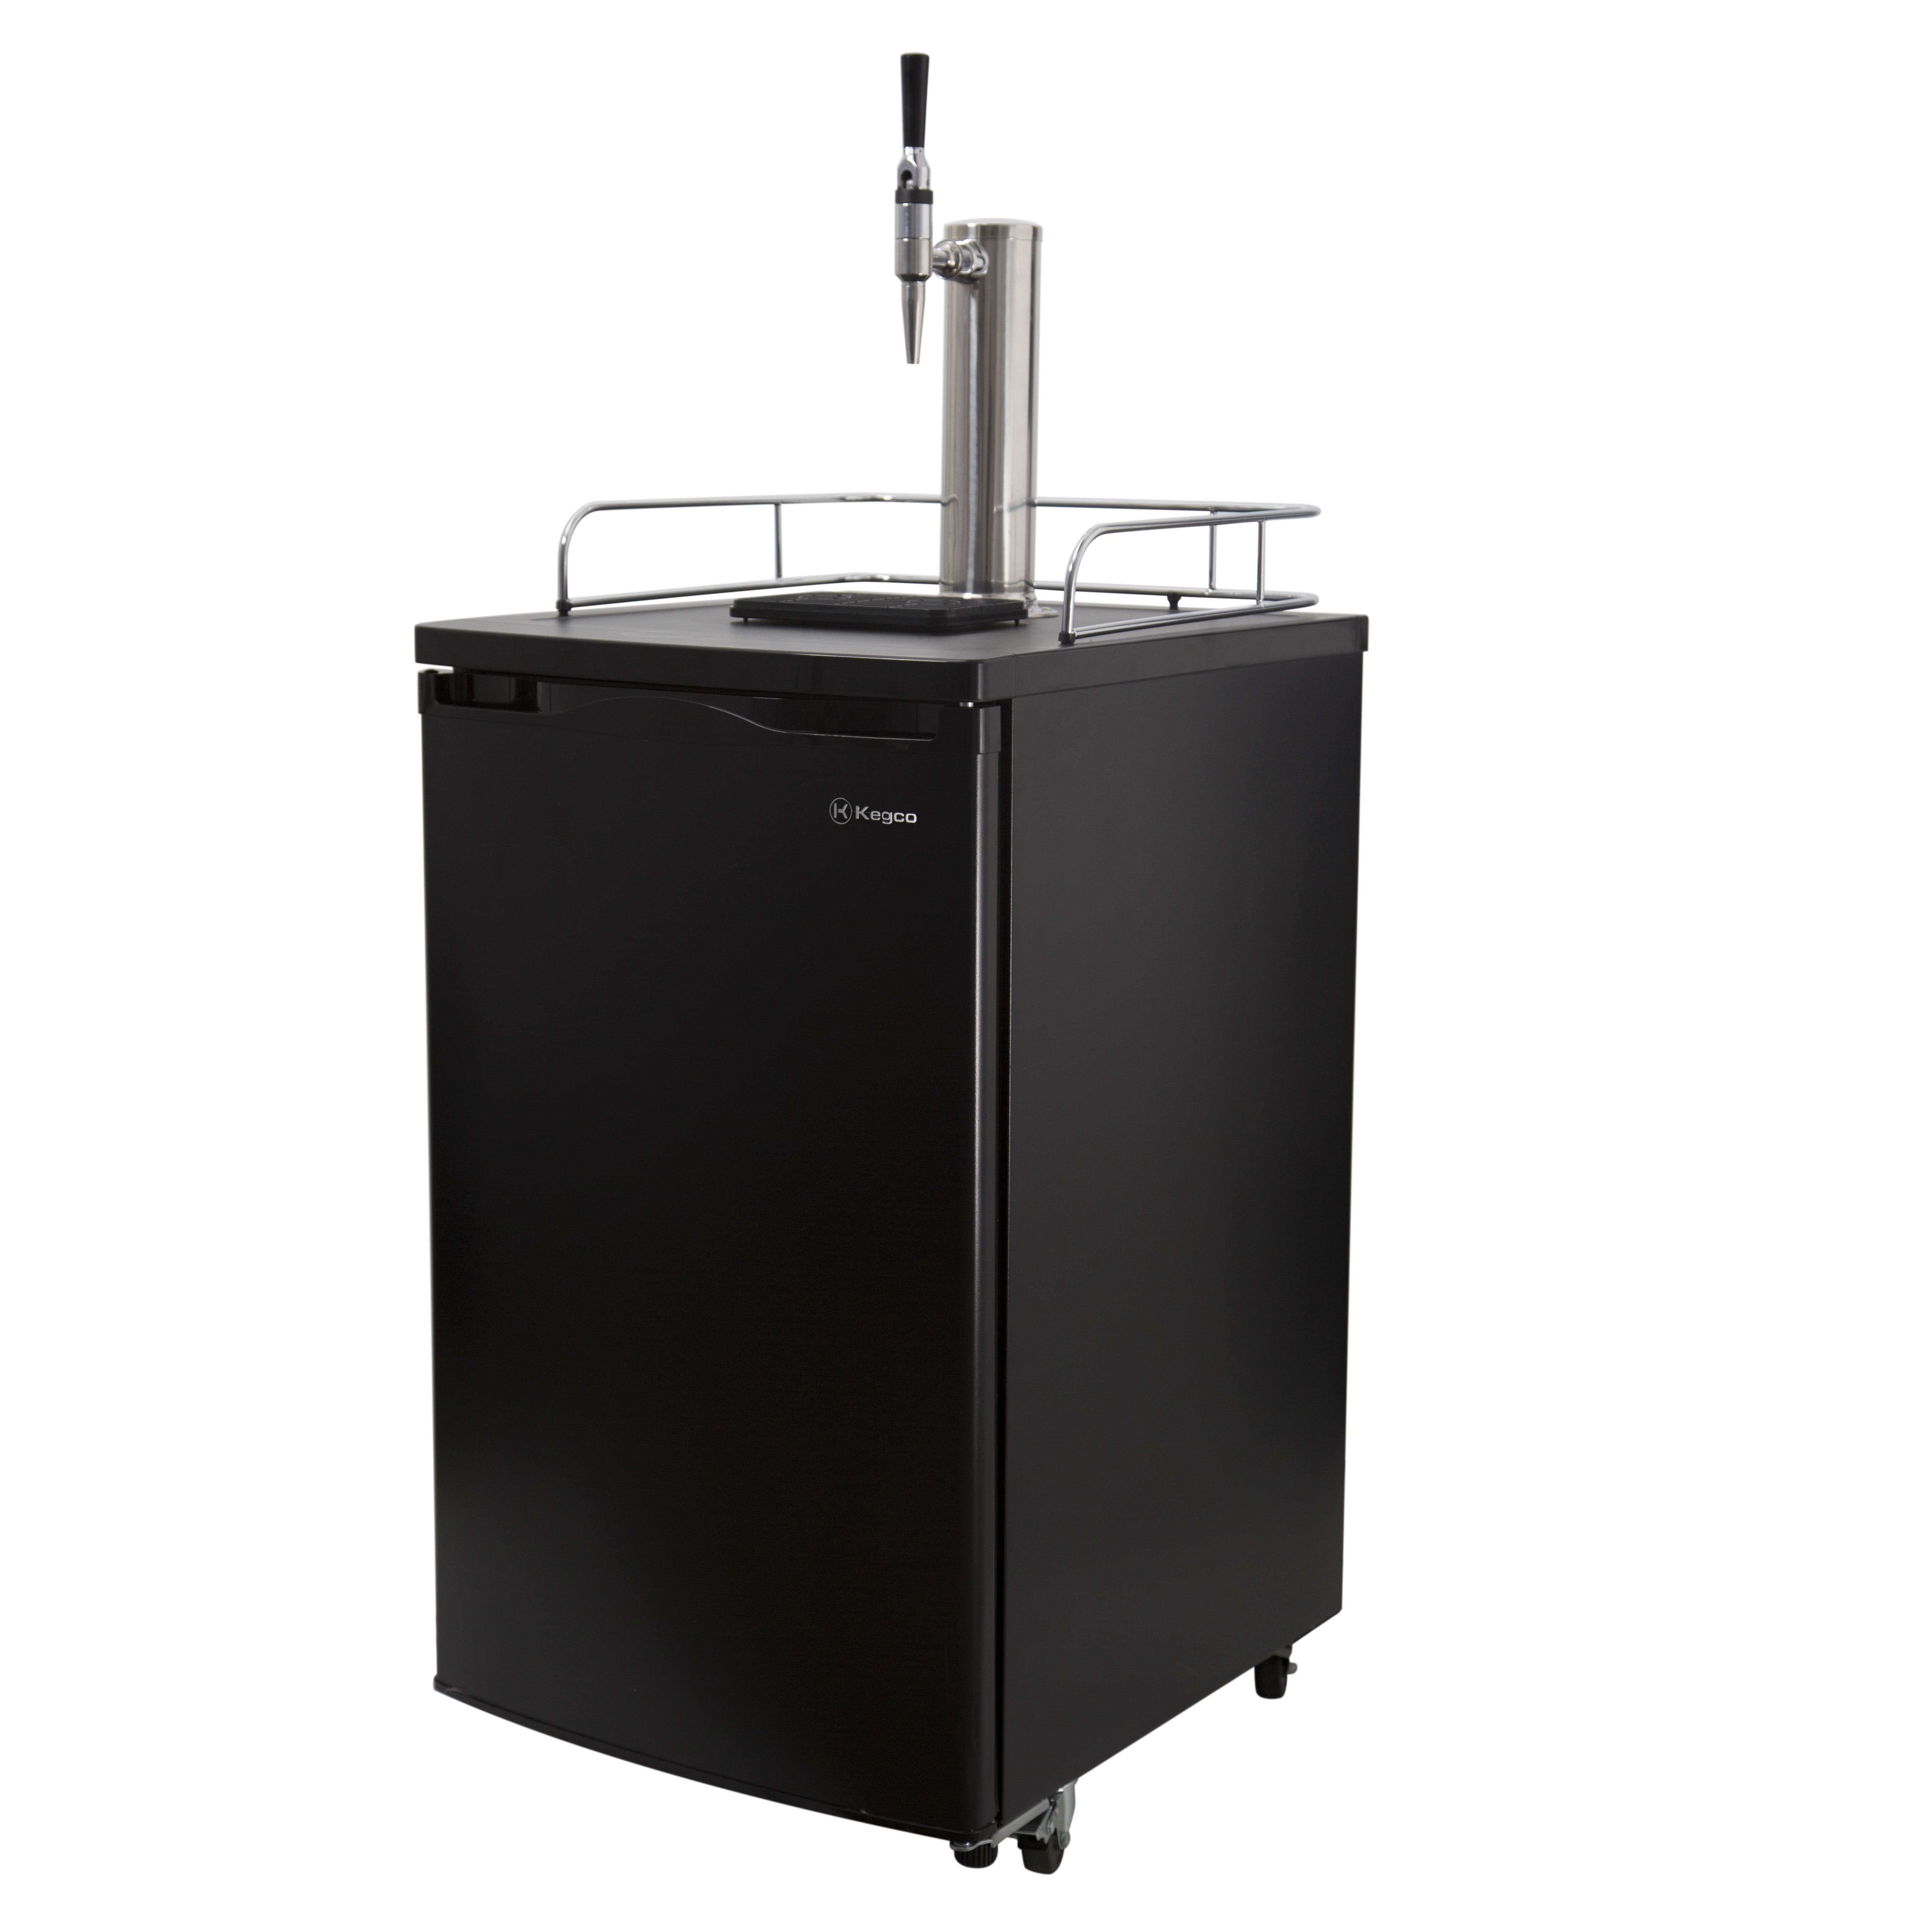
Hey, folks. It's Steve with Prima Coffee here. Today, I'm going to go through how to get a kegerator set up for nitro coffee. We're going to go through installing your kegerator. We're going to go through getting your coffee brewed and set up for dispensing on nitro. And I'm going to take you through the whole process from start to finish so you can get right on your way to serving delicious, creamy nitro coffee. First, we have our kegerator. This is pretty much fresh out of the box. The only thing that I have done so far is I have installed a shelf on the inside, the little base for my kegs later on. And I've taken the rail for the top and just popped it right in. Your kegerator might be a little bit different, but this is basically the barebones setup for my kegerator here.
Compact Nitro Coffee Kit
Kit includes everything you need - just add coffee and nitrogen
Featured Product
So to get started, we only need a couple simple tools. First is an adjustable wrench. Second is a screwdriver. This one is actually a combination, so I have Phillips and slotted. I will need both. And then the third is a faucet wrench. This should come with your kegerator, but these are pretty cheap and available as well if you lost one or just need to find one and get ready to set up. It's really simple. All you need is those three tools. So the first step is we need to prepare our faucet tower. This is the tower that sticks above the kegerator. We're going to attach a faucet to it later, but first, we need to actually prepare it and then mount it to the kegerator itself.
Step one is to attach a fitting to the end of the liquid line. So first I'm going to take a hose clamp and put it over the hose. Then I'm going to take my ball lock fitting, and I'm going to insert the barb into the tube. This takes a little tiny bit of work. Just kind of push and twist. Once it's there, we take our hose clamp, we slide it over the barb, and I'm going to tighten it down. Make sure it is nice and firm in place. You don't want any leaks, and this liquid will be under pressure. So there, we're all set. Now, we're going to install our tower under the kegerator. The first step is to drop the liquid line down through the existing hole. If you're modifying your own refrigerator for this, you'll need to drill a hole smaller than the diameter of your tower. Usually around two inches in diameter is fine.
Next, I'll have to screw down the tower using the existing screws and screw holes. My screw anchors are already pre-drilled and in place, so I'm just going to use my Phillips head screwdriver and screw each screw down nice and firmly. Once the tower is installed, you want to double check to make sure all of the screws are nice and tight, because once the faucet's attached and you're putting it into use, there's going to be a little bit of torque on the tower. So you want to make sure it's really firm and nice and stable. The next step is to install the faucet onto our tower. For nitro coffee, you want to use a stout faucet because it has a built-in restrictor plate that breaks up those nitrogen bubbles into the very fine creamy head that you're looking for. It's very easy to install a faucet onto a tower. All you need to do is put the threaded stem of the tower into the shank and tighten down the collar using the faucet wrench that's included with your kegerator.
Next, we need to prepare our nitrogen bottle. We need to install a nitrogen regulator so we can adjust the pressure coming out of the nitrogen bottle and going into the keg. When you get a regulator, you want to find one that has a range low enough that you can adjust between 30 and 40 psi. That's a pressure range that we found works very well for nitro coffee. First, we need to install our gas line onto the regulator itself. Just put some hose clamps on your hose, attach the hose to the barb, tighten down the hose clamp nice and firm, and attach your ball lock fitting to the end of the gas line just like we attached the ball lock to the liquid line.
Next, we need to install the regulator onto the bottle itself. Do this by inserting the nozzle into the stem of the gas bottle, then tightening the nut down by hand as far as you can. Finally, just use an adjustable wrench to firmly tighten that nut down and make sure the fitting is quite secure and firmly in place. When it comes to placing your nitrogen bottle, you have a few options with most kegerators. On some like the model that I'm using here, there's actually a harness for a bottle externally on the back of the kegerator itself. If you'd like to install your nitrogen bottle on the harness, simply slide it into place. But before you attach any fittings to your gas line, you need to run the gas line into the kegerator first. There should be a hole with a plug already installed on the kegerator itself, so you don't need to drill any new holes. In our case, we're going to install a nitrogen bottle just inside the kegerator with our keg. This is the simplest and easiest solution, and it makes the bottle very accessible if you need to take it out or refill it or swap bottles later on.
Next, we need to prepare our keg and our coffee. In this case, we're using a three-gallon Cornelius keg with ball lock fittings. This is a very convenient style of keg to use because it's got a very wide-open mouth. It's easy to fill with coffee from your Toddy brewer or whatever device you want to pour coffee into the keg from. It doesn't require any pressurized fittings. You just pop open the top, push it down to remove and twist. You can fill it very easily. It's got a nice wide-open mouth, again. And then when you're ready to close it off, you just insert the lid, twist it sideways and lock it down.
Now, I need to pressurize my keg. I'm going to do that by installing my gas line ball lock onto the in-post of the keg. Just pull up on the collar, push down on the fitting, and press until it locks into place. Usually, it'll have a firm click, but just give it a pull test to make sure it's firmly in place. To pressurize the keg I need to open up the main valve on my bottle by turning it counter-clockwise. Then I need to open the regulator valve by turning it parallel to the gas line itself. Finally, I need to adjust my pressure by turning the regulator screw. I'm going to adjust it until it's about 35 psi. And then my next step is actually to release pressure from the keg. I've added nitrogen to the keg itself, but there's still plain air in here, and I want to remove as much air as possible. So I'm going to pull up on the relief valve to remove air.
Our next step is to allow the keg to condition so the nitrogen will dissolve into the coffee. You can do this by shaking the keg. Or you can simply allow it to sit for 8 to 12 hours. So the last step is to just install the keg back into the refrigerator. I'm going to push my bottle out of the way. I'm going to get my keg ready. And I'm going to install the liquid line. This ball lock fitting works just the same as the previous one did. I'm going to press it right onto the outpost of the keg. And you'll notice that liquid immediately runs up the line. That's normal. I install the keg into my kegerator, and we're ready to go. And now we're ready to dispense.
If you've properly conditioned and pressurized your keg, you should have a nice creamy coffee dispensing from your faucet. If for some reason you don't have the results that you're looking for, you might consider turning up the pressure on your keg up to about a max of 50 psi or just allowing your keg to condition and sit a little bit longer so more nitrogen can dissolve into solution, and that's it. Now, you're ready to serve delicious nitro coffee.