
Video Overview | El Rocio Zarre
The Zarre from El Rocio is a robust one-group espresso machine suitable for home or small commercial operations, such as at restaurants, catering, or pop-ups. In addition to the large stainless steel boilers (.6L for brew and 1.8L for steam) and two vibratory pumps, the Zarre has 3 PIDs to regulate the temperature in the boilers and at the grouphead, so the path of water will always be precise. What really sets this apart, though, is its pressure profiling dial, which allows you to adjust pump pressure during shots or, if that isn't convenient, program shots by time. In this video, Steve shows how to use the external controller to change parameters, program shots, and pressure profile. The Zarre offers choice, too; it can be outfitted with walnut or maple panels and accents.
<Transcript
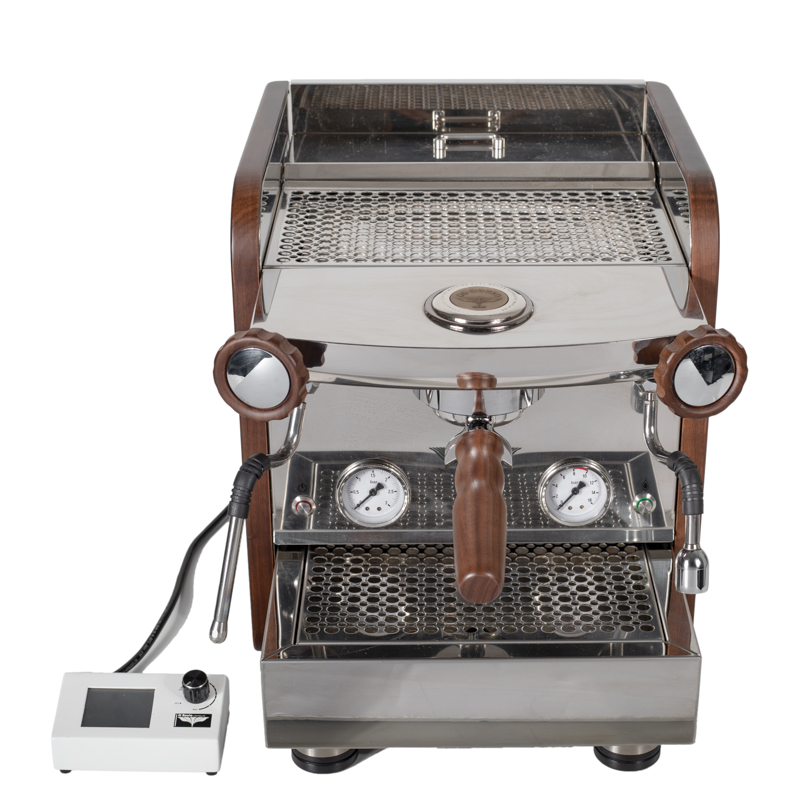
Hey, I'm Steve here with Prima Coffee, and today we're going to talk about the El Rocio Zarre. So, the Zarre is probably going to be used for home espresso setups, but it is a really capable, a really robust machine, it has a lot of great features that make it capable of doing stuff for small operations like catering or small cafes. It has three PIDs. So, the temperature both at the groupheads, the heated grouphead and in both of those boilers is going to be really stable. It has two stainless steel boilers that are actually pretty big. It has a 0.6 liter brew boiler and a 1.8 liter steam boiler. It's a 58 millimeter grouphead. So, you can, you know, buy accessories you can get a bottomless portafilter, and it has two vibratory pumps. So, the Zarre is going to be available in three different finishes. What we have on here now is the walnut finish. So, the portafilter, both the hot water and the steam knobs are walnut and these two sides. The back here is stainless steel, the drip tray is stainless steel, we got stainless steel up here, stainless steel here on the cup warmer, and also on that lid that gets into the water reservoir in the back. The other options you're going to have are the maple, which is this really light wood, and black as well. So, the Zarre is a pressure-profiling machine, and it has this little external controller with this cable that plugs into the back of the machine. And this is where you're going to do most of the adjustments for the parameters in here like the different doses, the temperatures, the preinfusion, that's all going to be done here in this external controller. And I'll show you that here in a second. But just to kind of go over what is on here. So, we have a steam wand with three-hole tip. It is not a cool touch, so it will get hot when you're steaming it. Has that silicone sleeve there to protect you from the heat. Same thing over here on this hot water wand. And you can see these come pretty low and the steam wand actually hits the tray. So, you can't fold it up. But it's to be used off to the side of the machine. Same here with the hot water. So, on the front here, under the grouphead, we have two gauges, one over here for steam, and then one over here for your brew pressure. And it is set at nine bar, the pump is set at nine bar. But because this is a pressure-profiling machine, you can also use the dial here on the machine to adjust that pressure during the shot. As far as temperature stability goes, we have a PID in here, and we also have a heated grouphead. So, the temperature between that boiler and the grouphead is going to be really stable. The drip tray here is in the front. Let's see how deep this is on the inside. So, it's not as deep as it looks here. Some of that is just going to be for cosmetic purposes. And if you're going to plumb it in, right there in the middle of the tray, you can see that silicone stopper. You want to remove that if you're going to plumb it in, so that the drain will drain into this little box here and then in through the waste tube that you have set up. So, if you're going to use the tank, you want to keep that in. The water tank is in here. It has a little...well, there's a metal cover here, and there's a plastic cover here on the inside. You can remove this tank, but because the water line is connected to this...so, the waterline basically is, if you're going to plumb this in, the water is still going to go into this reservoir before it goes into the boiler. And that water line is connected up here. So, if you're going to try to remove the tank to fill it, you're going to actually have to detach it here where that water line is so that you can pull it out. Otherwise, you can just fill it up in here. And this is a really interesting machine in the way that it knows that the water level is low. This is just like what you would find in the reservoir of a toilet. It has a little float floater in there that will drop down, and when that drops all the way down, it knows that it needs water. And so, it'll start to fill the boilers, or it'll ask you here on this on this controller here. It'll tell you that it's time. It needs to fill up with water.
So, let's jump in here to the programming or to the controller, so you can see how all the programming works. So, I've said a couple times that this is a pressure-profiling machine. And that just means that during your shot, you can control the pressure. This is also a machine where you can program shots by time. So, you can choose in here if you want to do either the pressure profiling or to use one of the two profiles. So, there's two profiles for time. And then if you do that, then you have, this button over here is the one that you're going to use to start the shot right there. And the shot will run all the way through based on how much time that you've set in here. To kind of walk you through what this controller can do. So, in the bottom here, you're going to have the temperature. If you click on the temperature down here, it'll bring up the boiler temperature for brewing. It says shot temperature. And then you can go ahead and move it up and down. You can see it's going by 2 degrees Fahrenheit there. And then you can go back out, and that'll save it. Go back out to the home screen. If you click on the time, it'll bring you into your options for the different shots that you can do. So, there's your first program shot, it's a one cup, second program is two cups. And then the third one is just to use this dial to be turning on and off the shot and also to increase or decrease, you can hear that, the pressure for the shot. So, we have 18 grams of coffee in here. We're going to start it on kind of our own preinfusion, start it on a low pressure. And then, we're just going to kind of increase it to show you what's possible there. Since this one is not already programmed by time in here, we haven't set it up with a scale yet, we're going to use a scale, so we can stop it where we want. So, we're going to go ahead and start this by turning the dial. So, I'll go ahead and show you that, just turning the dial past the off, we'll click, and it'll start that pump. So, you can hear the pump and you can see pump pressure over here as it rises. So, now we're increasing the pressure. Now, we're up to four. We're going to leave it there for a second, and then we can go ahead and increase it all the way up. You can see with this kind of pressure profiling, the shots, you can go way, way, way finer on your shots. So, that went really fast. And we would obviously want to go finer on our grind with that. Pressure profiling allows you to go really fine, to preinfuse it at a low pressure, and then to increase the pressure and maybe not even go all the way up to eight or nine bar, maybe to do something low around, like, six. And we've had really great results with that. So, really long shots, really fine grind that tastes really good. So you can kind of experiment with that. You can set the time for the clock. Auto sleep time, which just means do you want the machine to go to sleep? And if so, after how many minutes? And you have your auto power. So, instead of going to sleep, going to sleep just means it lowers the power, but auto power off means it actually turns the machine off. After how many minutes? After 40 minutes, the machine will go ahead and turn off. Auto wake-up time. So you can set it in here for, it sets to wake up at 6 p.m. We can set at 6 a.m. A lot of machines don't have this function. You can only tell it to turn off after so many minutes. This one has the actual time you want it to wake up. And you also can turn off the auto wake up. Do you want it on or do you want it off? The shot temperature is here just like you have on the front screen. Sleeping temperature is when it goes into sleep mode. What low temperature do you want it set at? We have it at 88. The temperature units, do you want to read it in Celsius or in Fahrenheit? Steam heater. If you're only going to make espresso, you can turn the steam off. We'll go ahead and turn it on so the steam heats up as well, and then you can set your steam temperature. Under temperature is count. You get your shot count, your total shot count, and your shot count reset so... If you wanted to reset it back to zero for how many shots you're using, perhaps after you've done some maintenance on this, or after you've cleaned it, something like that, then you can do that in here. The last one on here is administrator, and those are some of the sort of getting deeper into the machine and what you can do with it. But we are probably just going to sort of stay on this first screen here. The hot water dispenser over here we're going to turn it on for, you can see... It actually uses up a lot of water, pulling that out of the steam boiler as you can expect. So, every time you use that, you're going to hear the pump kick on and fill that steam boiler. The legs are adjustable. So, you just turn it to the right. It's maybe a little counterintuitive. Turn it to the right or clockwise to extend the leg and turn it back to the left to make it shorter. And you can see the level probe in there thinks that the steam boiler needs to be filled. So, it went ahead and did that.


