
Video Overview and Installation | SSP High-Uniformity Burrs
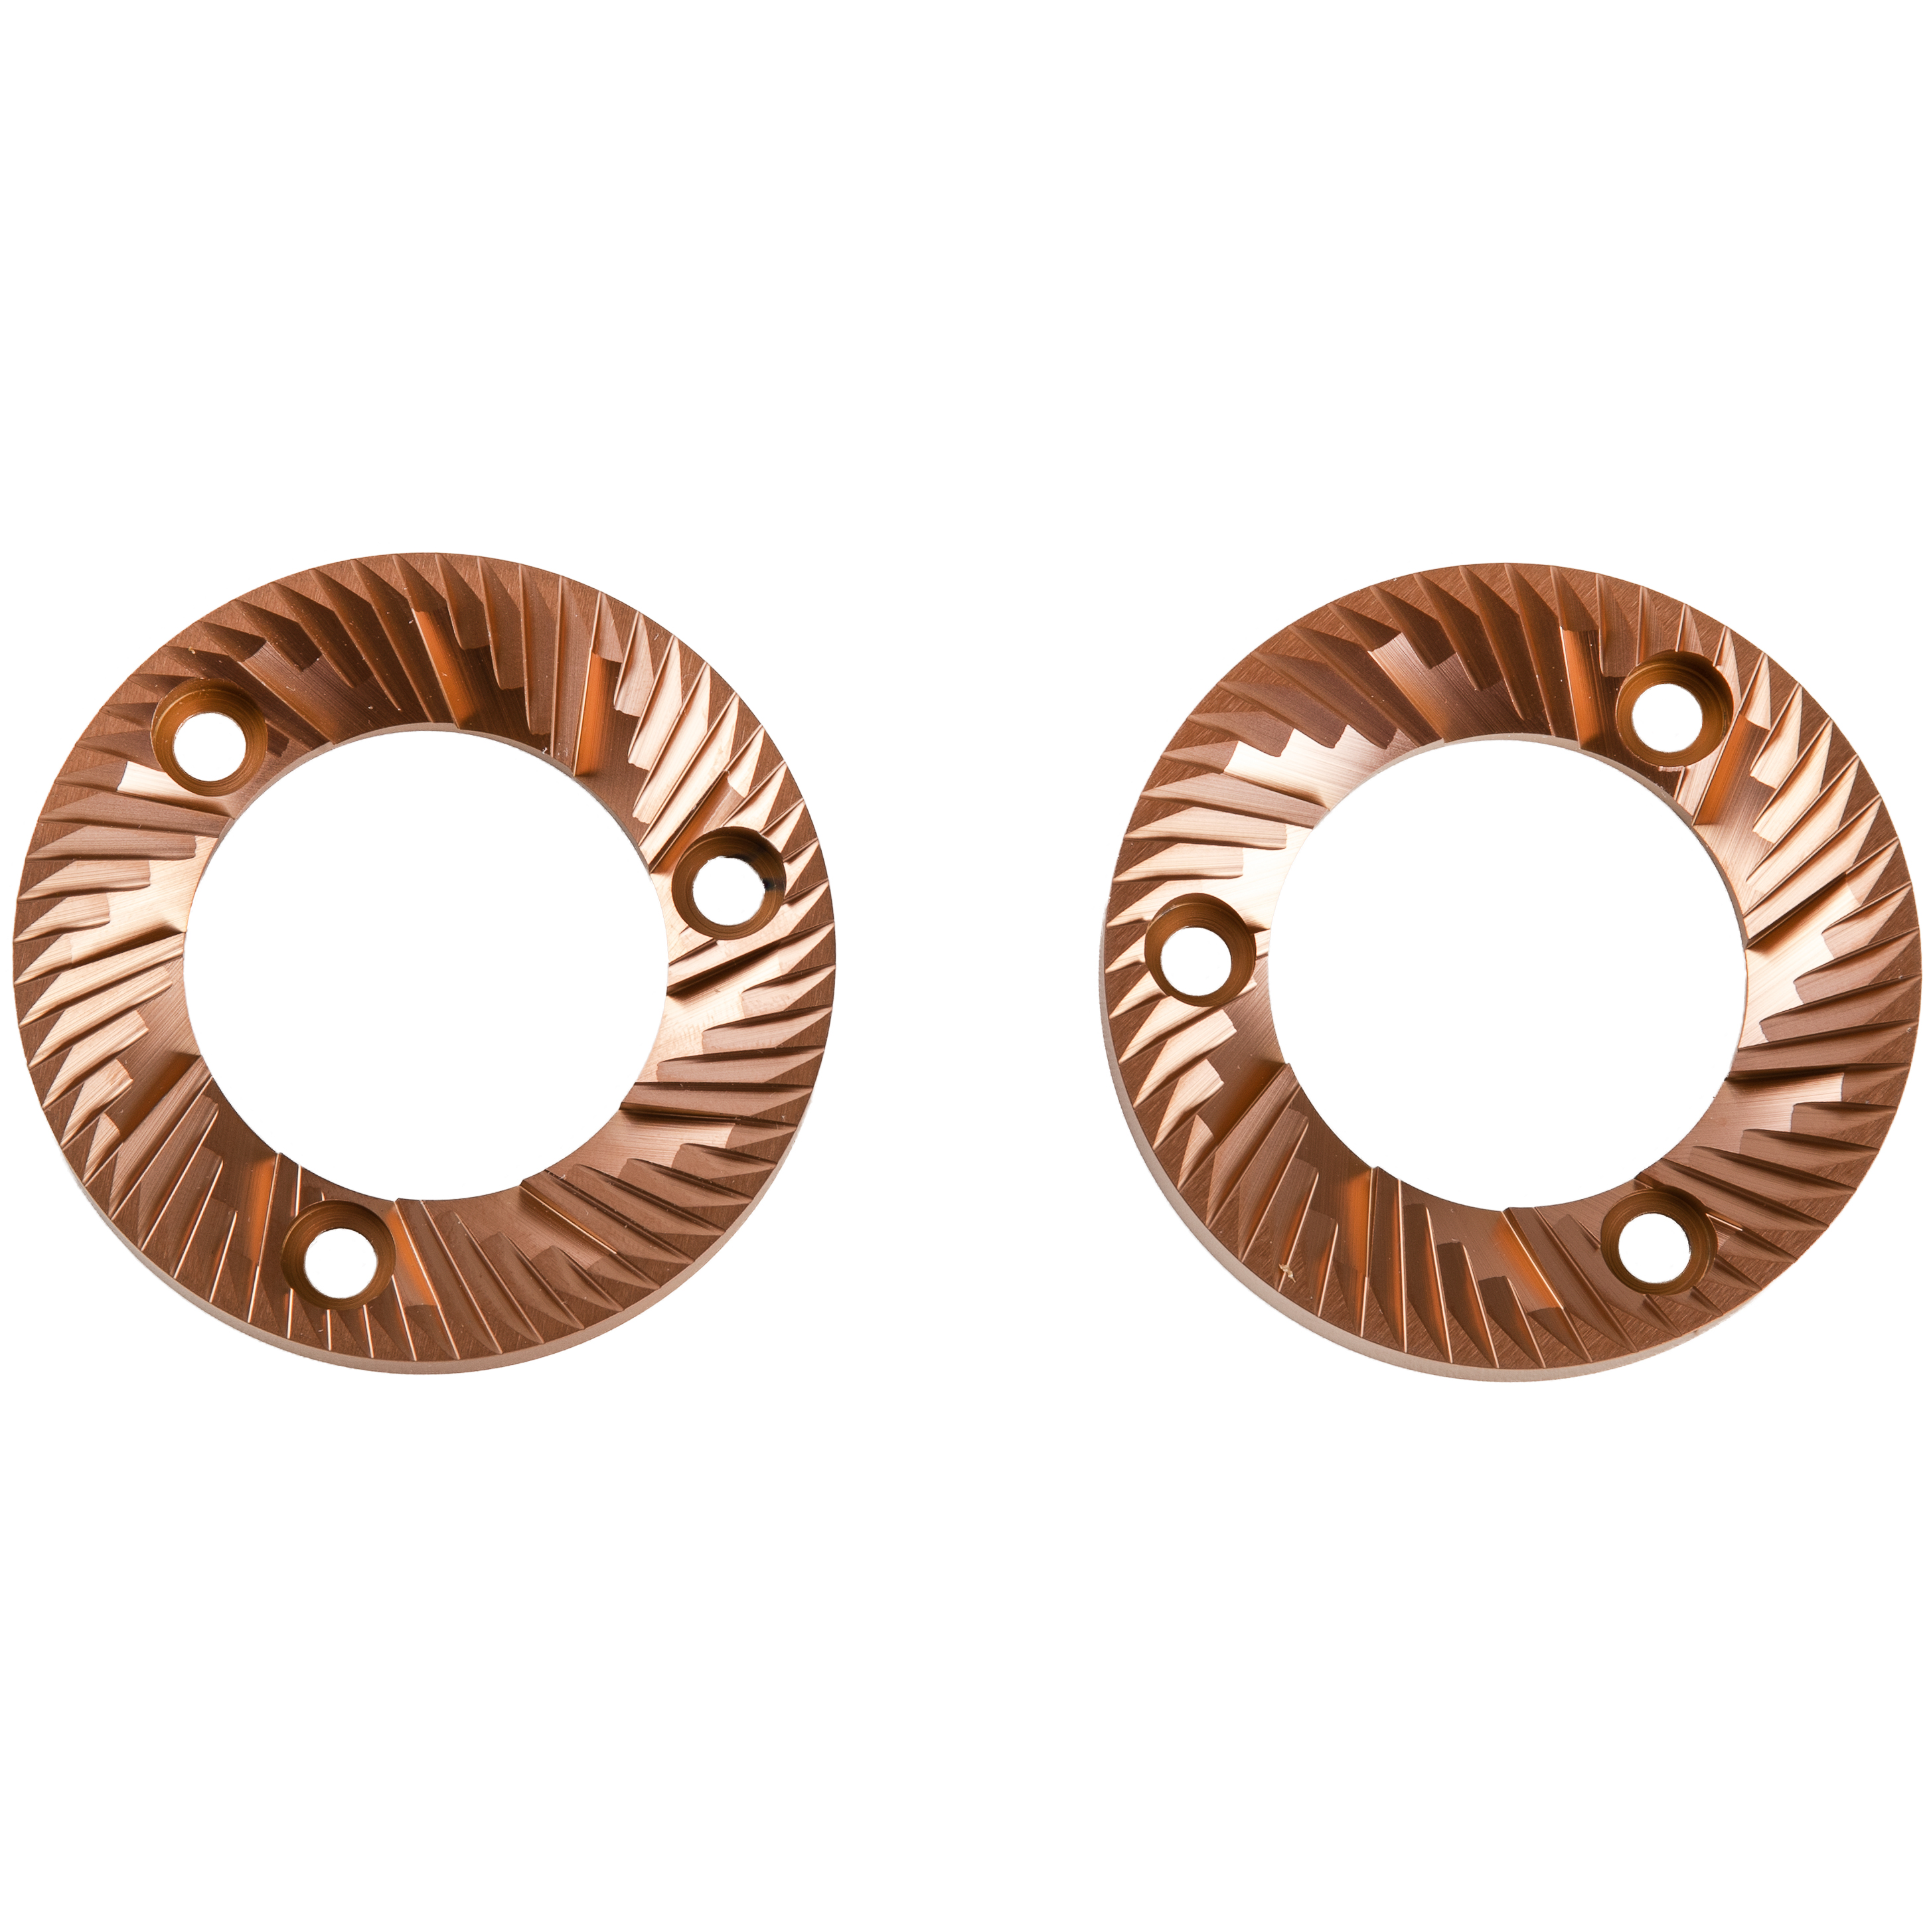
The 64mm High-Uniformity Red Speed coated burrs from SSP were engineered to create a traditional full body espresso profile. They work best with blends and medium and dark roast coffees and the conventional 1:2 ratio. In this video, Steve shows you how to install a set of SSP High-Uniformity burrs in a Lagom P64, one of the many compatible grinders.
Transcript
Titanium Aluminum Carbon Nitride coating (red speed)
Featured Product
Hey, I'm Steve, with Prima Coffee. And today, I'm going to show you how to install a set of high uniformity burrs into the Lagom P64. The burrs that are in there right now are what are called multipurpose burrs. These are both SSP burrs, and they're both coated in Red Speed, which is titanium aluminum carbon nitride, which means that they're both going to last forever. But the burrs inside there right now are called multipurpose because they're for brewing coffee and for espresso. And on the espresso side, they're really more for your light roast espresso, your higher ratios espresso. So, instead of one-to-two, which you'll probably do with these, you might be doing one-to-two-and-a-half, one-to-three, maybe pushing a little farther, so for your single-origin, your light roast espresso. These burrs here are called high uniformity, and these are what you're going to find in your sort of traditional espresso burr. So, if you like that traditional espresso, if you're doing that one-to-two ratio, if you're using blends or medium and dark roasts, you're probably going to want these high uniformities. So I'm going to go ahead and show you how to put these in. So, what you're going to need to take out the burrs and to install these other burrs is a flat-head screwdriver, a brush to clear away any of the debris in there, and then the burrs that you want to put in. So, in order to get into the burr carrier here on the Lagom, you'll just hold the body here with one hand, and you'll turn the collar counter-clockwise until this top part just comes free. There you go. So you can put this aside, and now you have access to it. So, what you'll do is just take off this, and this is the stationary burr here. This in here is your rotating burr. And so, we'll go ahead and take this one out. This is the most difficult one to get out. So, take your flat-head screwdriver, and you'll probably need to apply some pressure here either to the middle or holding on the side so that you can get leverage. And there you go. So, once you have the screws out, the burr should be free. You can see it moving there. And it's a little difficult to get out, but what you need to do is get your fingers on the inside here and press out on both of them until you can get a pretty good grip, and then you can lift straight out, like that. So, there's your burr. And put that aside. And we will take the different SSP burr that we want to install, and SSP has labeled them on the button. This is your bottom burr, so this goes in here. But let's go ahead and clear away some of this coffee. It goes in just like the other one came out, press it in, and then find your screw holes there. And then you can start to replace this. Go ahead and make sure they're tight enough. Don't overtighten them. Certainly, give the final turn. Okay. So your bottom burr is in, and now we'll go ahead and take off the top burr. Make sure that's the top. So, once you have both high uniformity burrs in, you can just take this top one and fit it right back into its place. Take the collar and screw it back on. As you get closer to the end, there we go, you may have to bring this back a little bit. Okay. So, now, you're ready to start making espresso. So that is how you install a set of burrs on the Lagom P64.


