
Video Overview | Mazzer Major V
Created for medium-volume cafes, the Mazzer Major V is a more sophisticated version of the company's beloved Major grinder. It has 83mm flat steel burrs that spin at 1600 RPM and grind espresso doses in about 5-6 seconds. The many updates include a new burr removal system, keeping grind settings intact even when you remove the top burr for cleaning; quick calibration collar; portafilter vice and activation button; digital display in which up to three grind settings can be saved; Grind Flow Control dampers to keep static and clumping to a minimum; and more. The hopper holds about 3.5 lbs. of coffee and is stylized with a more modern shape. In the video, Steve walks through the various upgrades and features.
Transcript
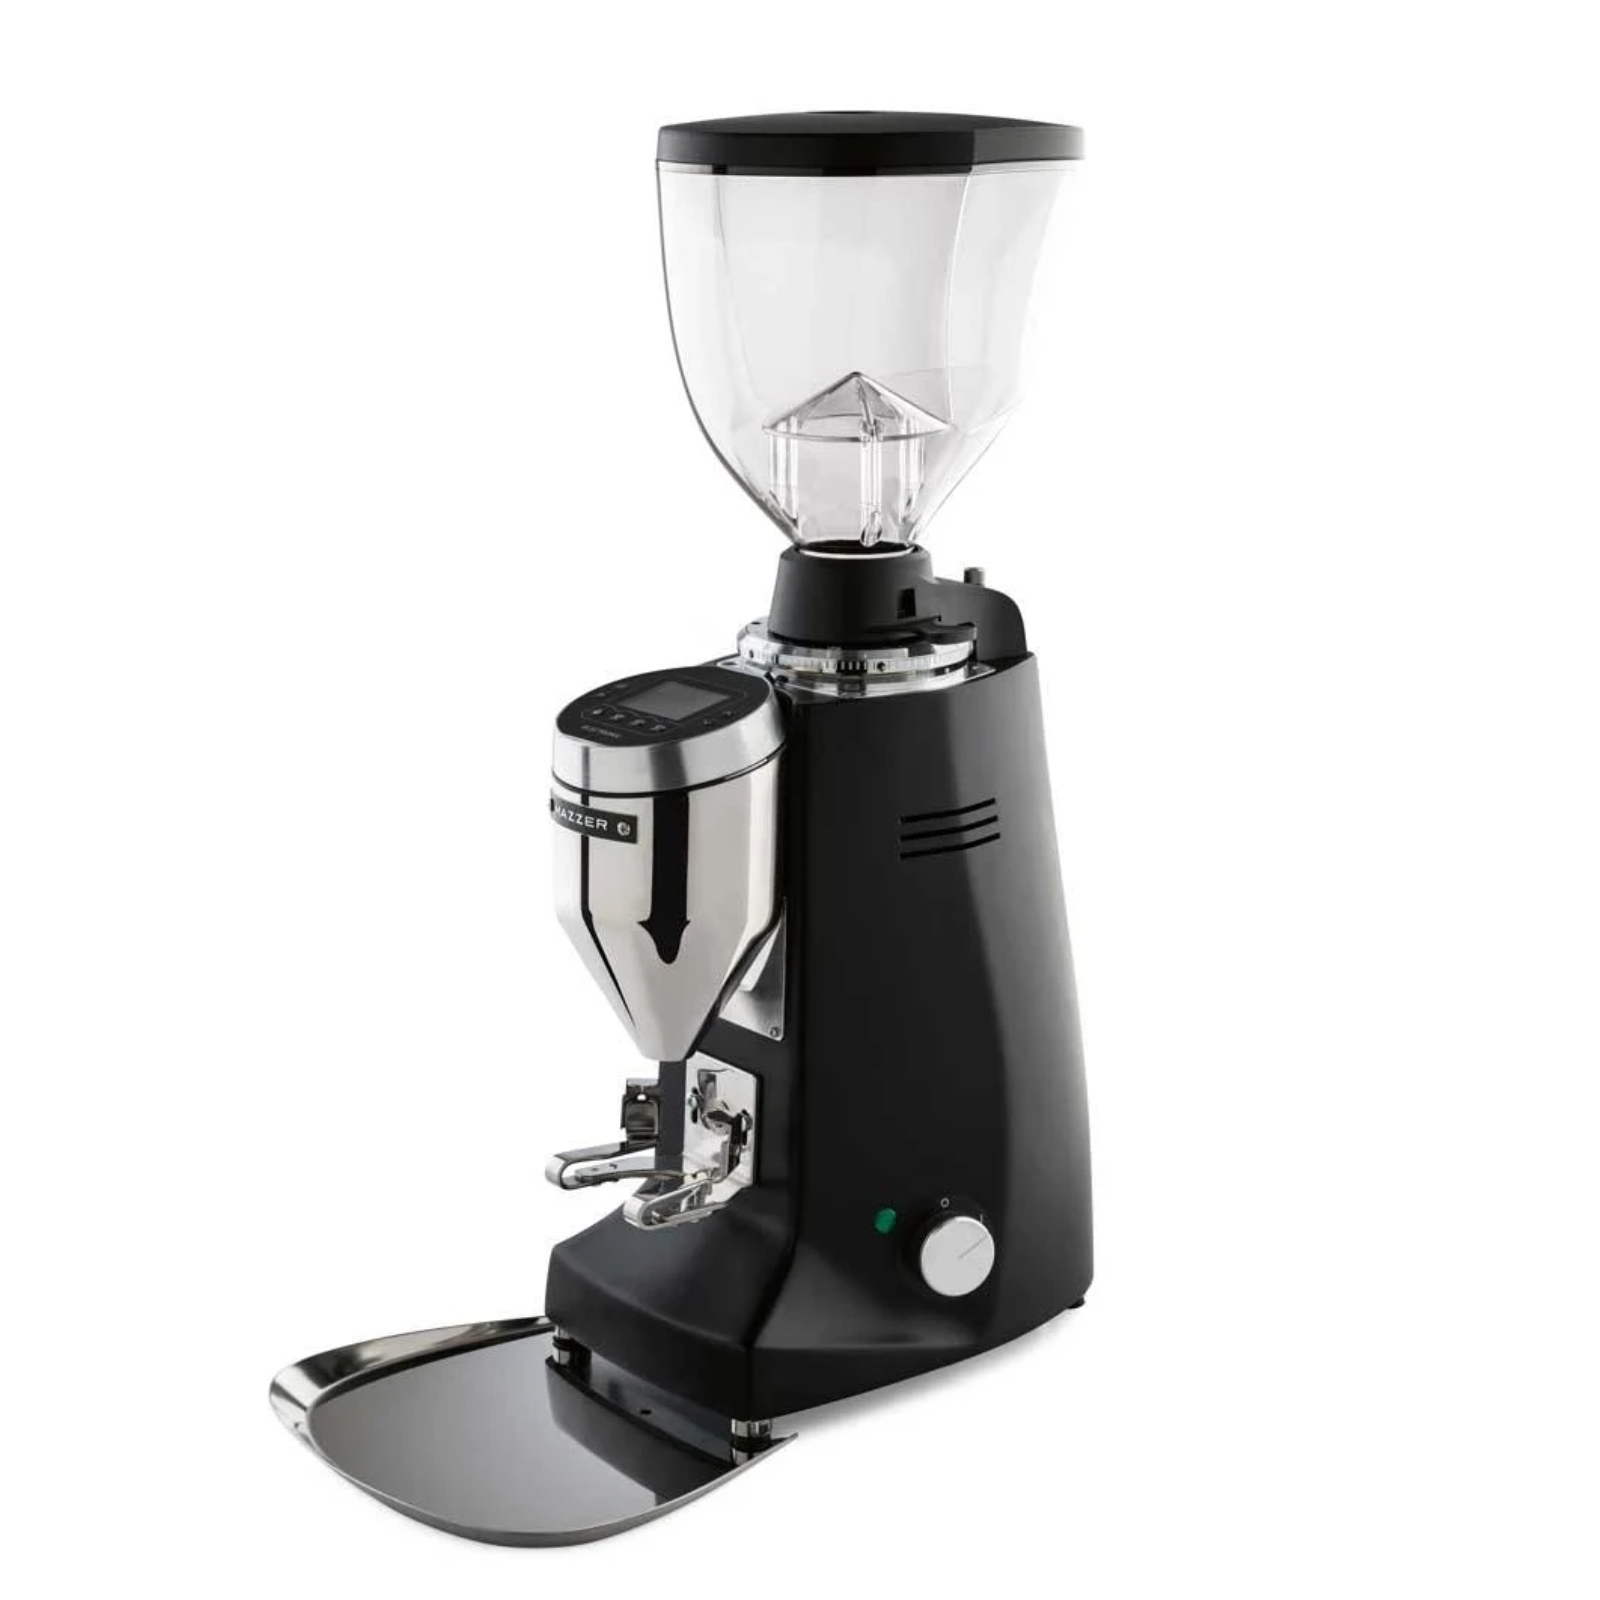
Hey, it's Steve here with Prima Coffee. And today, we're going to take a look at the Mazzer Major V Espresso Grinder. ♪ [music] ♪ The Major V has been built for medium to high-volume cafes. This has 83-millimeter flat steel burrs. Those are spinning at 1600 RPM, so it'll dose out fairly fast, about 5 to 6 seconds for your 18 to 20-gram espresso dose. The hopper here is fairly large, a little bit smaller than the old one, but still, you can hold about 3 and 1/2 pounds of coffee in there. And you can dial this in here, program your shots by second, down to the 100th of a second. So let's jump into the collar, which has been completely redesigned here. The biggest feature that you're probably going to notice is that on the old Mazzers, you had to completely unscrew the top burr, so that top burr carrier, in order to get access to the burr and to clean the other burr and clean the burr chamber. Well, what Mazzer has done with this one to make it much easier is once you've dialed it in, so that you don't have to worry about figuring out where you were when you put the top burr back on, what they have done is they've created this system where you can remove these four hex screws right here on the top, and you can actually just pull that top burr out. It doesn't change your grind settings at all. It keeps those grind settings so when you put it back on, it'll be where you were before. But really what you want to do is you want to take these four plastic covers off. You probably...you can use your fingernails if you can get it, but you probably need something like this that has a point on the end of it. So those are off there. And then you have 4-millimeter hex screws. On some of the other Mazzers, the size of this is going to be different so do note that. And, you can leave them on, you don't have to actually pull the screws out, you can just make sure they are completely loosened. So now you can just go ahead and pull that top burr right on out. Mazzer has made this really easy to calibrate the grinder, which is to set your zero point. And so once you find out what that is, all you have to do is on the top here, there are two Phillips head screws and you just loosen them, you don't have to bring them all the way off. And that allows you to actually turn, you can see the numbers here, to turn and change whatever was your zero point. So you can bring the zero all the way around to right there where the arrow is, and you can set your zero point like that. The portafilter forks on the Major V is different from the ones that were on the old models of Mazzer. So now they've made it not just a fork where you can set your portafilter and you have to hold it but they have these two sort of clamps here on either side that you can set the height of and then you can fit your portafilter in. And it has little...you can kind of see little tabs here on the end that'll grab the rim of your portafilter so that when you do grind, you can fit that in and it should hold it on there for you. They also send in the package two larger tabs here in case your portafilters are taller. If you're using spouted portafilters, you might have to lower this fork here and the use these so that it fits in there. Also on here is a button for portafilter activation, which was not included on previous ones. So when you hit the portafilter activation button with your portafilter, a little goes out. So that portafilter button can actually be changed out for a longer one. So depending on the size of the portafilter you're using, if it's not reaching all the way to the back or if you wanted to dose to a different part of the portafilter, instead of moving this part here, what you can do is you can sort of increase the length of that button, creates the depth of it.
So if you don't want to use the button down here to dose, all you have to do is change that here in the menu. There are eight buttons here on the face, around the edge. Four of them down here are for dosing out espresso, you have your menu button, your back button to go out of the menu or to go to the previous screen, and then your up and down keys over here to change the settings when you're in there. So if you go into your menu, the first option is Grind settings. So hit the menu key again, it gives you your Dosing time, your Grinding pause, and your Working mode. But working mode we have it set on now as portafilter. But, if you go down to Working mode and change that to Keyboard, do you want to confirm? Yes. It'll confirm that, and then you can go back out to the home screen, and now if you wanted to dose out, you're not going to use the portafilter button, you're going to use the keyboard, so you can choose either Setting number 1, Setting number 2, or Setting number 3. On each of those, the times for each of those can be set. You can quickly set those times from the home menu or you can go into the menu where that is done. But, if you just want a quick set so that you don't have to take the time to go into the menu, you hold on to the menu key and then the number that you want to change. So there's number one, two, and three. So you hold that and hit one, it'll show you that's three seconds. You can use the up and down keys over here to change in the 100th of a second. You can do that with the other two keys as well. The fourth key for dosing is a hand, and that just means you're manually dosing. So if you want to get a little more, for instance, you can hit that, and as you're holding it, it'll dose, and when you let go, it stops. You can also set a pause in the middle of the dosing. So if you set it for six seconds, for instance, you can set it to pause halfway through that. You can actually set it from 30% of the grind all the way up to 90% of the grind. So what we see that as is an opportunity to distribute the grounds so that just one more step to make it even in the portafilter, and that's if you're using the portafilter button down here or if you had it set for the keys. To do that, you just go into Grind settings, and the second option is Grinding pause, Dose 1. You choose the time percent dose. And then in there, you can set it from 30 to 90. It's set at 50%, so we'll go ahead and say okay. And then under that, so it won't actually work until you go in to Activate pause, which is your second option within there, and then enable it. So now button number one on here is set to have a pause at 50% through the grind. So we'll get our portafilter in and [inaudible] you can see right there so you can use the fork. And then when you hit the button again, it'll dose out the rest on there. What Mazzer has created for these new models is what they're calling the grind flow control, and those are basically wired dampers or wires that they've placed in the chute to reduce the clumping and the static. So you just need a Phillips head to pull the guard off and then the guard should just come right out. So there's your guard, the GFC, the grinder flow control, is right here, and you can just twist it to the left. So unscrew it a little bit and then it comes loose and you can pull it on out. So you can see in here it is really just a wire kind of bent like an M or a W. And then in the front here we have two dampers, so two kinds of paddles. So this is the hybrid wire, which is good for anti-clumping and anti-static, but Mazzer has also included in the package one that is just for anti-static. So if this isn't working for you, what we recommend is that you use the grinder some, you see how it's performing, and then if you notice that there's a lot of static or this is not working like you think it should, you can always put in the other one. Well, let's go ahead and dive in here to the menu. It is more sophisticated than the previous models of the Major that have been out by Mazzer, and you can see it just on the display screen itself it just gives you more options. When you go into the menu, you'll see Grind settings, Settings, Information, and Service. So the first one, Grind setting, we've already shown you a couple of those. The second option here is your Settings. So when you go into that you'll have languages, there are 19 options. Now, the second one is to set your date. You can set your clock. The fourth one here is your display. So when you go into that, you can change the brightness on this if you don't want to be 100% bright, or depending on the light that you're in, you can go all the way down to 30%. The second one on there is your Standby. So the third option you have on your menu is your Information, and in there you have your Dose counter, which is not any different from what you have on that main...or on the home screen. You have your Daily stats and your Alerts, your Burr history, and your Firmware version. That is the Mazzer Major V, it is a little bit more sophisticated than the previous models and it is also more modern.


