
Learning How to Roast Coffee at Home With a Hottop
A guide to home roasting, covering the basics of roasting science and how to work with your Hottop roaster. Examine custom roast profiling and other tips for turning green coffee into roasted goodness.
Have you ever wanted to roast your own coffee? Me too! Like many coffee lovers, I’ve gone through seasons of infatuation--latte art, pour overs, espresso, etc. And roasting coffee is one of those things that seemed super interesting to me, but also extremely daunting. I felt like I didn’t have enough time or resources to invest in a hobby that would, seemingly, produce subpar coffee. Sadly, home roasted coffee often takes on negative connotations; it’s the coffee people make on their stovetop and give out for Christmas, leaving your unassuming taste buds to feel like they just licked a tire. However, I decided it was finally time to face my fears and see if I could get a decent batch of home roasted coffee.
Prior to preparing for this article, I had only ever roasted with a slightly-modified popcorn popper in my dimly-lit, and probably mold-infested, basement. And the reason I say “slightly-modified” is that all I did was remove the thermal fuse from the “roasting chamber,” so that it wouldn’t restrict the heat to a certain degree; this also effectively made it a bit less safe to use. I didn’t have any way to control heat or airflow. The only thing I could control was how long I roasted. I typically stopped around first crack, and my cooling process consisted of swirling beans around in two colanders, switching back and forth so that more heat would transfer. In all honesty, even though I never actually had a good cup of coffee from these roasts, I had a really good time. I enjoyed learning about what happens to coffee beans when they are heated, and it helped make coffee feel even less like a commodity.
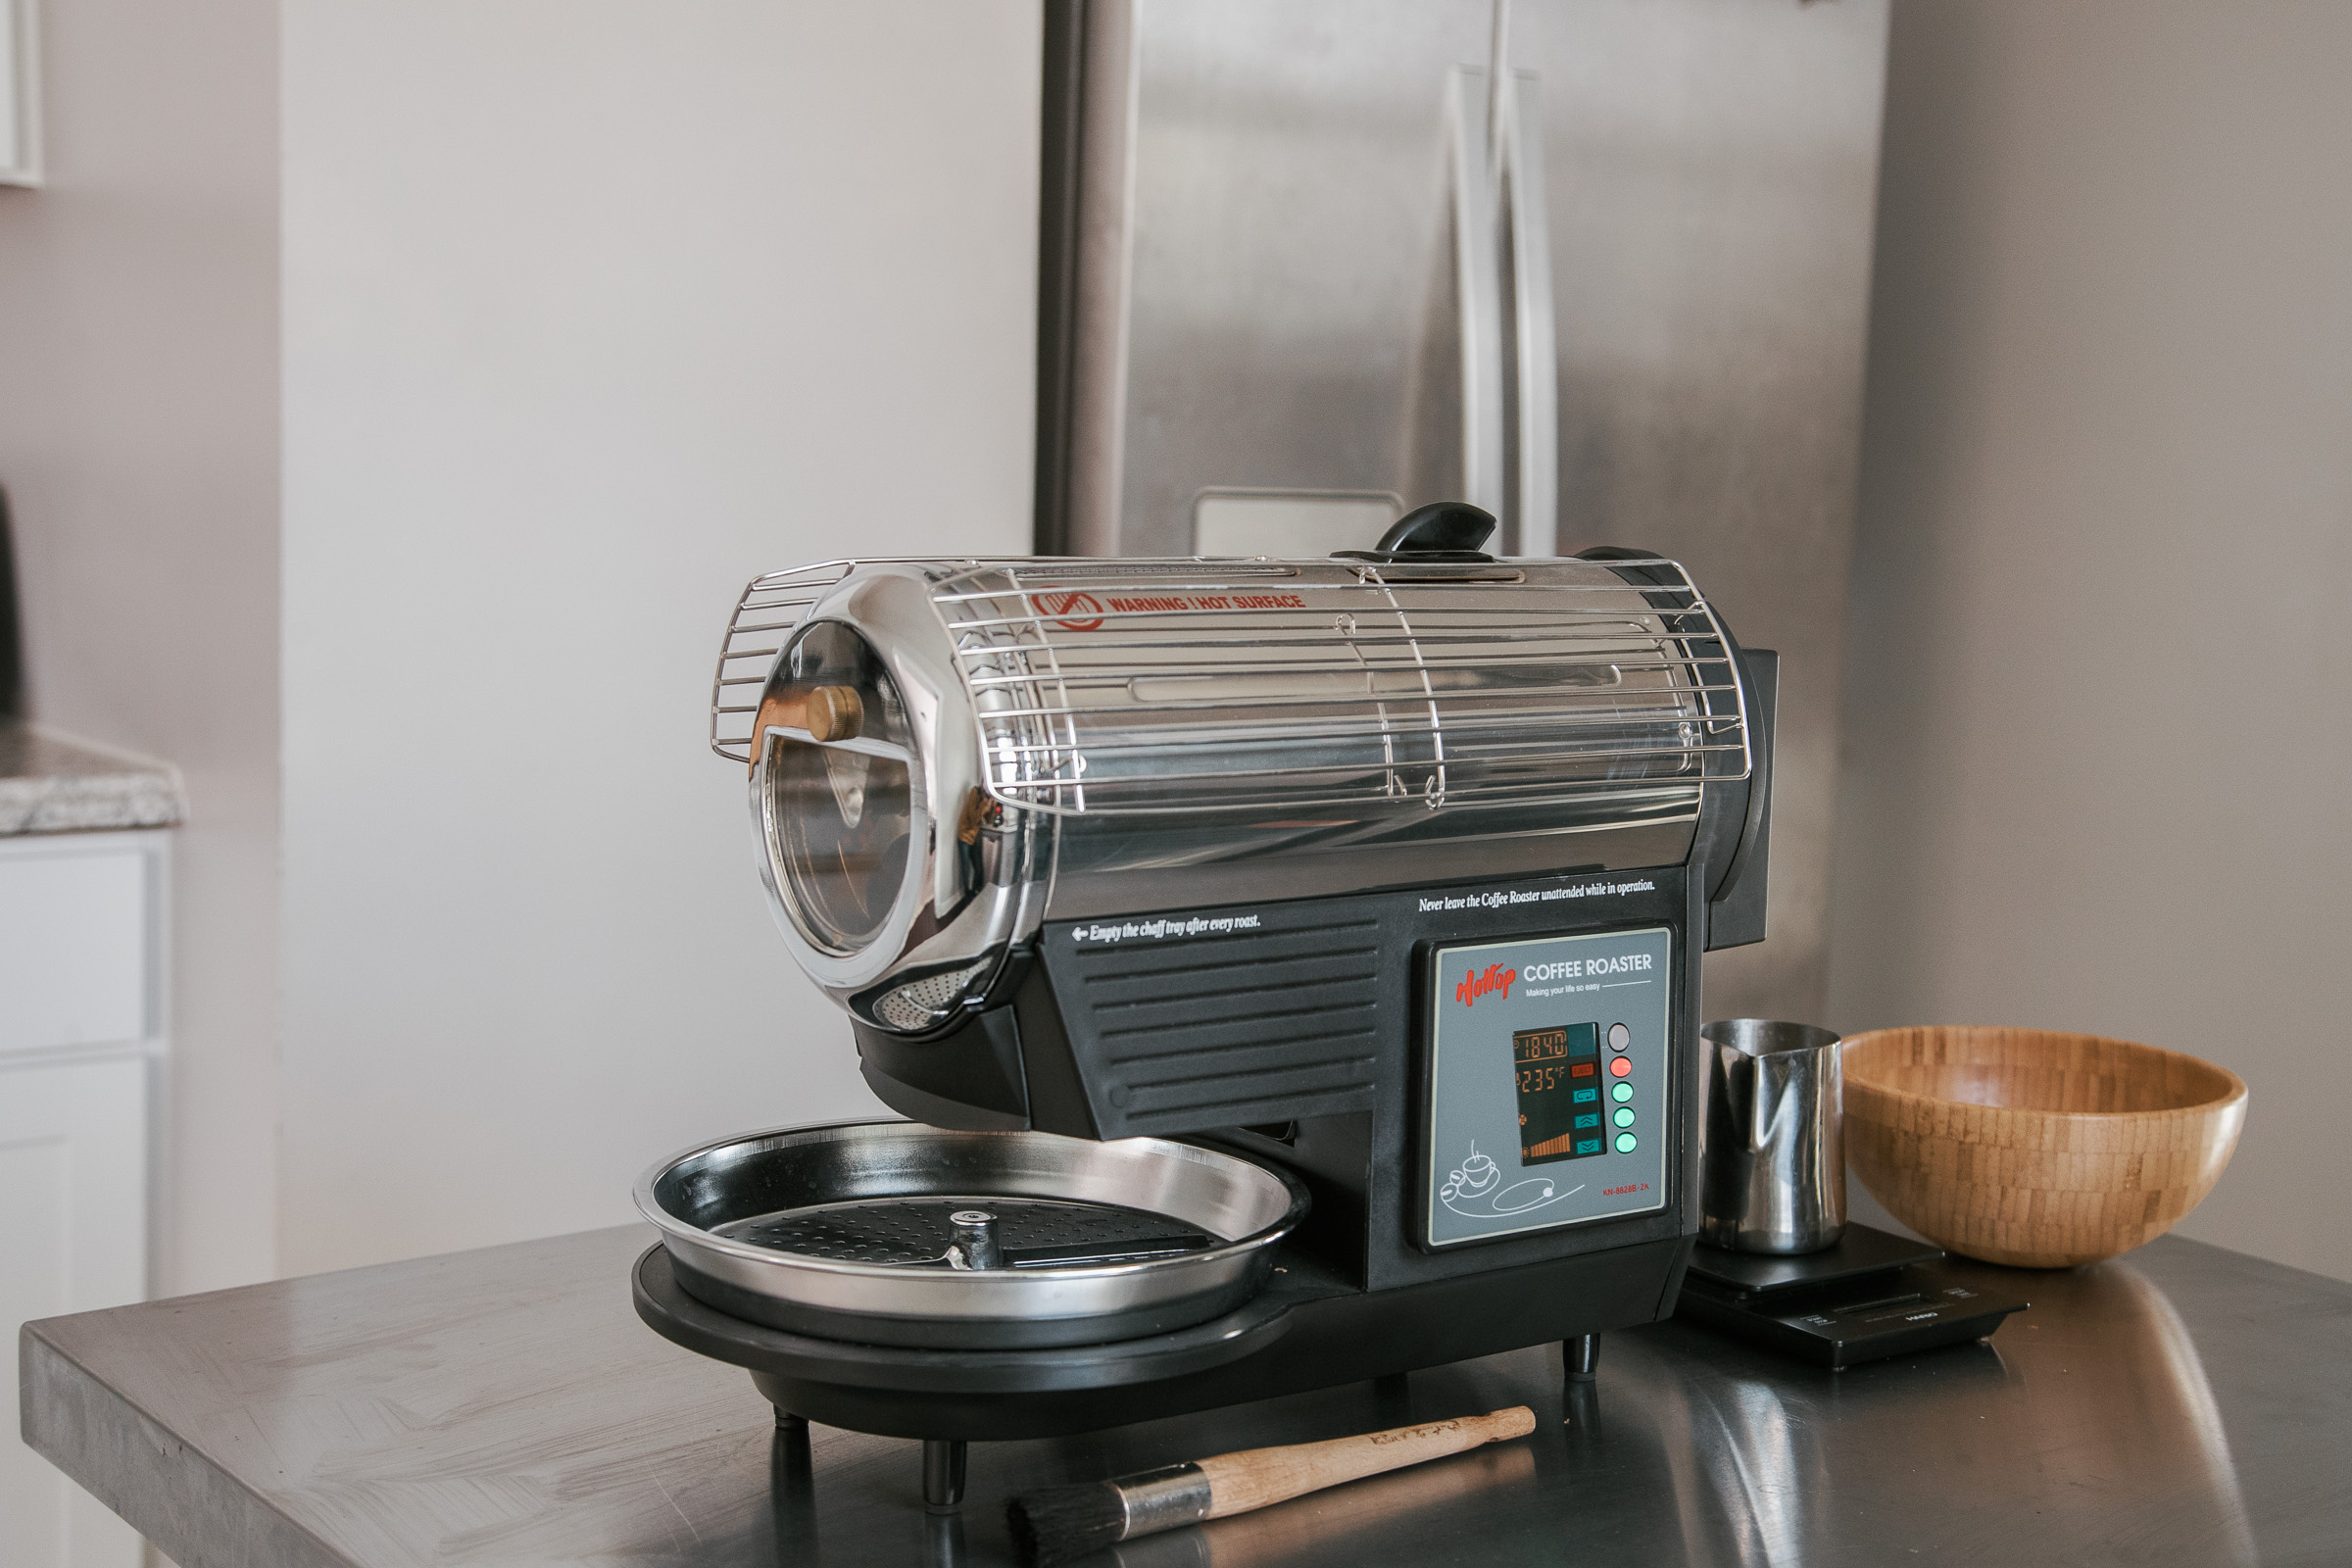
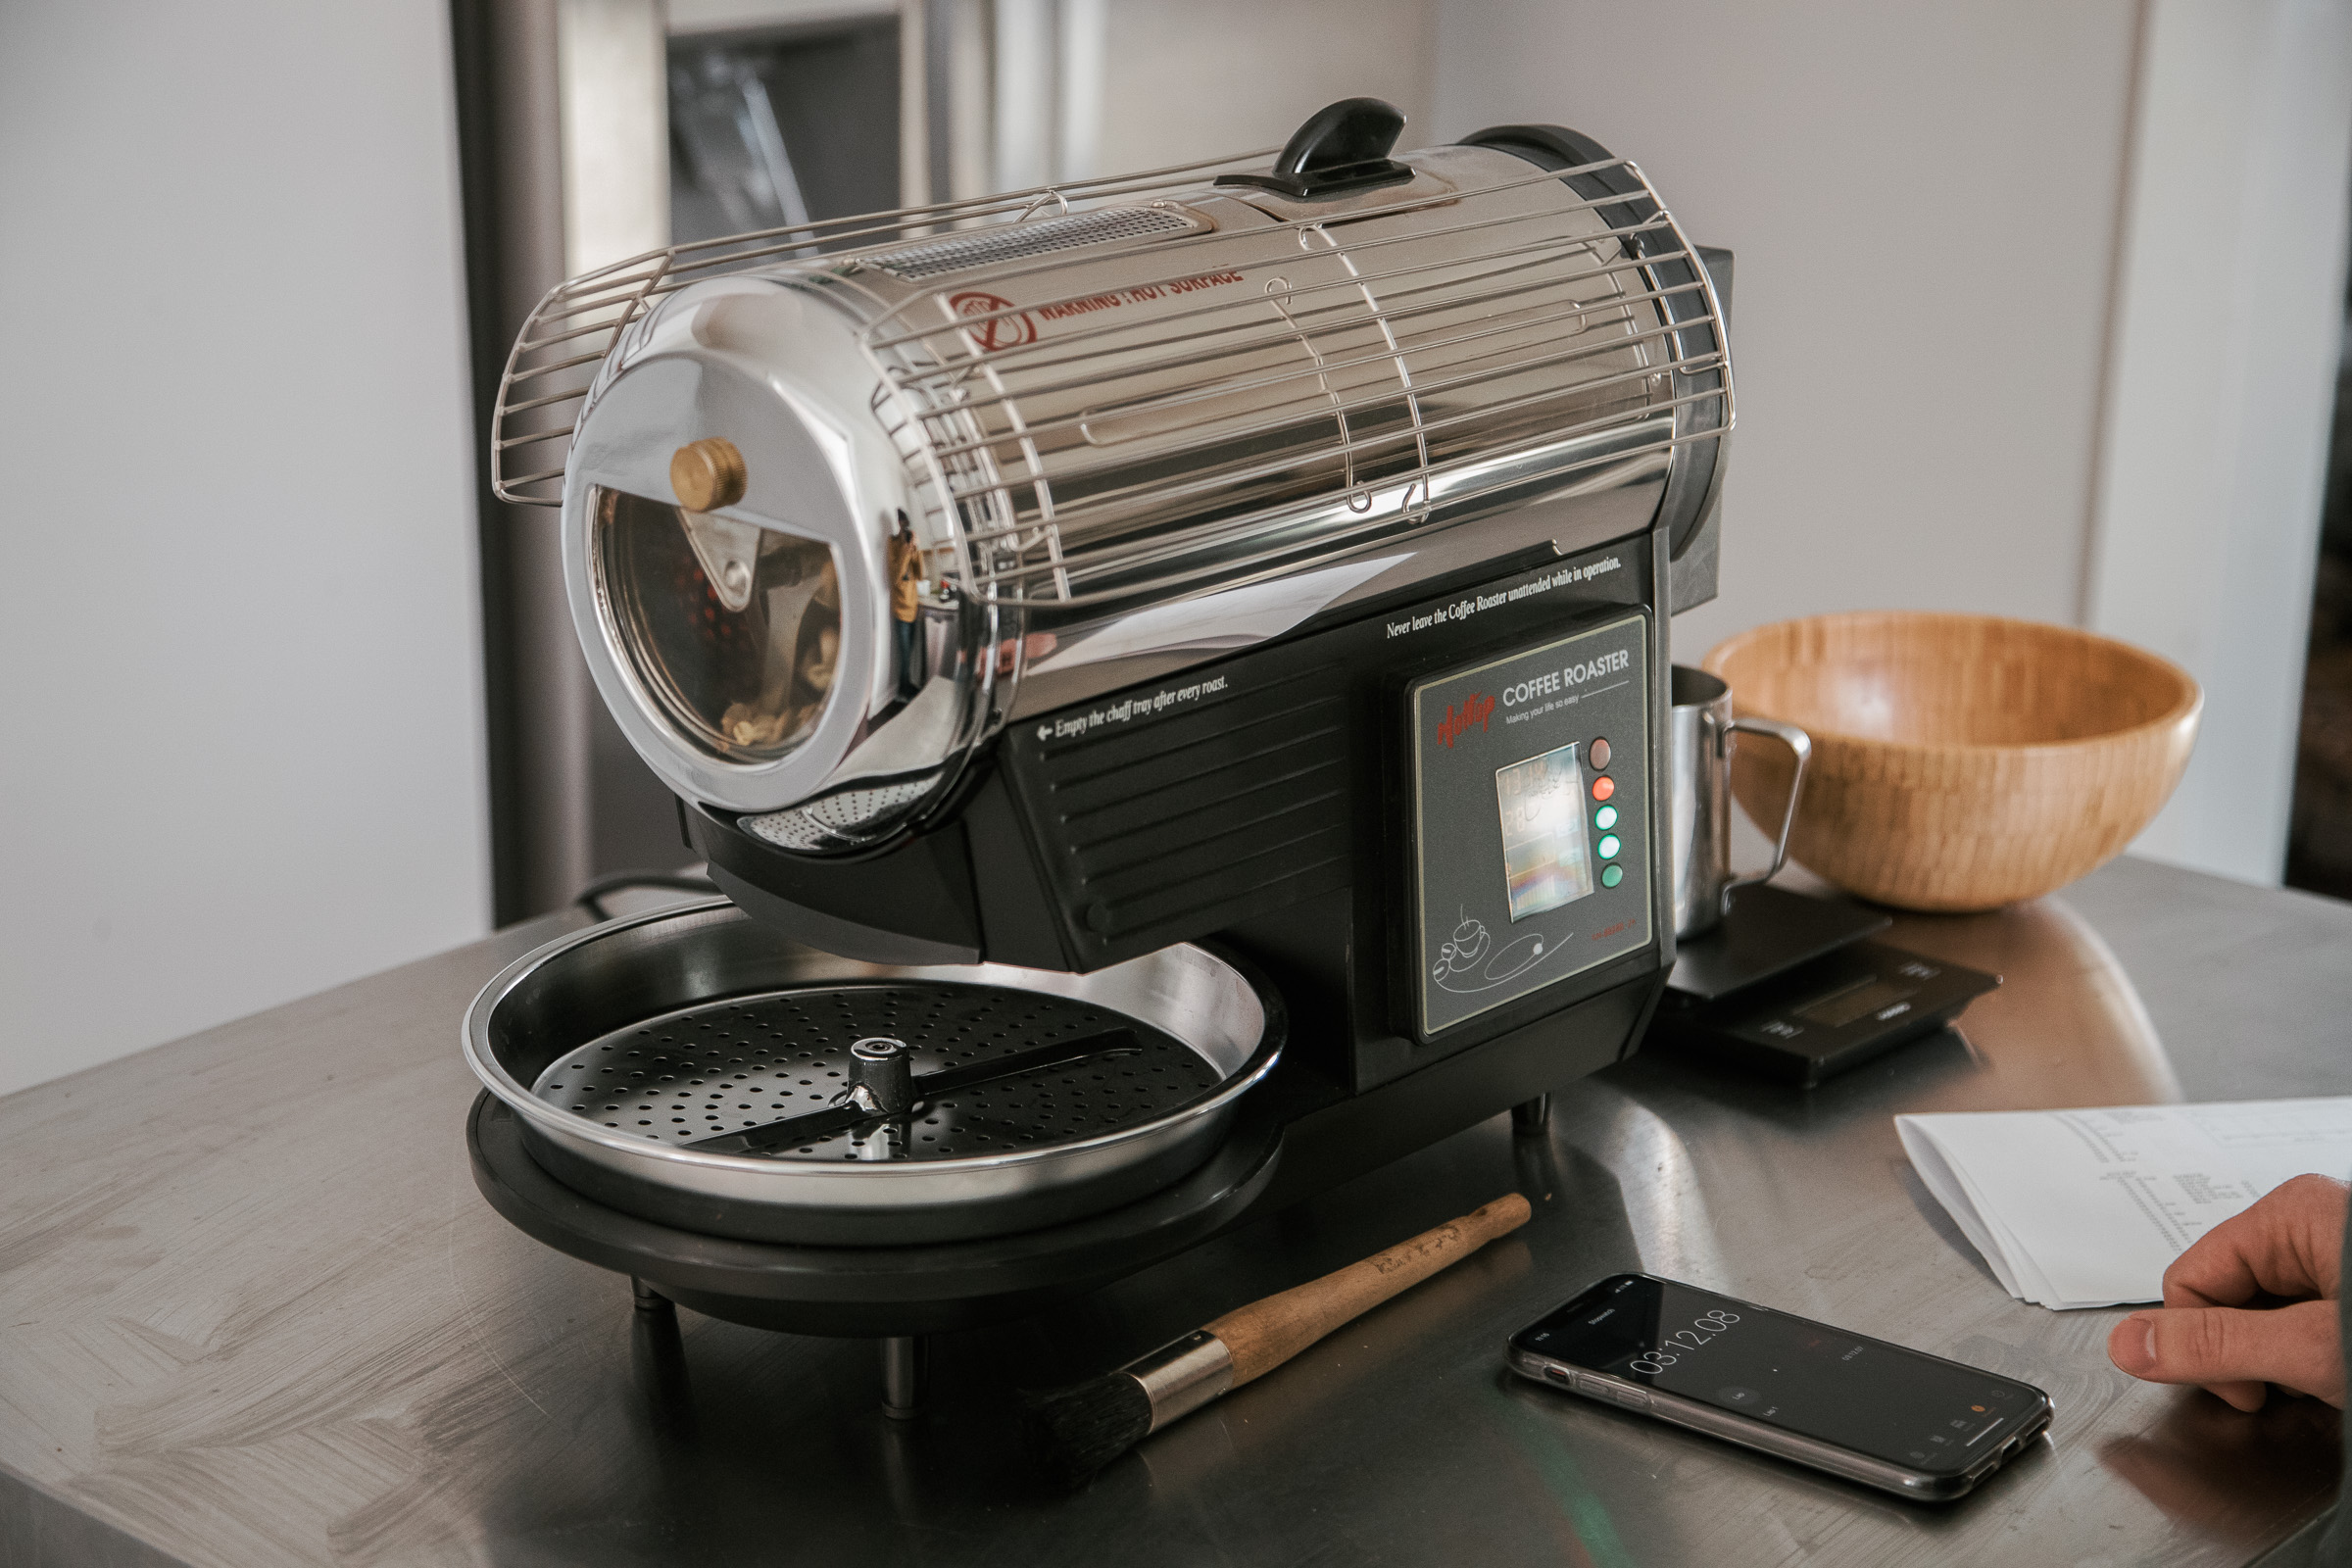
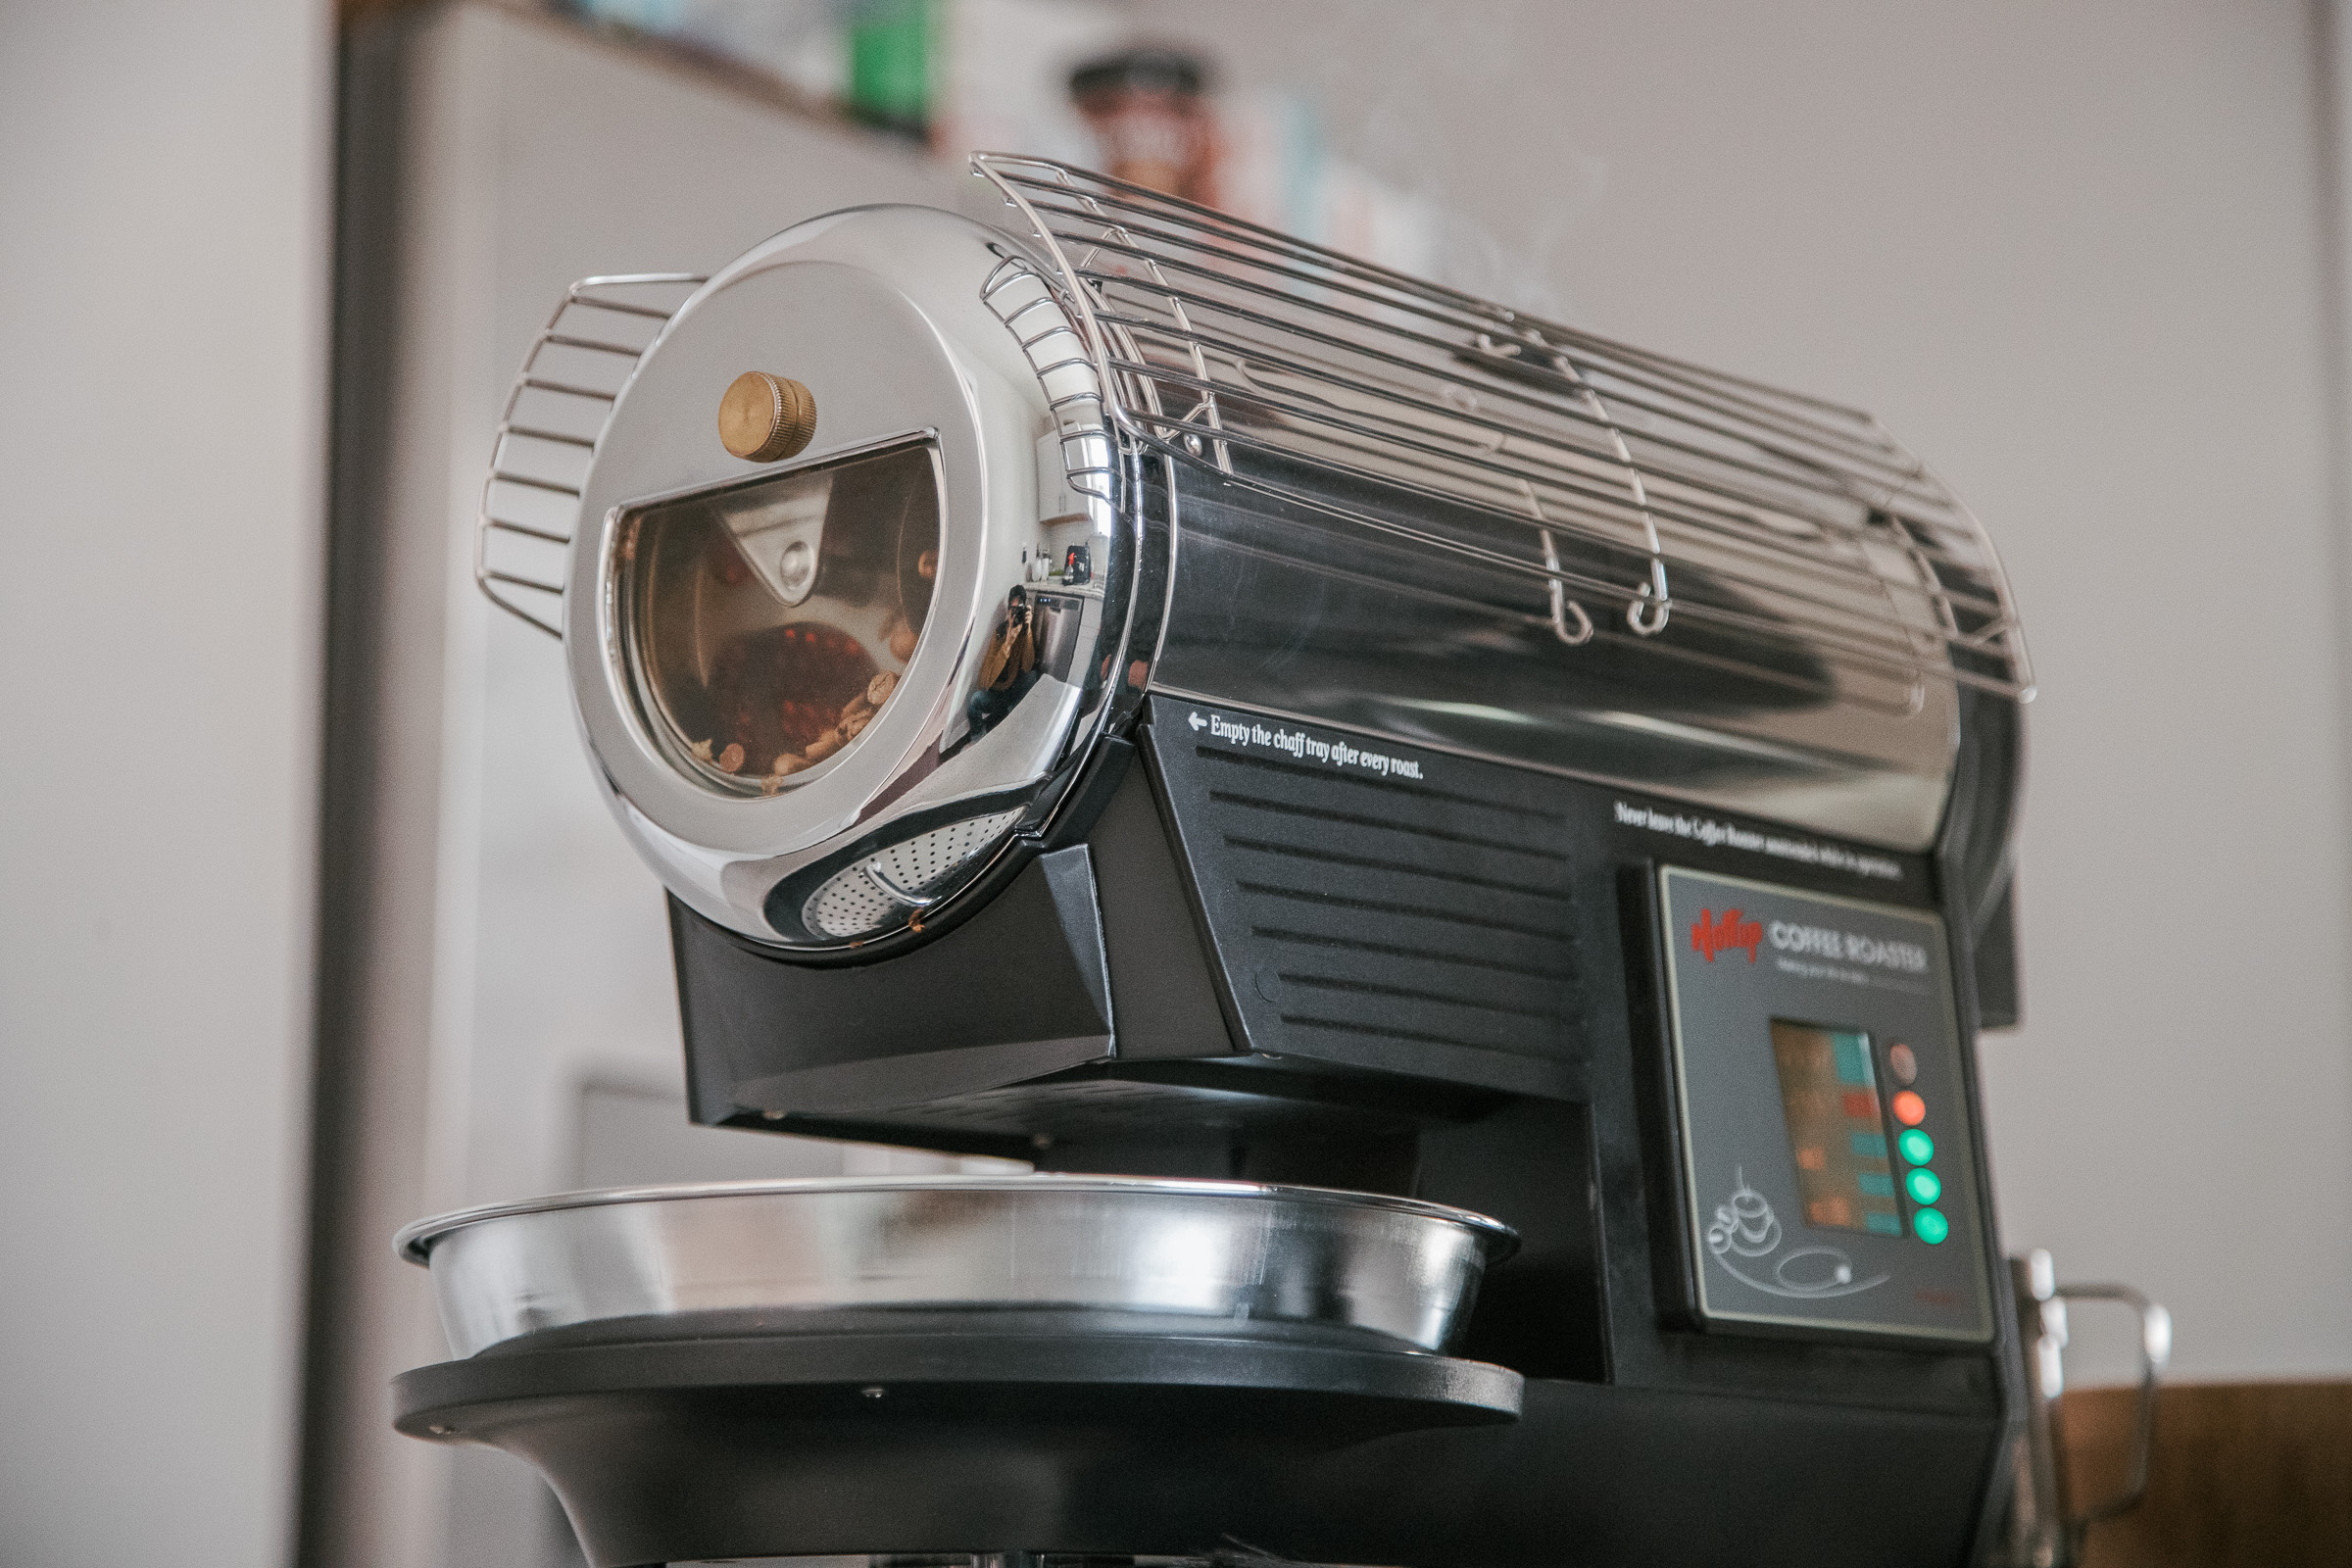
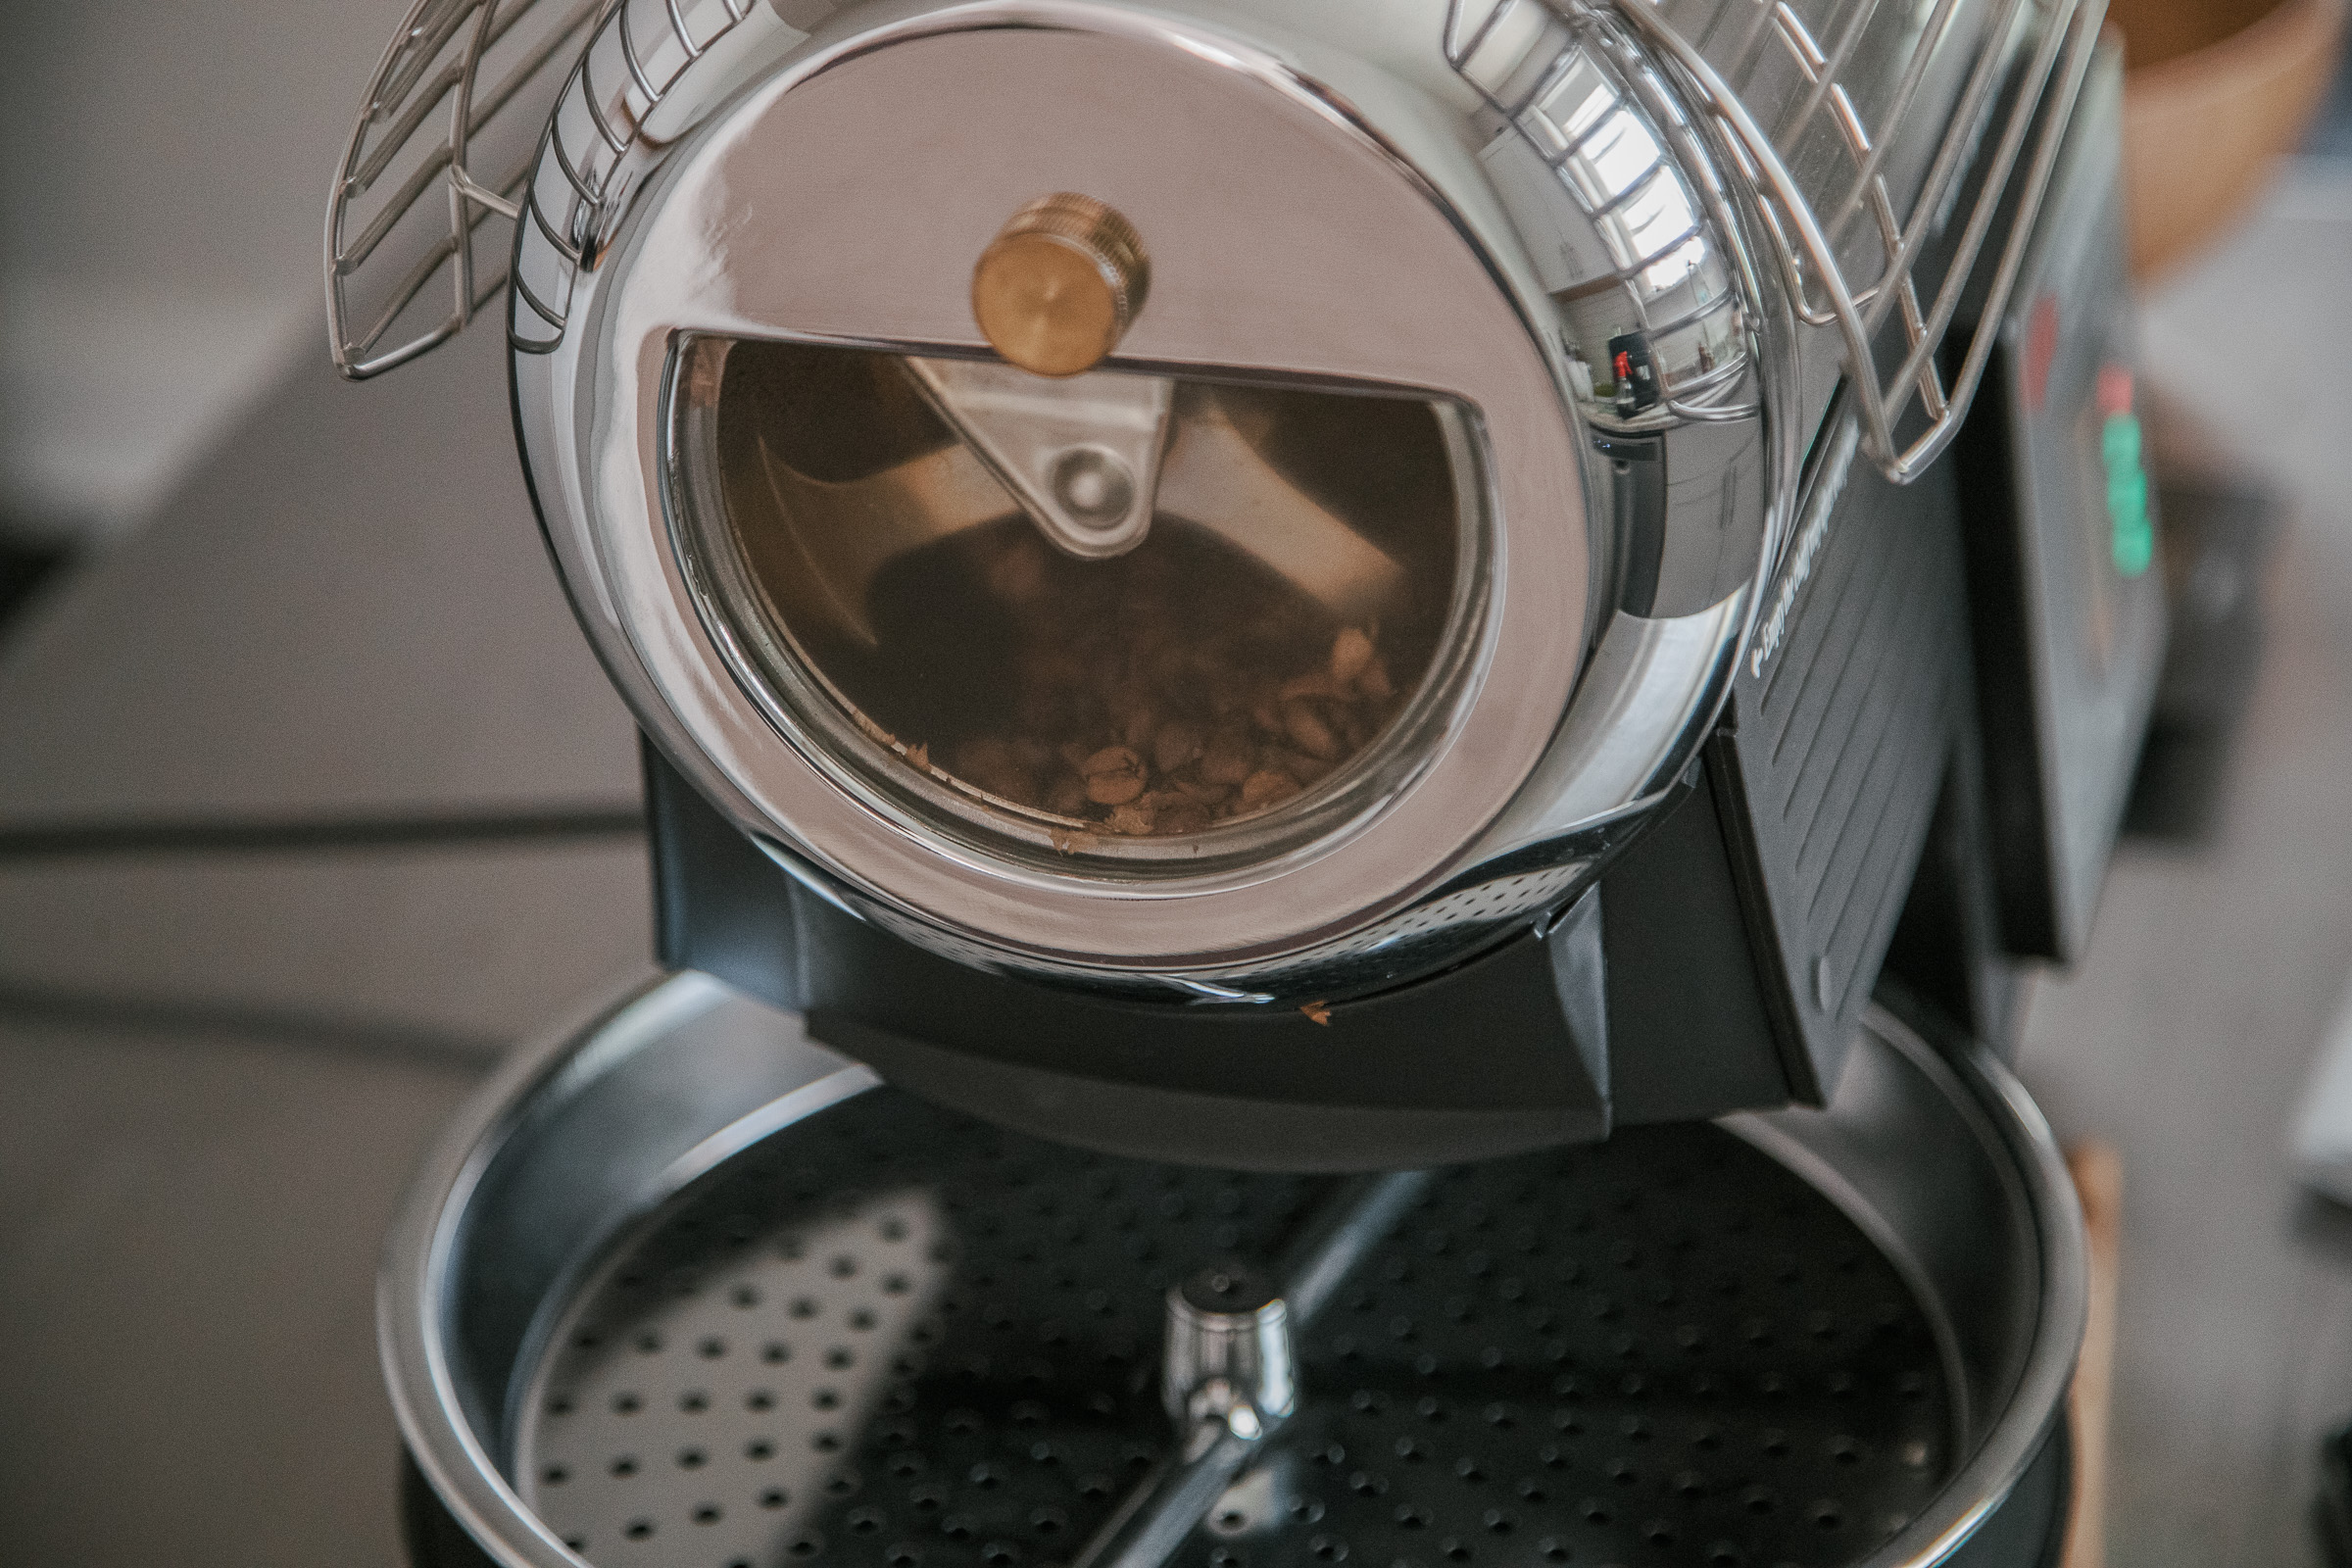
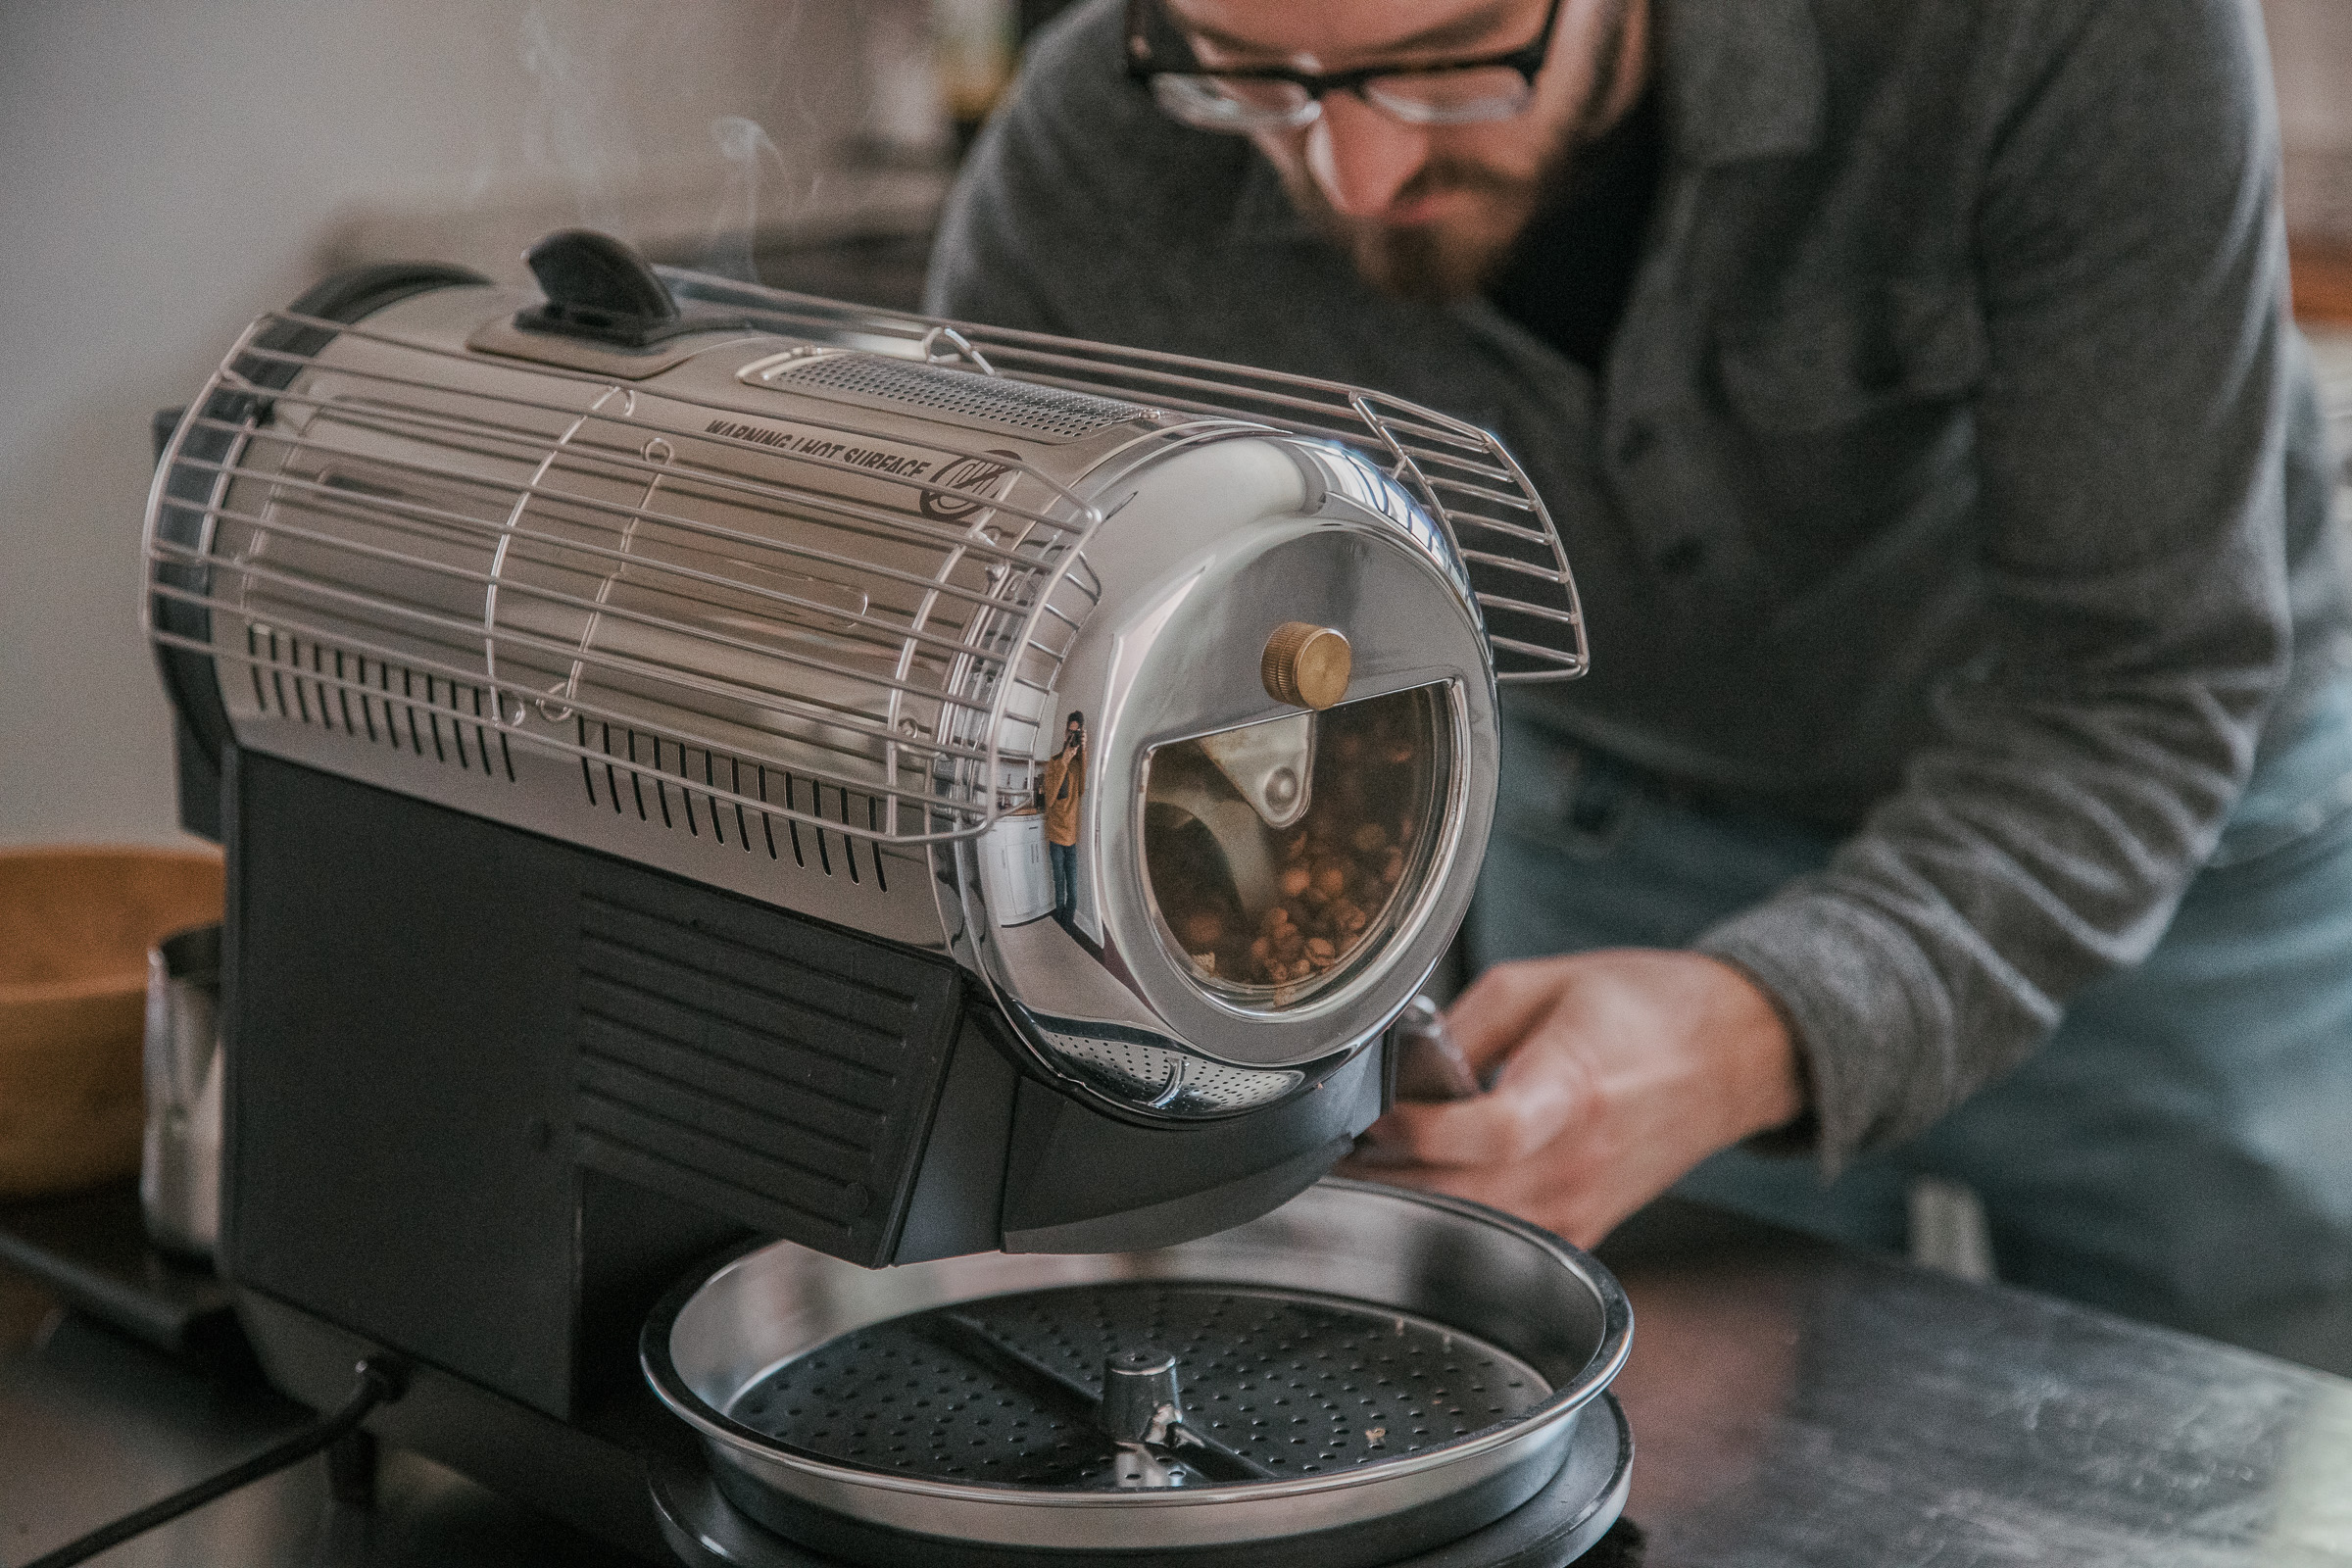
For the last month, however, I have been roasting 1-3 batches every day on a Hottop Coffee Roaster. Considering its roasting drum, viewing window, control panel (temp and airflow control), cooling tray (with an automatic agitation arm), chaff tray, top and rear filters (for smoke reduction), the Hottop was clearly made for roasting coffee; definitely a major step up from a popcorn popper. And while we currently offer two different models, I used a KN-8828B-2K for this blog. Unlike the 2K+ model, the 2K is not USB ready and only has 1 K-type thermocouple (the 2K+ has two). Therefore, I was unable to use third party software to monitor, graph, or control my roasts, and I could only see the environmental temperature of the roast, not the bean temperature. This, of course, made things a little more difficult, but it also makes this blog post more accessible to owners of either model.
With the little experience that I had with a popcorn popper, the Hottop has really opened my mind to the art and science of roasting coffee. And to my surprise, I actually got a few decent tasting cups! Below you will find a brief overview of the roasting process, some tips and guidance from my experience, and a step-by-step guide to roasting with a custom roast profile.
The Basics of Roasting
There are a number of ways to go about roasting coffee, anything from in your oven or on your stove to a popcorn popper or a full-on coffee roaster. Entire books have been written on the art and science of coffee roasting: one of the most notable being Scott Rao’s The Coffee Roaster’s Companion. Also, there are some great video series on YouTube. So even though I’ll do my best to briefly summarize the process of roasting coffee, it will be far from a full explanation.
In the most basic sense, coffee roasting is the process whereby heat is applied to the green seeds of a coffee cherry, resulting in a number of chemical and physical changes that bring about a tasty cup of coffee once ground and brewed, hopefully. The reality, though, is that roasting coffee is much more than that. Any old cat can add heat to coffee beans, but knowing how to apply different amounts of heat and airflow at the correct times for each individual batch is what separates the pros from the amateurs, the artists from the wannabes.
Balancing Act
If you’ve ever shot photographs in manual mode, you probably already know about the exposure triangle, a model for balancing aperture, shutter speed, and ISO for getting a good shot. When it comes to roasting coffee, there is a similar balance. Rather than having a particular scene that you want to capture, requiring different settings depending on lighting and movement, you have certain amounts of coffee beans that come from different places, requiring different parameters to bring about a well-roasted batch of coffee.
Adopting the metaphor, when roasting coffee, there is a balance between heat, airflow, and time. However, like a particular scene requires a balance of settings to take a picture, different green coffee beans and different batch sizes require different applications of each parameter.
Yet, it’s not as simple as the correct amount of heat or airflow or the right amount of time, because the appropriate amount of each of these variables changes throughout a single batch. For example, a roaster may start with high heat and no airflow, and then slowly switch both as the roast progresses. But each coffee will require different amounts of each. Too much heat, and you chance only roasting the outside of the bean. Too little heat, and you get an underdeveloped batch. Not enough airflow, and you get a smoky tasting coffee. Roast too long and you can start a fire.
Roast Progression
It’s commonly said that there are three stages in coffee roasting: drying, browning, and developing. These stages can be helpful, but they have been debated more recently, due to the fact that these things are kind of happening the entire time. Coffee beans lose moisture at a relatively consistent rate, losing a total of 12%-24% by the end of the roasting process. And although they start out green, they become browner and browner as they continue to develop (unless they are burned, that is).
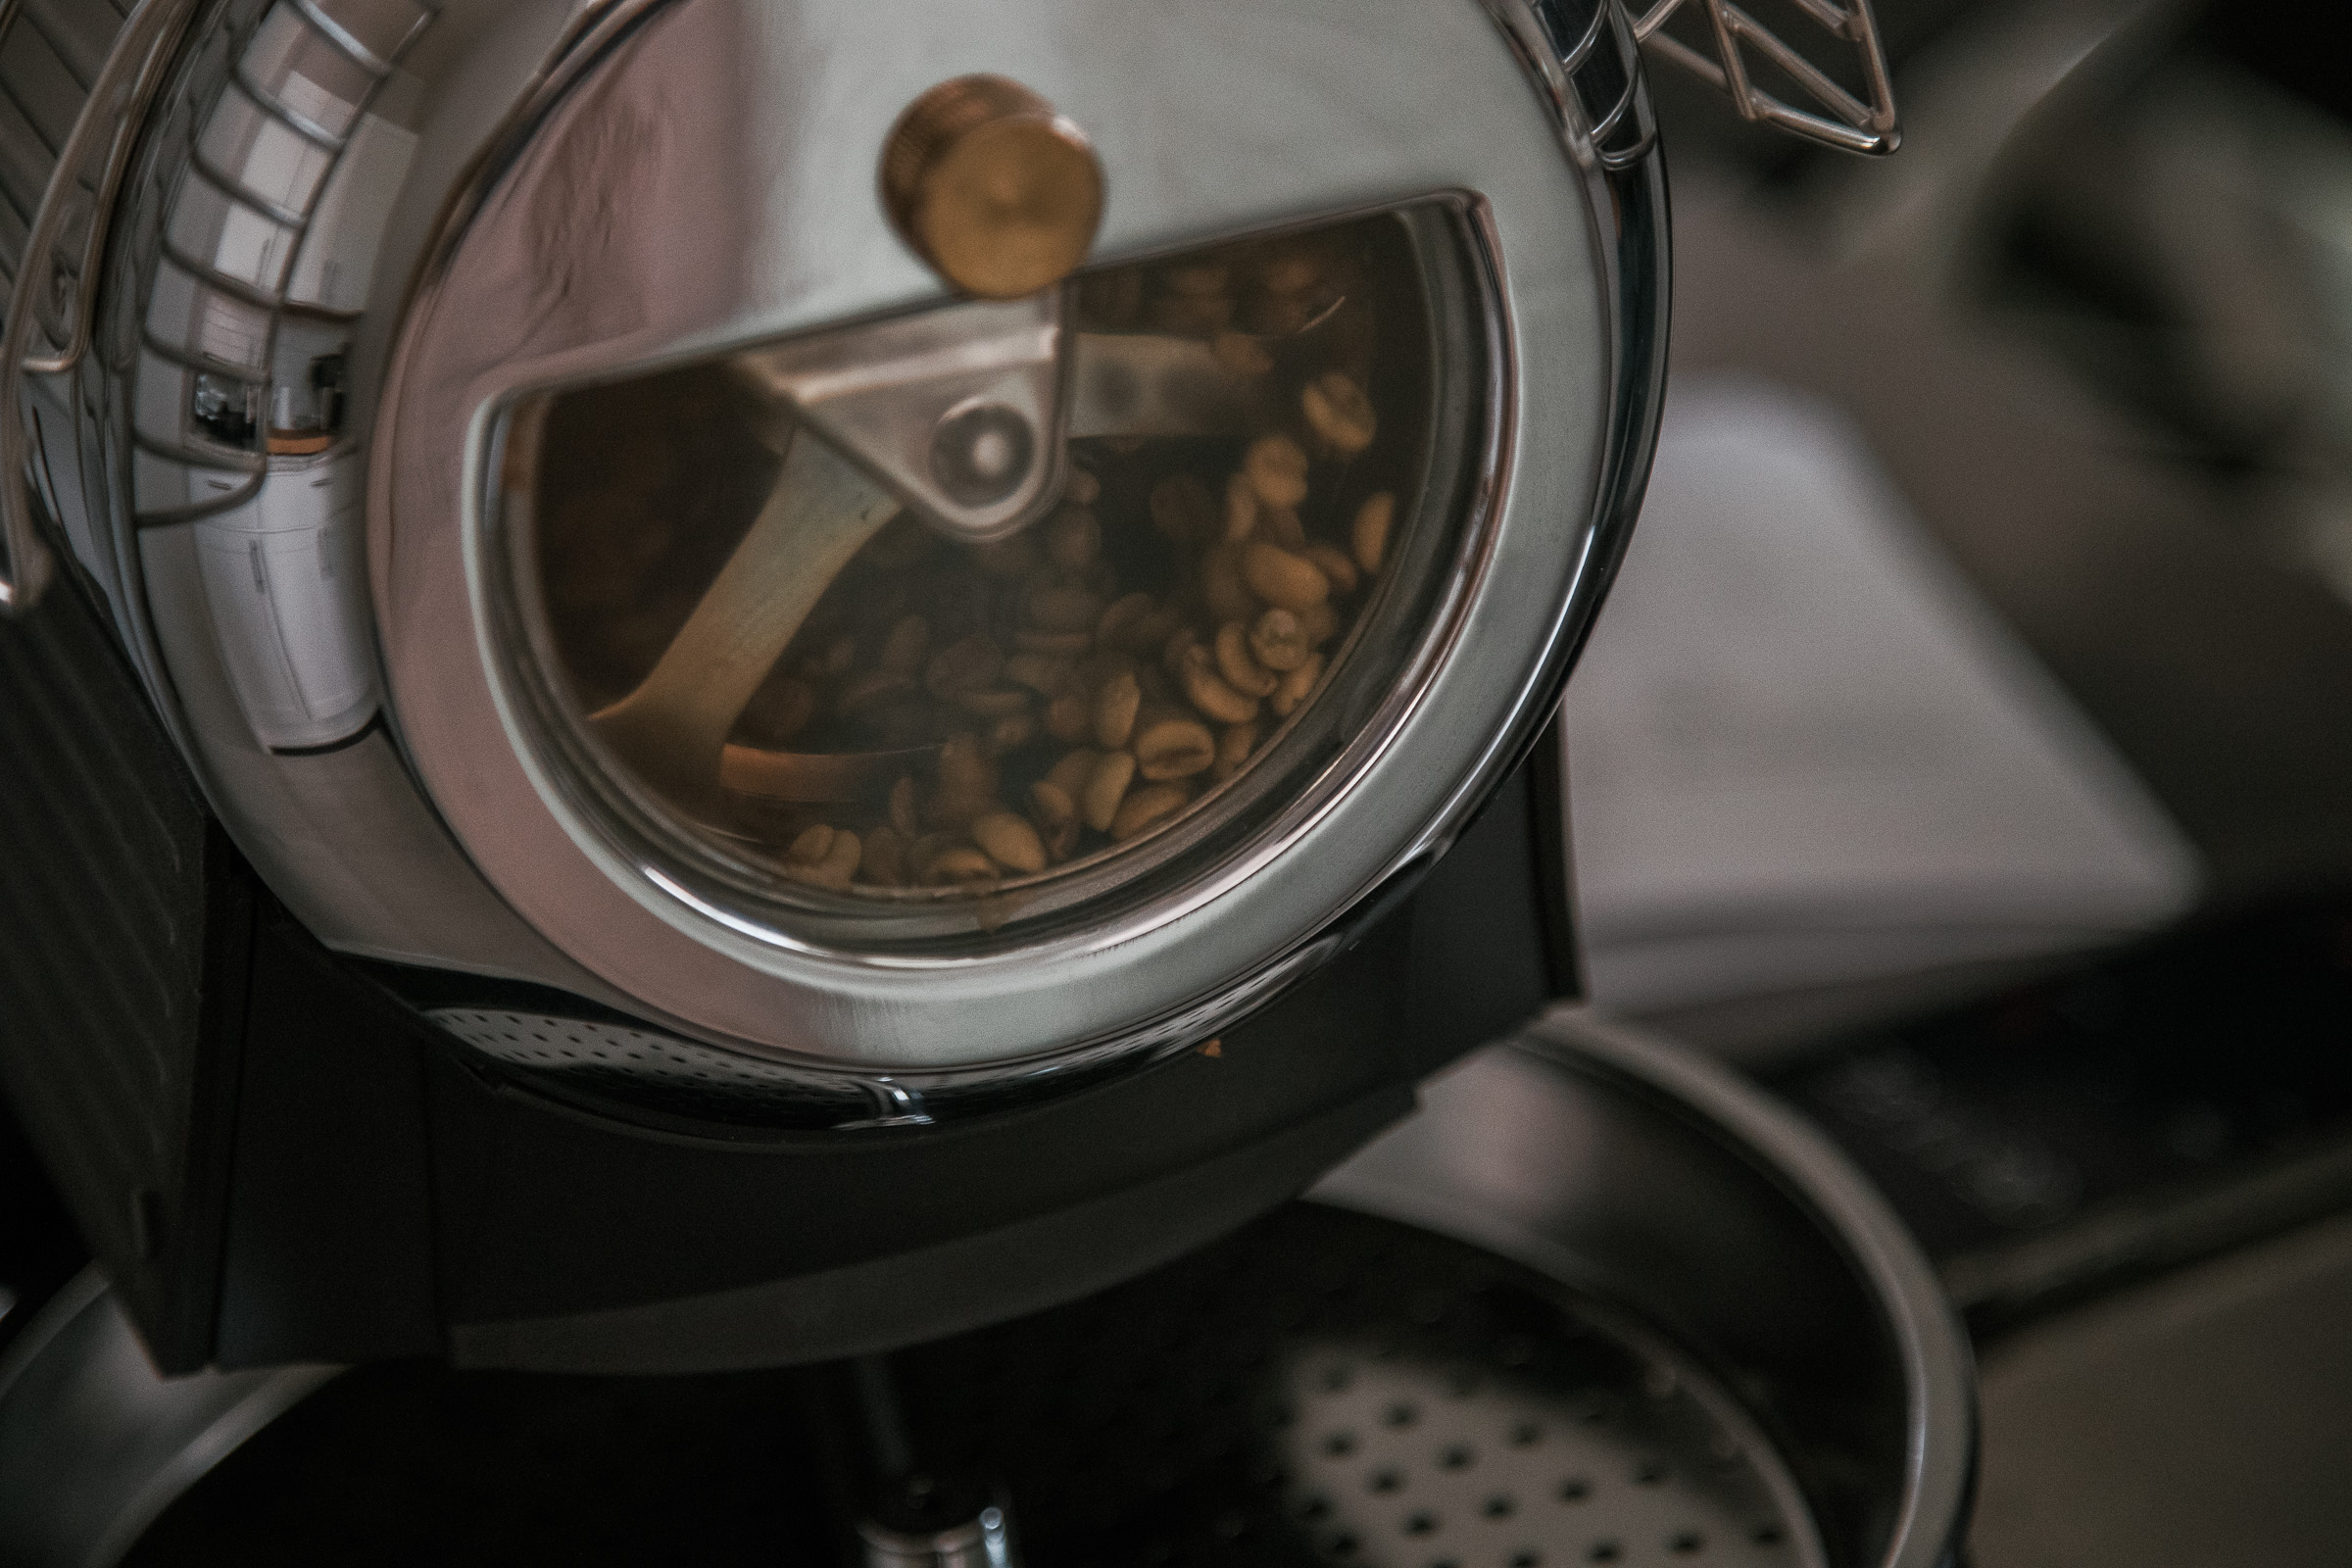
There are a few particular color changes that happen during the roasting process. In the first few minutes, chlorophyll is broken down, changing the beans from green to yellow. After that, they go from yellow to tan to light brown because of Maillard reactions. During this time, the beans structure begins to break down, resulting in the audible sound known as first crack. After this, the beans become darker and darker brown due to caramelization, which leads to the second sound known as second crack. Finally, they continue to develop until they can’t any longer and become black due to carbonization.
But that is really just the tip of the iceberg. There are hundreds of chemical and physical changes that occur during a single roast. About 50% of a single green coffee bean is made up of carbohydrates, half of which is cellulose, while the remaining 50% consists of water, proteins, lipids, acids, and alkaloids. When coffee is roasted the chemicals lining the cellulose web are what change and are responsible for the flavors and aroma that you get in your cup. The development of acids plays a major role in coffee, significantly contributing to the inherent acidity and bitterness of your coffee: chlorogenic acid is the largest culprit, while citric, phosphoric, acetic, and malic acids play smaller roles as well. About 6-9% of a green coffee bean is sugar, primarily sucrose; this drops significantly when roasted, affecting the sweetness and the acidity of your coffee. On top of this, alongside certain acids and sugars breaking down, Maillard reactions and caramelization occur, affecting flavor, aroma, and bean color.
Tips from Experience
While I’m not an experienced roaster with a lot of wisdom to offer about nailing down the perfect roast profile every time, I am in a unique position to offer advice to those of you who are wanting to get in to roasting your own coffee. Here are some things that I’ve learned so far:
Get Comfortable
My first batch did not go like I thought it would. I roasted a fully washed Guatemala Huehuetenango FTO, consisting of Bourbon, Catuai, and Caturra. The only reason I started with this one was because it seemed like a relatively basic coffee; I didn’t want to use all of the more complex Kenyan coffee that I had until I knew more about what I was doing. I charged 250g (roasting lingo for pouring the unroasted beans into the roaster) at 215 degrees, as recommended by a few online guides. I made a number of changes all throughout and finally dropped the beans (released them into the cooling tray) at 400 degrees, because I started hearing second crack (which was not my goal). The result was a 15.2% weight loss and some very oily looking coffee.
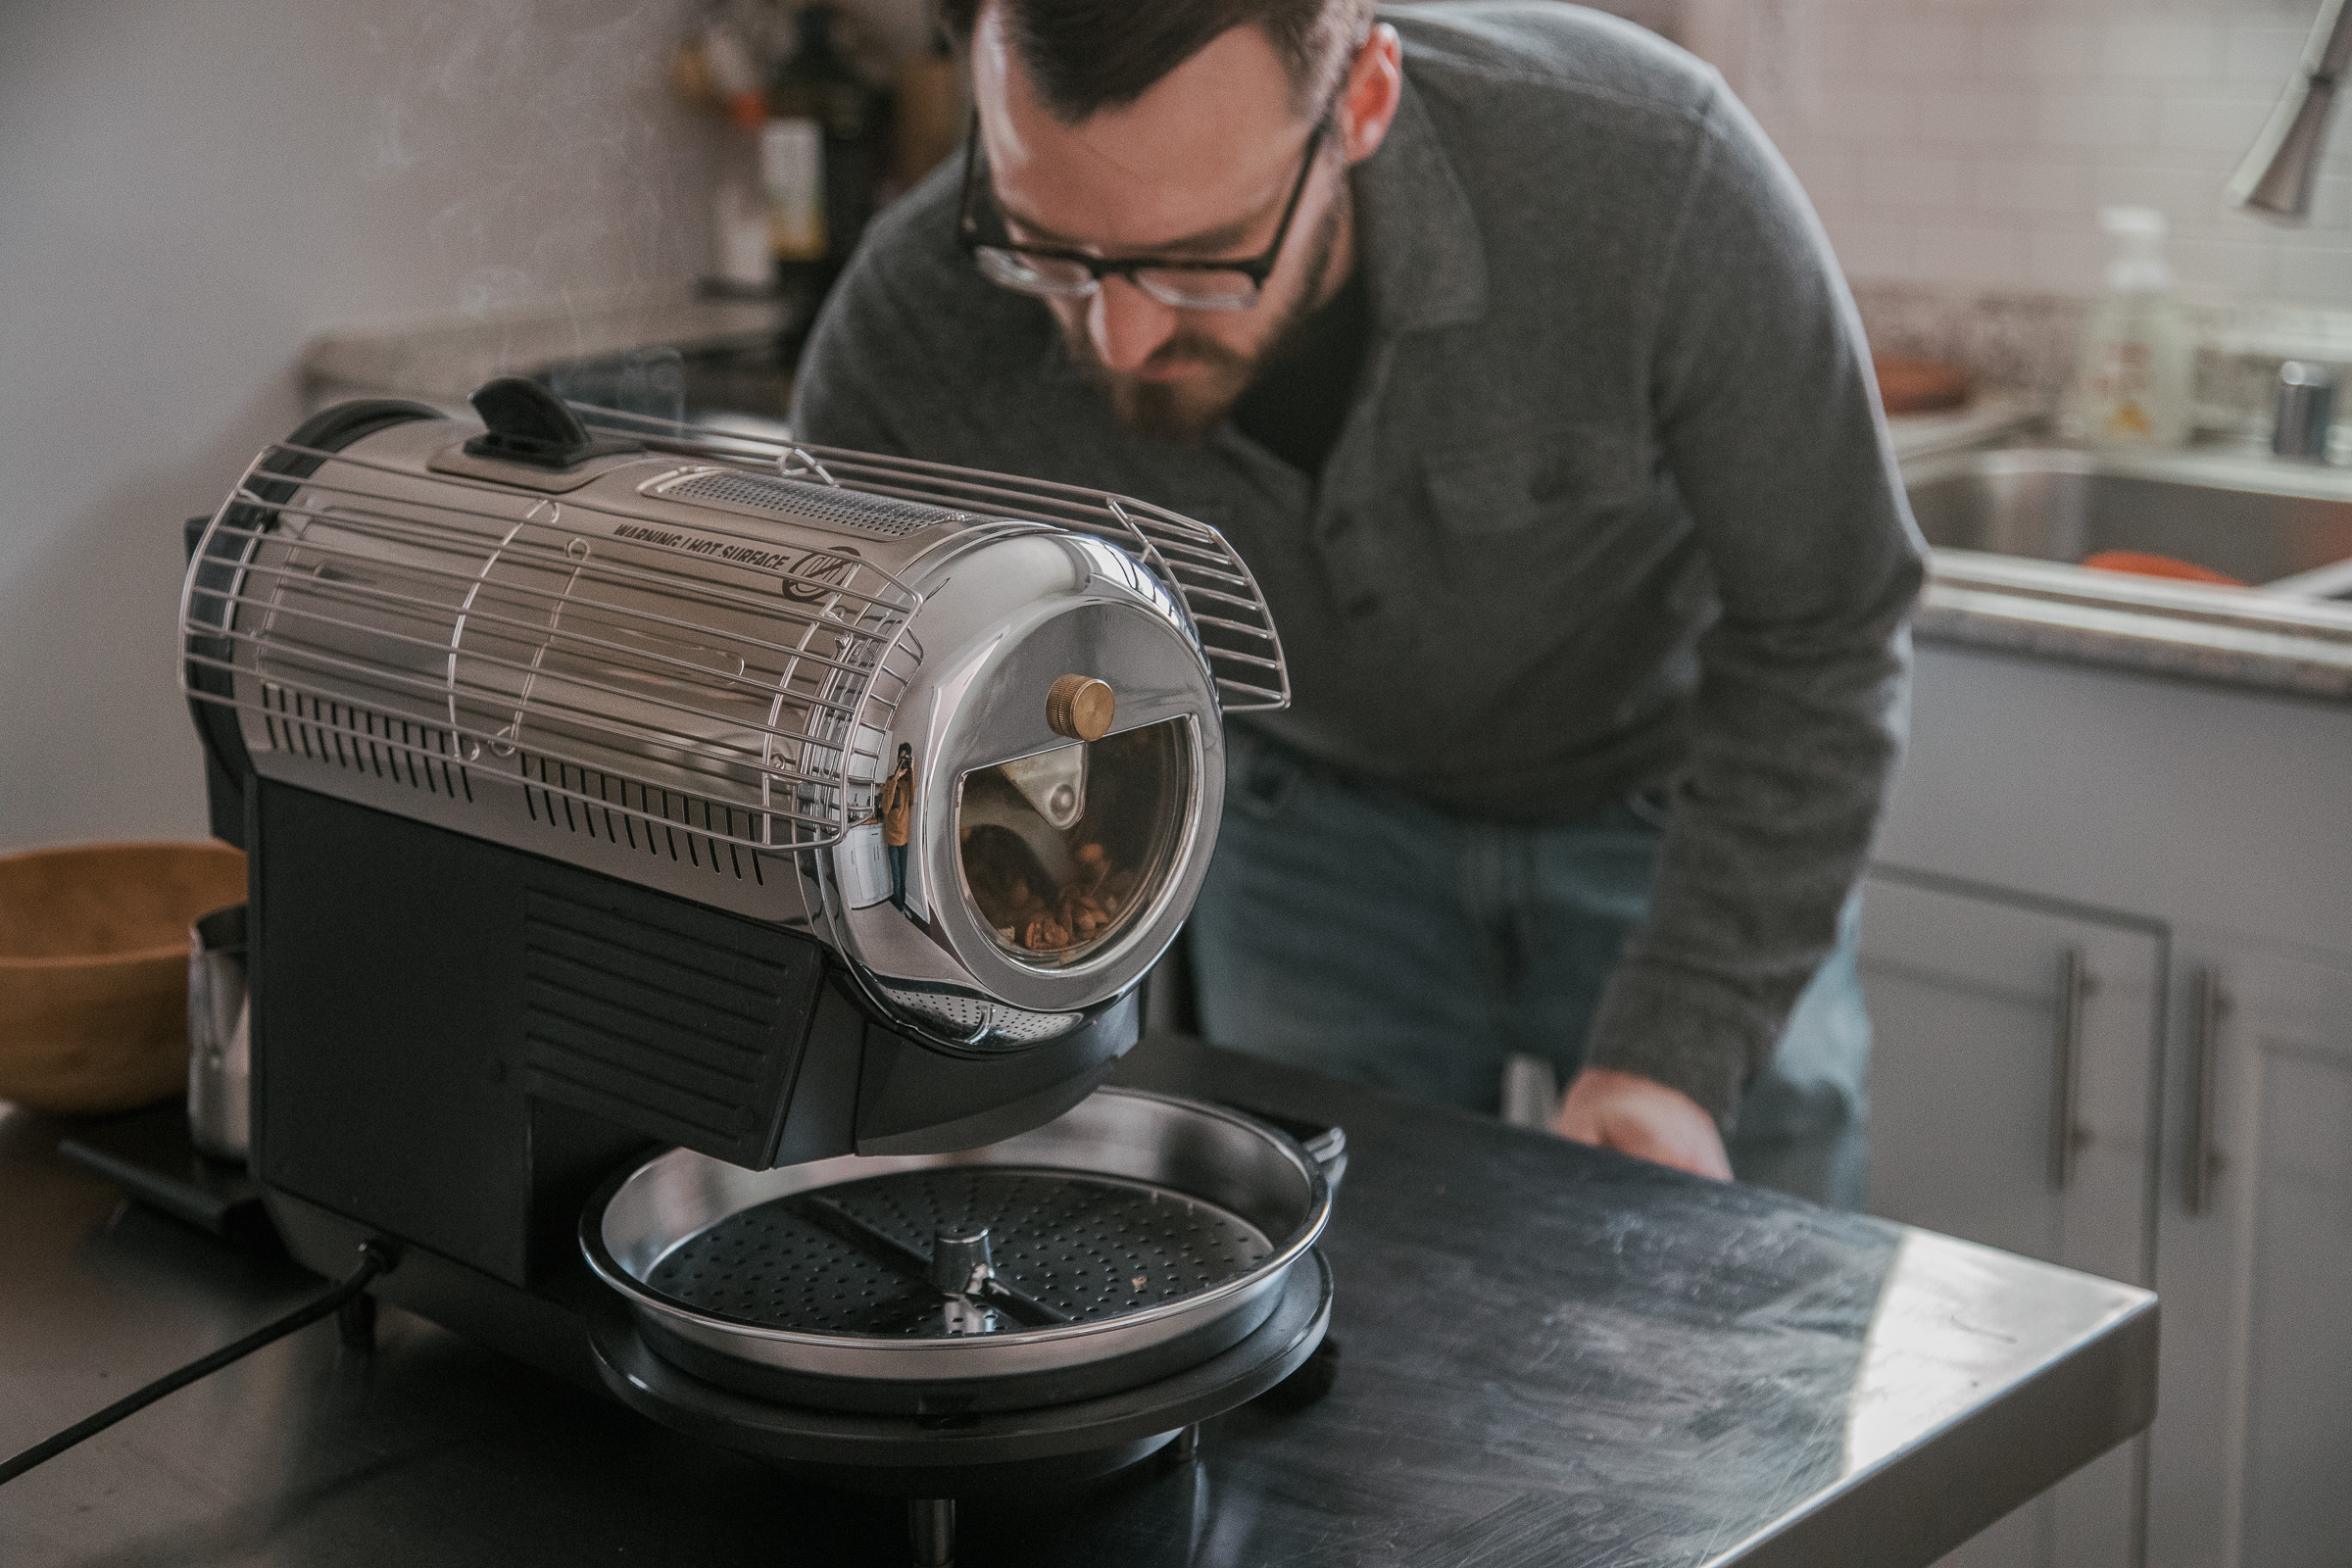
In all honesty, the first 7 minutes or so were pretty relaxing, a time of hope and excitement. But once it entered first crack, the roast developed especially quickly and felt a little overwhelming. Part of what threw me off was recognizing that the thermometer on the Hottop I used was not able to keep up with the quick changes that occur at first crack and beyond. I had read that first crack typical ends around 420 F and that second crack begins at about 450 F. However, I started hearing second crack when my display read 400 F.
On top of this, I realized that I had no idea how long this batch roasted. The Hottop suggests a charge temperature of 167 F, and it starts the timer at that temperature no matter when you decide to charge the beans. Thus, because I charged the beans at a different temperature than the Hottop suggests, the timer was off the entire time.
Because of these things, I would suggest roasting with the auto-roast setting first, just to get a feel for it, and using your own stopwatch. Follow along and make note of color, smell, smoke, time and temperature changes (especially when first crack occurs). I was a little overly ambitious, trying to use my own roast profile right off the bat, leaving me a little overwhelmed. However, if you don’t have an auto-roast setting, I would make a very clear and easy to follow guide prior to actually roasting. Either way, roasting a few “throw-away” batches will help you get more prepared for the task at hand.
Take Notes
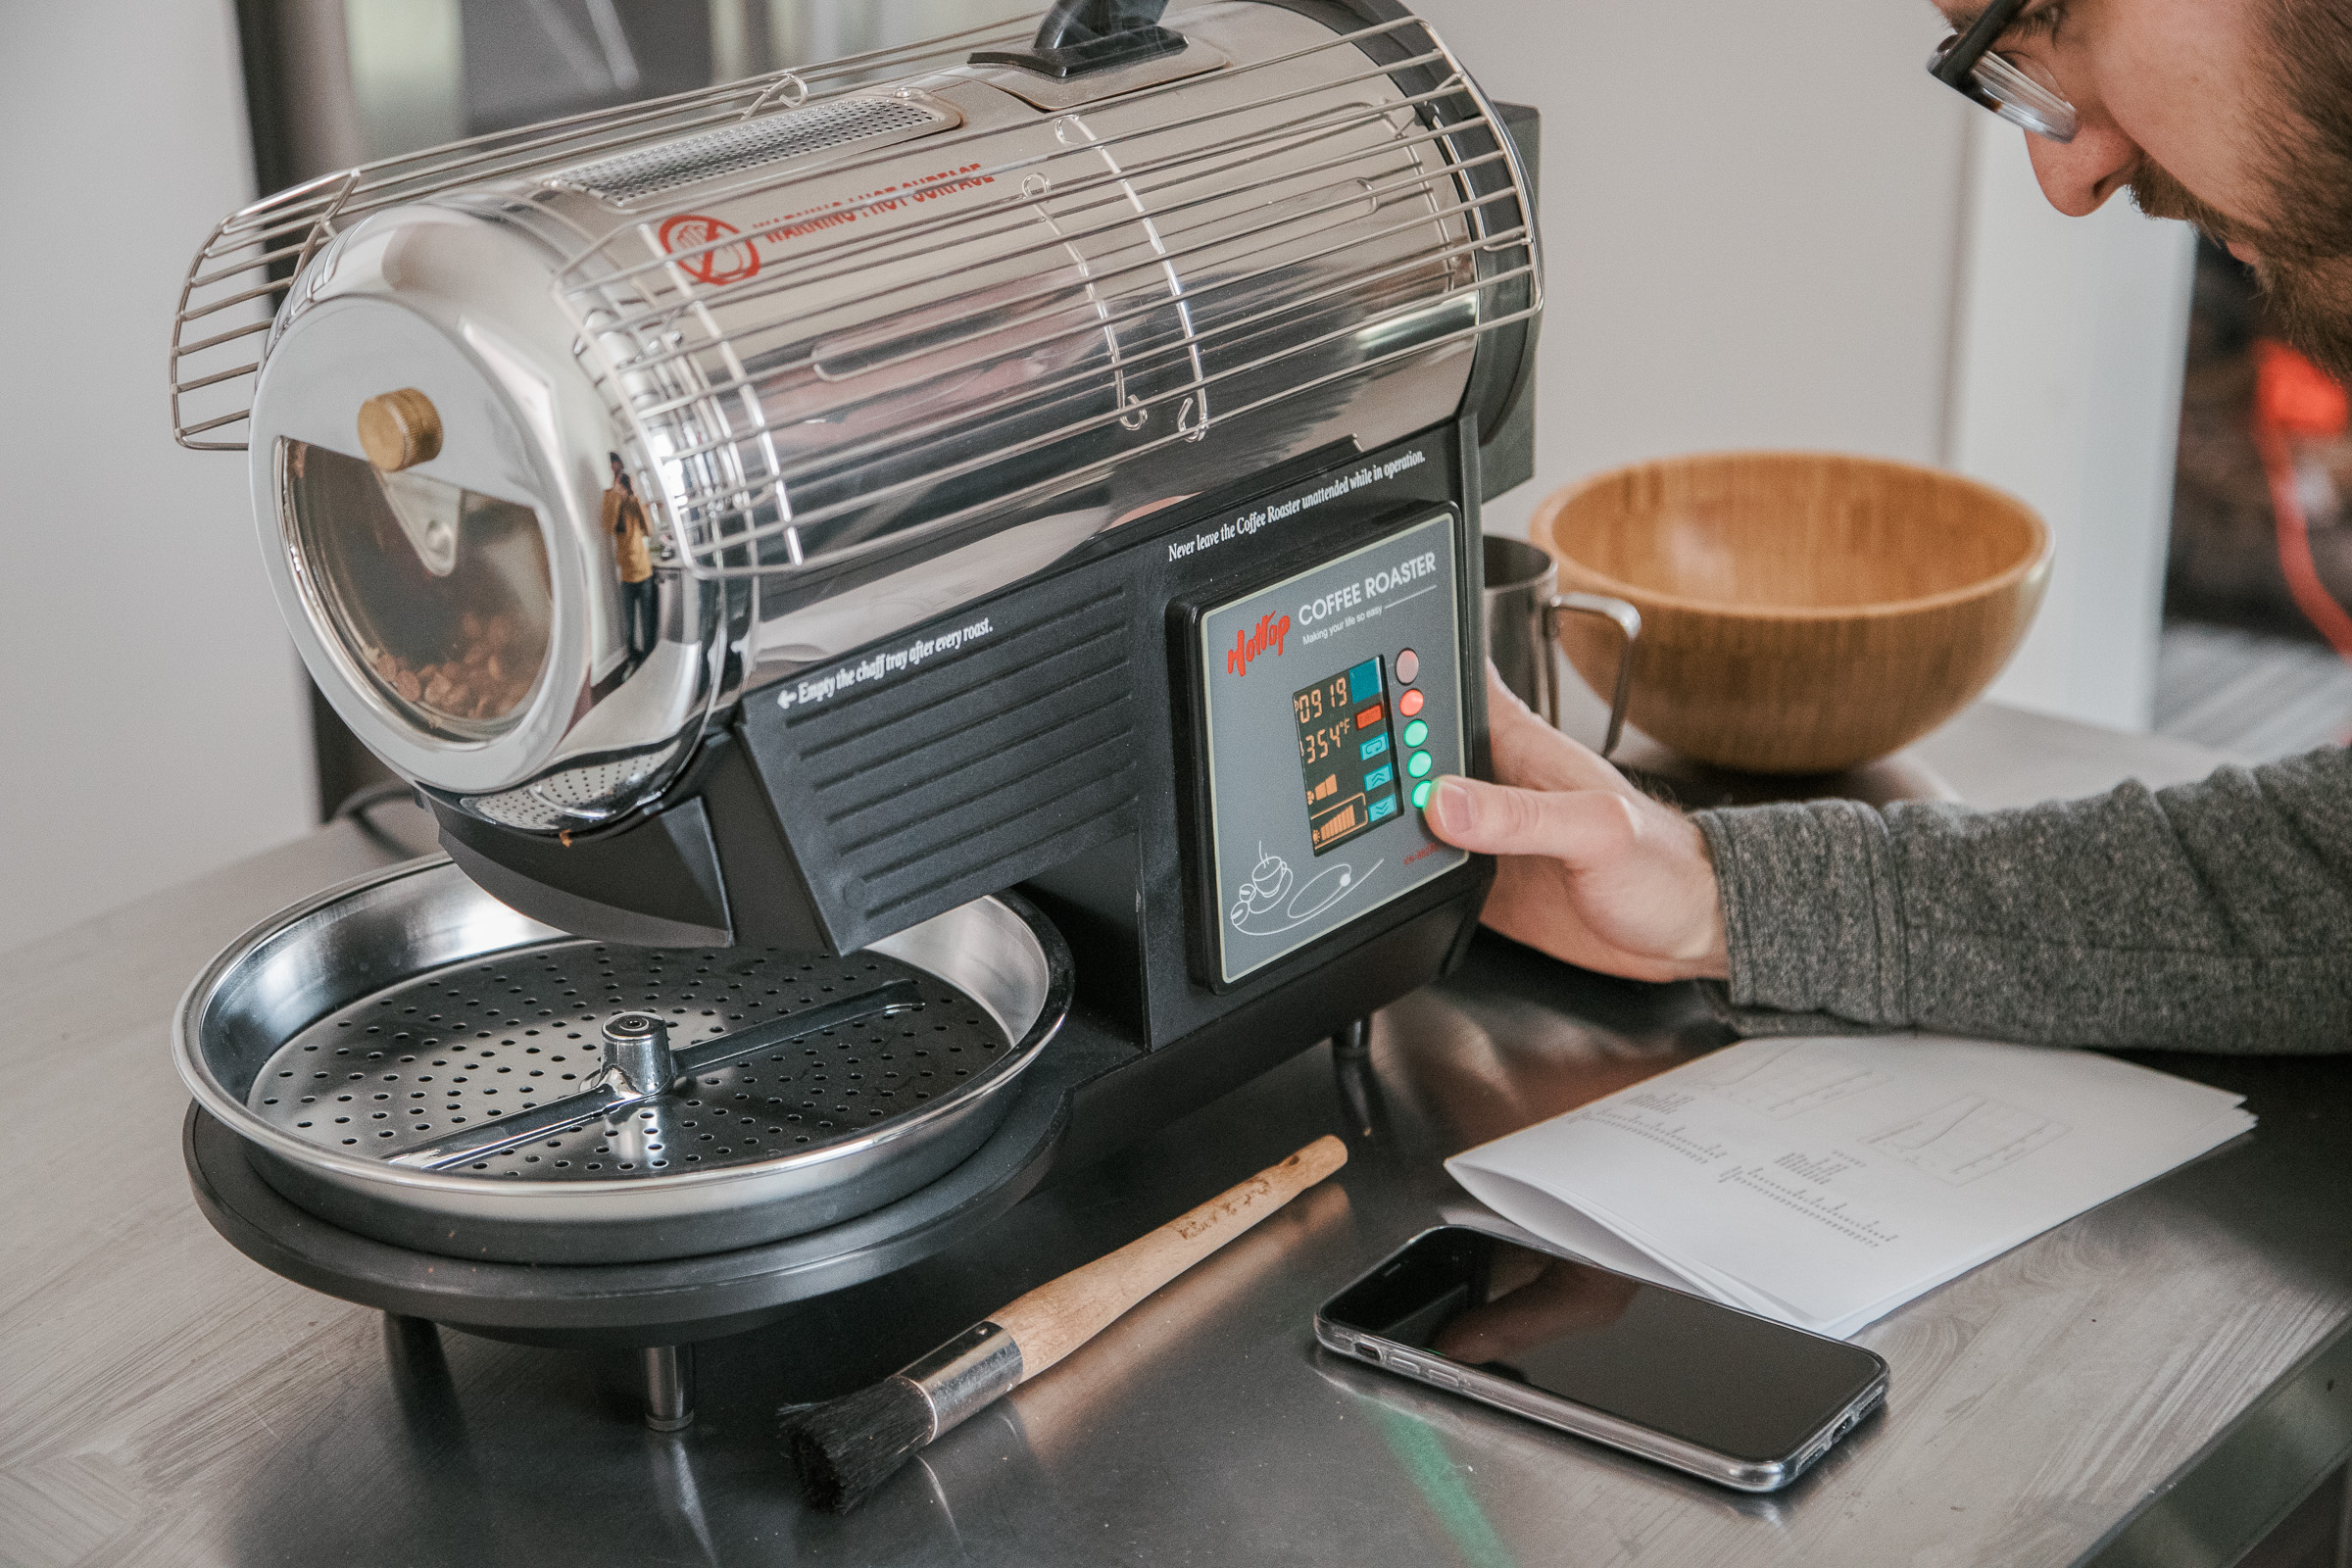
After realizing that the temperature sensor on the Hottop does not display the actual bean temperature, but rather the ambient temperature, and the timer starts at 167 F, I began monitoring my roasts a bit differently. I particularly kept an eye on the Hottop’s display temperature, marking it down every 30 seconds. I did this by printing off a table with two columns: one with 30 second time intervals, and one that was blank for me to add the display temp. On top of this, I used a second table with two columns that helped me know when to adjust parameters: one column with temps, and one with directions (see the example roast profile chart near the conclusion). I started the timer on my phone as soon as I charged the beans and picked up my pen immediately. While it might seem like it would be more overwhelming to add a task that required involvement every 30 seconds, in reality it helped me focus on the task before me by giving me clear directions. Furthermore, roasting is definitely a hands-on endeavor, so giving it your full attention is not only helpful but absolutely critical.
After the roast was finished I transferred what I had written by hand to Google Sheets and made a line graph, which helped me see how controlled the temperature remained and how it compared to other roasts. As I continued to keep track of these temperature changes, I began to understand how the temperature sensor worked, helping me get a feel for the typical temperature the roaster displayed at pivotal points in the roast progression. The following batches went much more smoothly. Do note, though, that the cooling tray doesn’t remove heat instantly, so they do have a little more time to develop at the beginning of the cooling cycle. Of course, this depends on the ambient temperature of your roasting location. For example, if you are roasting in a garage or patio, you might find that cooling happens much more quickly during the winter months.
The hardest part about all of these first few batches was not drinking them for a few days. This is another reason that taking good notes is essential. If you forget your roasting profile for the batch from a few days ago, you’ll have a hard time tweaking it or getting something close to it again. Or if you make a tasty batch for someone and they want it again, you’ll be able to go back to your notebook and replicate it easily.
Practice, Practice, Practice
Finding the correct profile for a batch can be the most frustrating part about learning to roast coffee. You’ve got your roasted batch of coffee and finally get to drink the fruits of your labor, but something is off. You know it’s not right, but you aren’t exactly sure what to do about it. I found myself asking these questions a lot: Did I charge the beans at too high of a temperature? Did I introduce too much airflow too early? Did I not taper off the heat soon enough? Did I start with the wrong batch size? Did I roast them too long? Why does my coffee taste off, too acidic and kind of grassy? Why does it taste weirdly of burnt popcorn and lemons? I’m sure there were more.
This is where practice goes a long way. The questions above led me to hone in on specific roast profiles by roasting two to three back-to-back batches. I would roast the first batch with a generic roast profile (mentioned below) that seemed to be a good starting place. Then, for the second batch, and sometimes third, I would make small tweaks. For example, I would use the same roast profile but change the batch size, or reduce the heat sooner, or increase airflow sooner, or roast 15 seconds longer, or increase the charge temperature. I also learned, though it seems obvious, that it’s best to change one thing at a time, as it will help you see how small, specific changes can affect your batch.
The reason that I roasted back-to-back batches was because of two things: environmental conditions and degassing. Because I was roasting in our warehouse, the environmental conditions were not consistent. This led me to find that if I roasted a batch in the morning, when it was cooler, it would take longer than if I roasted it in the afternoon, when it was warmer. This makes sense, but it goes to show that roasting in a consistent environment is key to consistency.
The second reason for roasting back-to-back batches is the necessity for roasted beans to degas, or off-gas. During the roasted process, gases form inside of coffee beans. While these gases, consisting primarily of CO2, effectively create what we call the “bloom” when brewing, they are released much more rapidly immediately after roasting. The rapid release of these gases negatively affects the flavor that you get in your cup, most commonly causing a metallic flavor. Now, this is a balancing game, because the longer you wait to drink your coffee, the more oxygen gets inside (oxidation), becoming more and more stale. While this is something that I had known from working in a cafe, trying a batch immediately after roasting was kind of a fun experiment. It tasted especially bitter, hollow, roasty, and a little like...hairspray, and definitely like metal. From my experience, it seems best to wait at least 2-3 days to compare your batches. For a few roasts, I repeated the cupping and found that I enjoyed them even more about a week or so off-roast.

An Example Custom Roast Profile
Once you’ve roasted with the Hottop’s auto-roast profile, you’re now ready to move on to customizing your own roasts. Similar to the way a barista might use a different brewing method to pull out their favorite flavors and aromas from a batch of coffee, roasters have the ability to hone in on different qualities of a certain coffee. Every coffee out there has innate chemical differences, based on variety, origin, processing, and more; different experienced roasters can get different tasting coffees from the same bean, simply because they choose to emphasize different qualities.
In this section, using a simple example roast profile, you’ll find a step-by-step approach to roasting on your own. And because coffees are different, you may find that some of the color and temperature changes occur slightly differently than this guide. Play around with it, and have fun!
What You’ll Need
- Hottop (other small batch home roasters will work)
- 200g of unroasted, green coffee beans
- Pen and paper
- Stopwatch
- Plastic bag or glass jar for storing roasted beans
Step 1
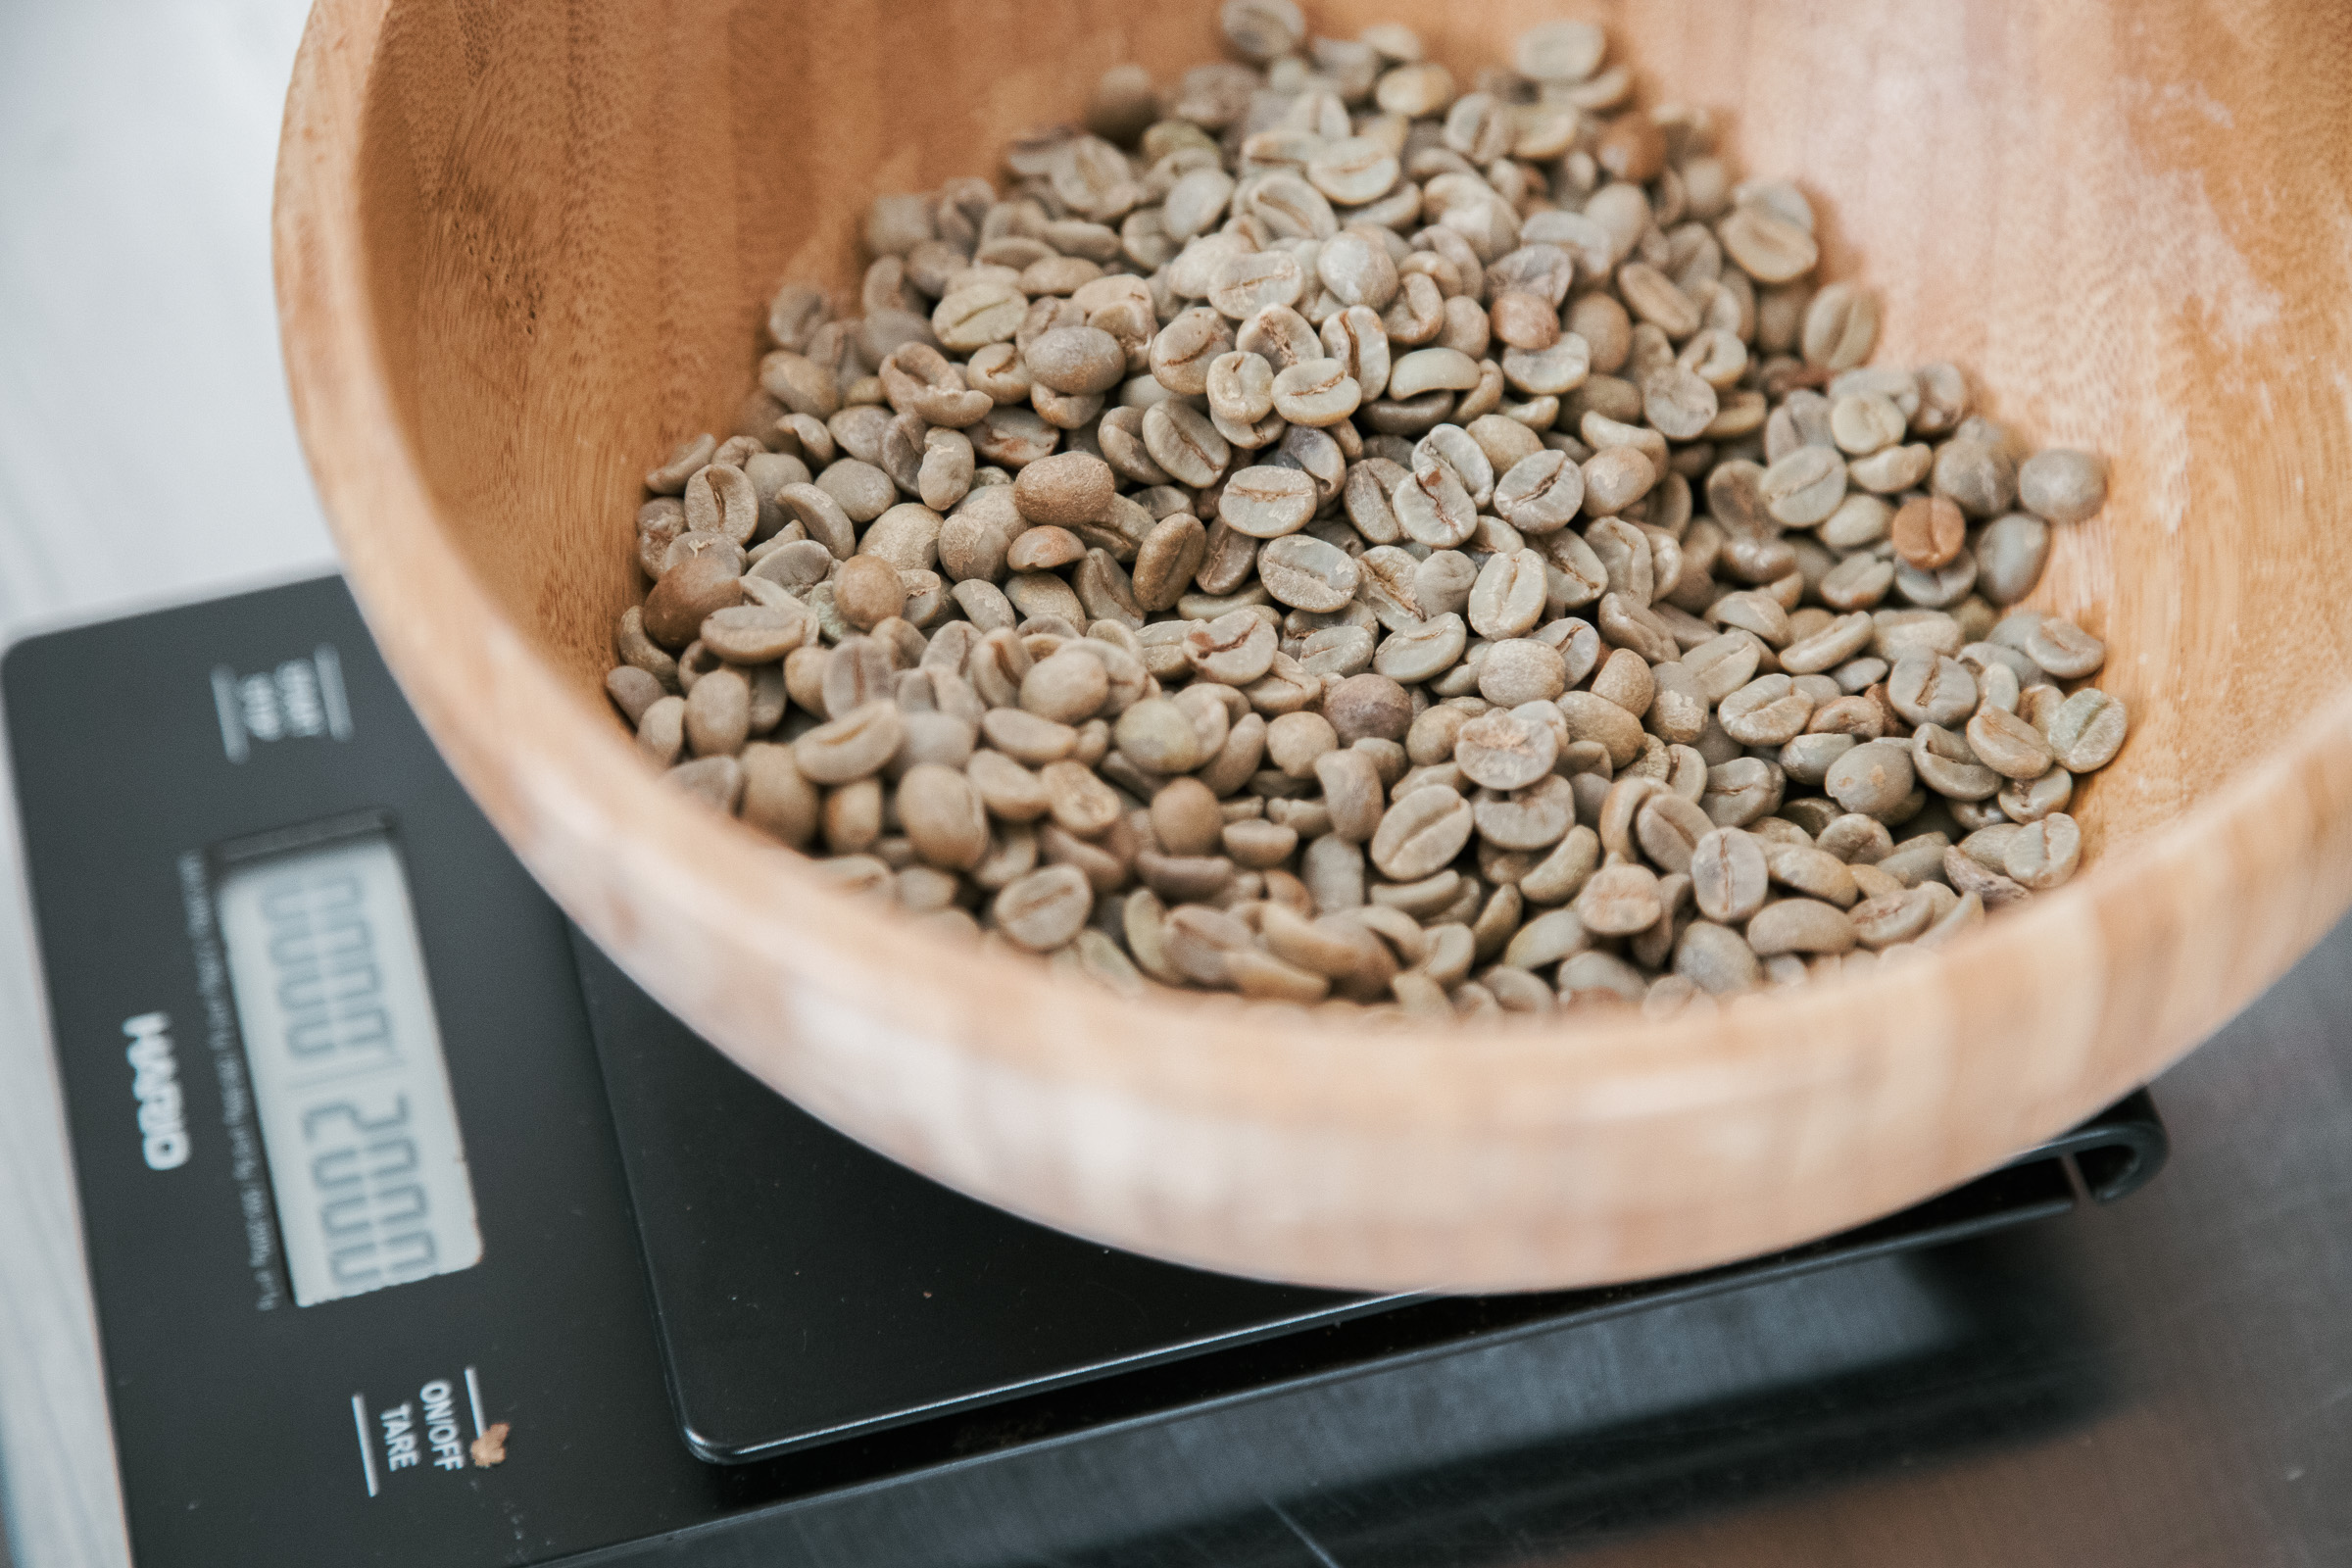
Start preheating the roaster, and weigh out 200g of green coffee. Be aware that as you are waiting for the correct preheat temperature, the roaster will beep quite loudly at 167 F and start its own countdown timer (this is the Hottop’s suggested drop temp).
Step 2
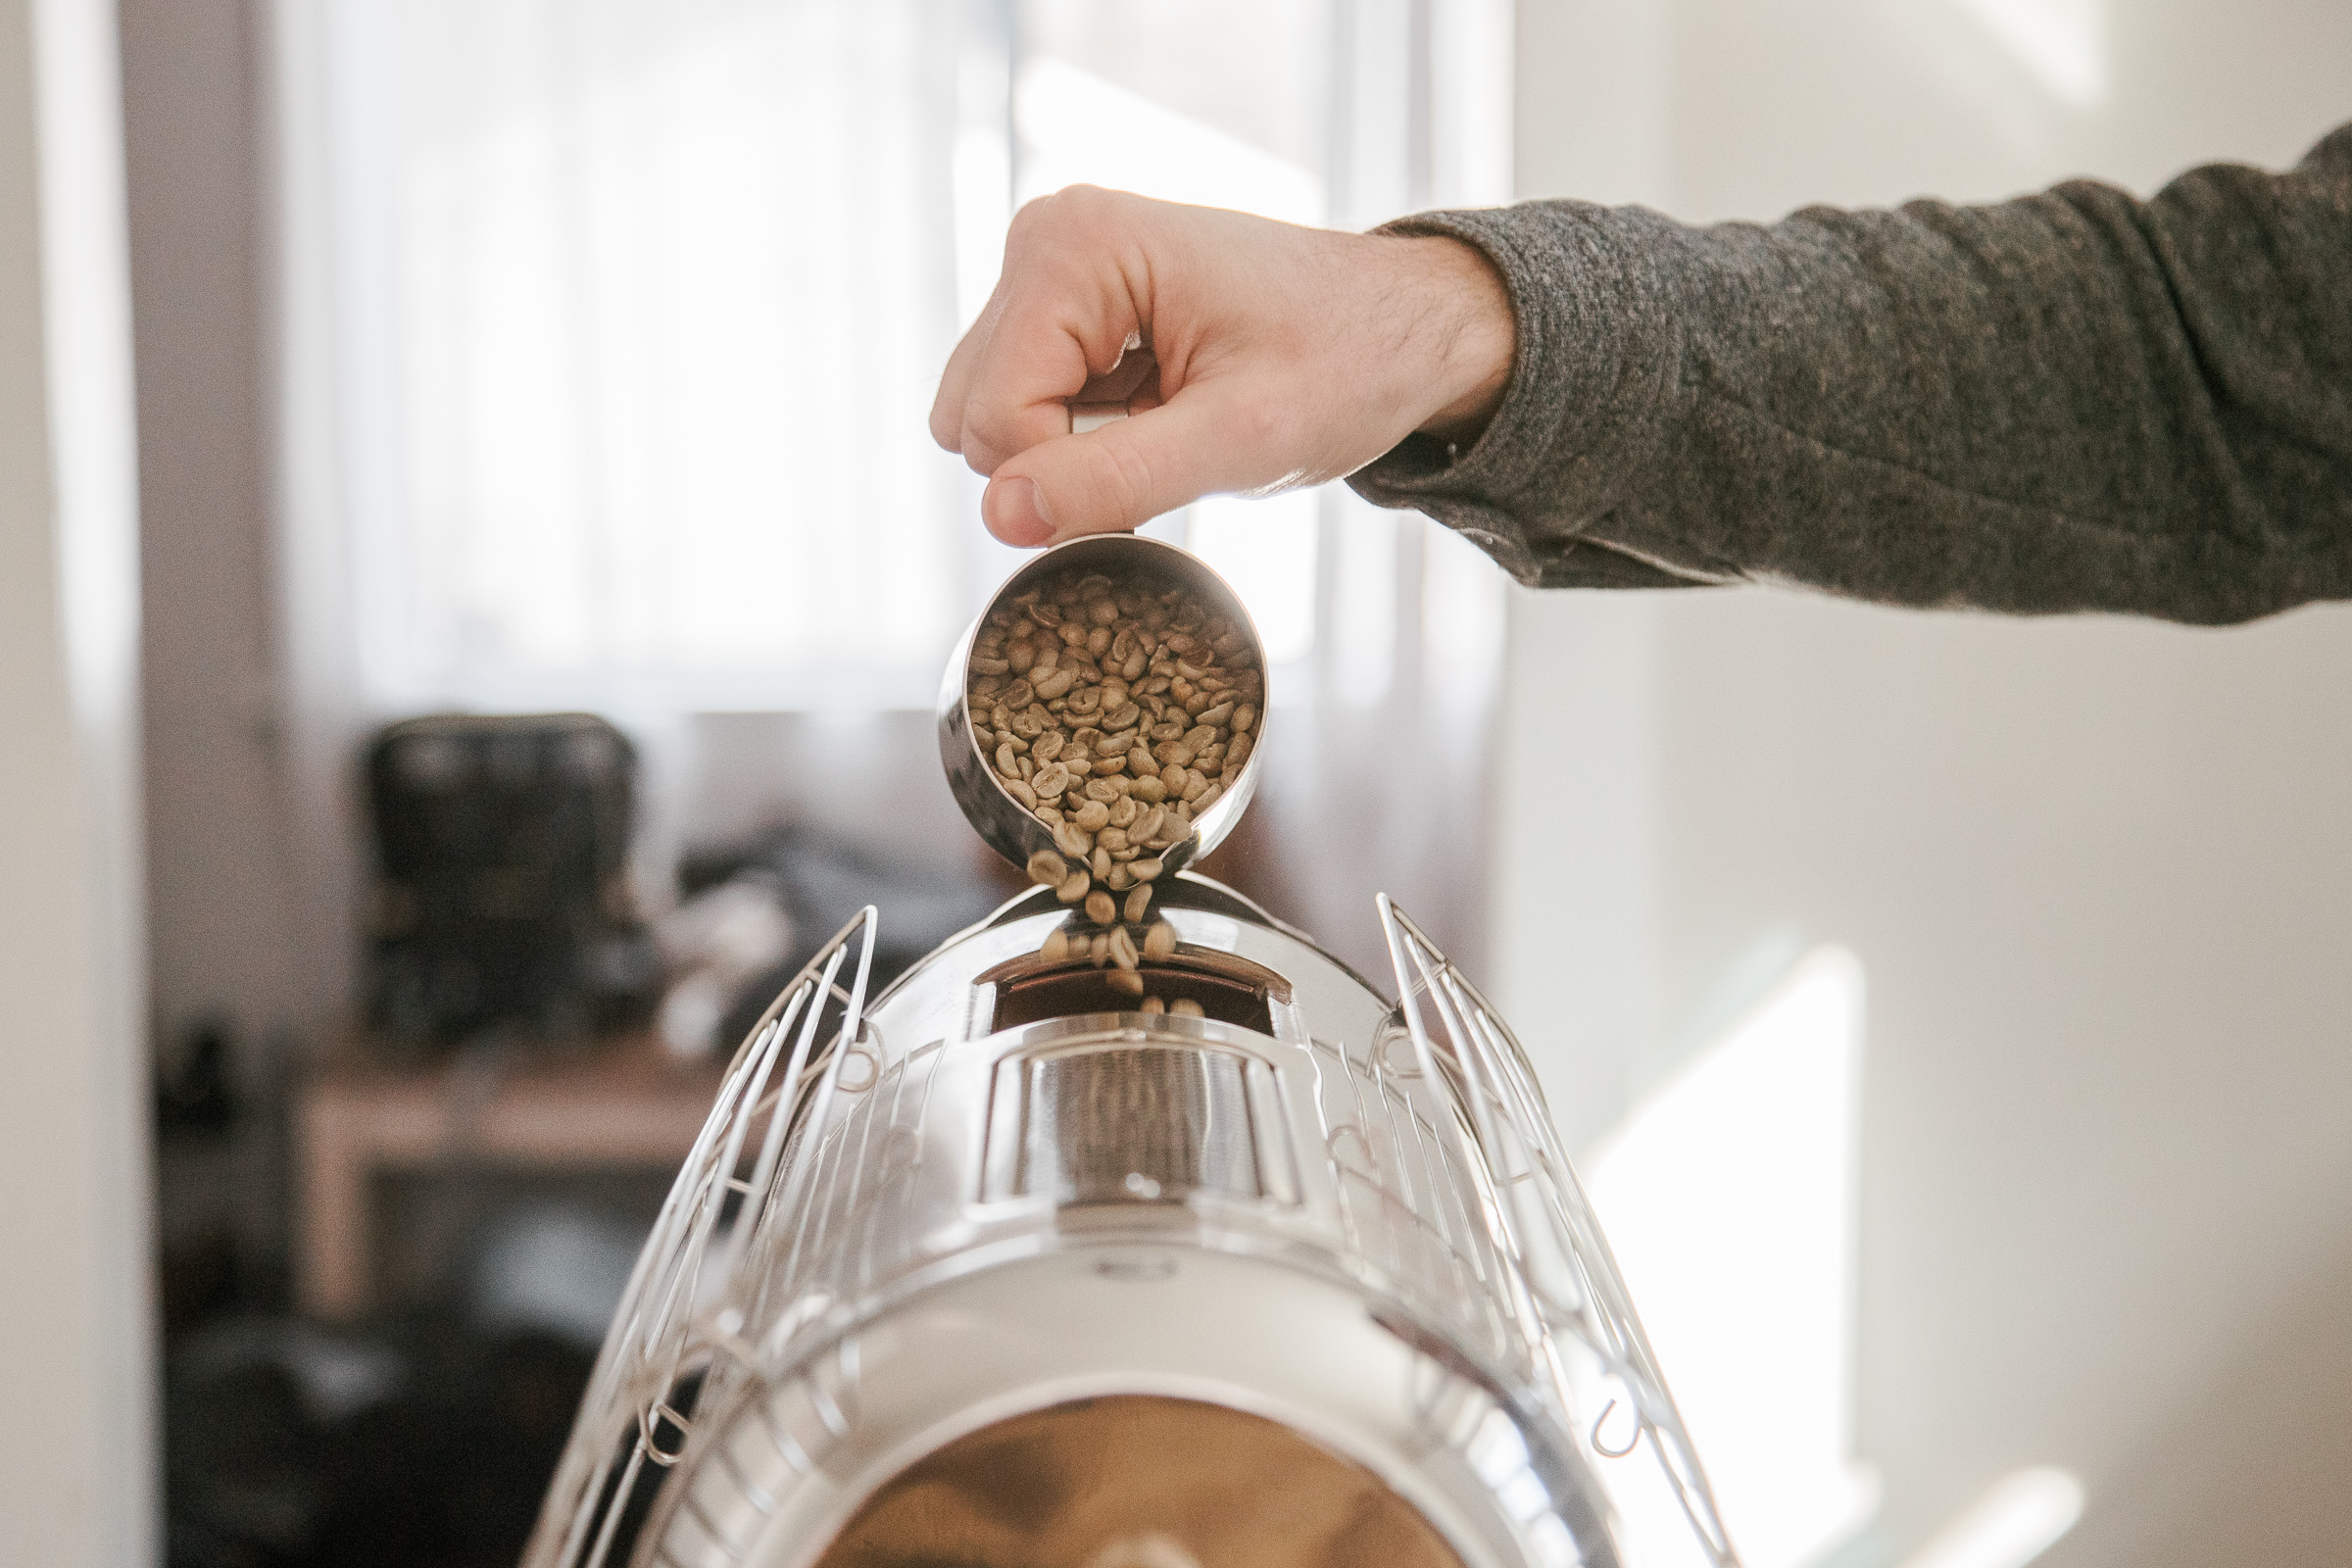
Once the roaster reaches 380 degrees Fahrenheit, open the lid on top of the roaster and add the 200g batch. Replace the lid, start your timer, and turn off the heat of your roaster for 1 minute. If you are wanting to keep track of the heat as I did, every 30 seconds, be sure to start this process now.
Step 3
At 1:00, crank the heat back up to 100%. You’ll leave this here until the Hottop shows 320 F, so take a minute here to collect your bearings. Depending on your coffee, it’ll take about five minutes to reach 320 F. As you wait, take notes as to how your coffee is developing. You’ll be able to notice a nice grassy smell and that your coffee becomes even greener, before starting to yellow.
Step 4
At 320 F, decrease the heat to 90% (down 1 notch) and increase the fan to 25%. At this point, you should really be smelling that grassy smell and seeing your coffee beans turn yellow. Once you finish this step, you’re going to want to pay very close attention, as the remainder of the roast is pretty involved and quick.
Step 5
At 340 F, decrease the heat to 80% and increase the fan to 50%. You should hit 340 F around a minute after Step 4, and you’ll start seeing your coffee begin to become a very light shade of brown.
Step 6
At 360 F, decrease the heat to 70% and leave the fan at 50%. You should hit 360 F about 1:30-2:00 minutes after Step 5. At this point, your coffee will still be a light shade of brown, but you’ll be able to watch it slowly become more and more brown. You’ll notice now that things are picking up even quicker.
Step 7
At 370 F, decrease the heat to 50% and increase the fan to 75%. This step usually happens in less than one minute of Step 6. It is typically during this step that you are going to hear the infamous First Crack, the moment when the internal structure is breaking down and releasing an even greater amount of steam, giving off a stronger, sweet aroma. Take note of when first crack begins, because you are going to drop the beans 1 minute and 30 seconds afterward. There are typically a few lone beans that crack before first crack is really underway, so wait until you hear multiple beans popping at the same time. (Also, be prepared for your Hottop to beep at you around 374 F. This is a safety feature to make sure that you are present. Simply press ENTER and be one your way. If you are roasting darker, this happens again at 395 F, and it will automatically eject at 428 F.)
Step 8
At 380 F, decrease the heat to 30% and increase the fan to 100%. You’ll typically be at or near the end of first crack at this point.
Step 9
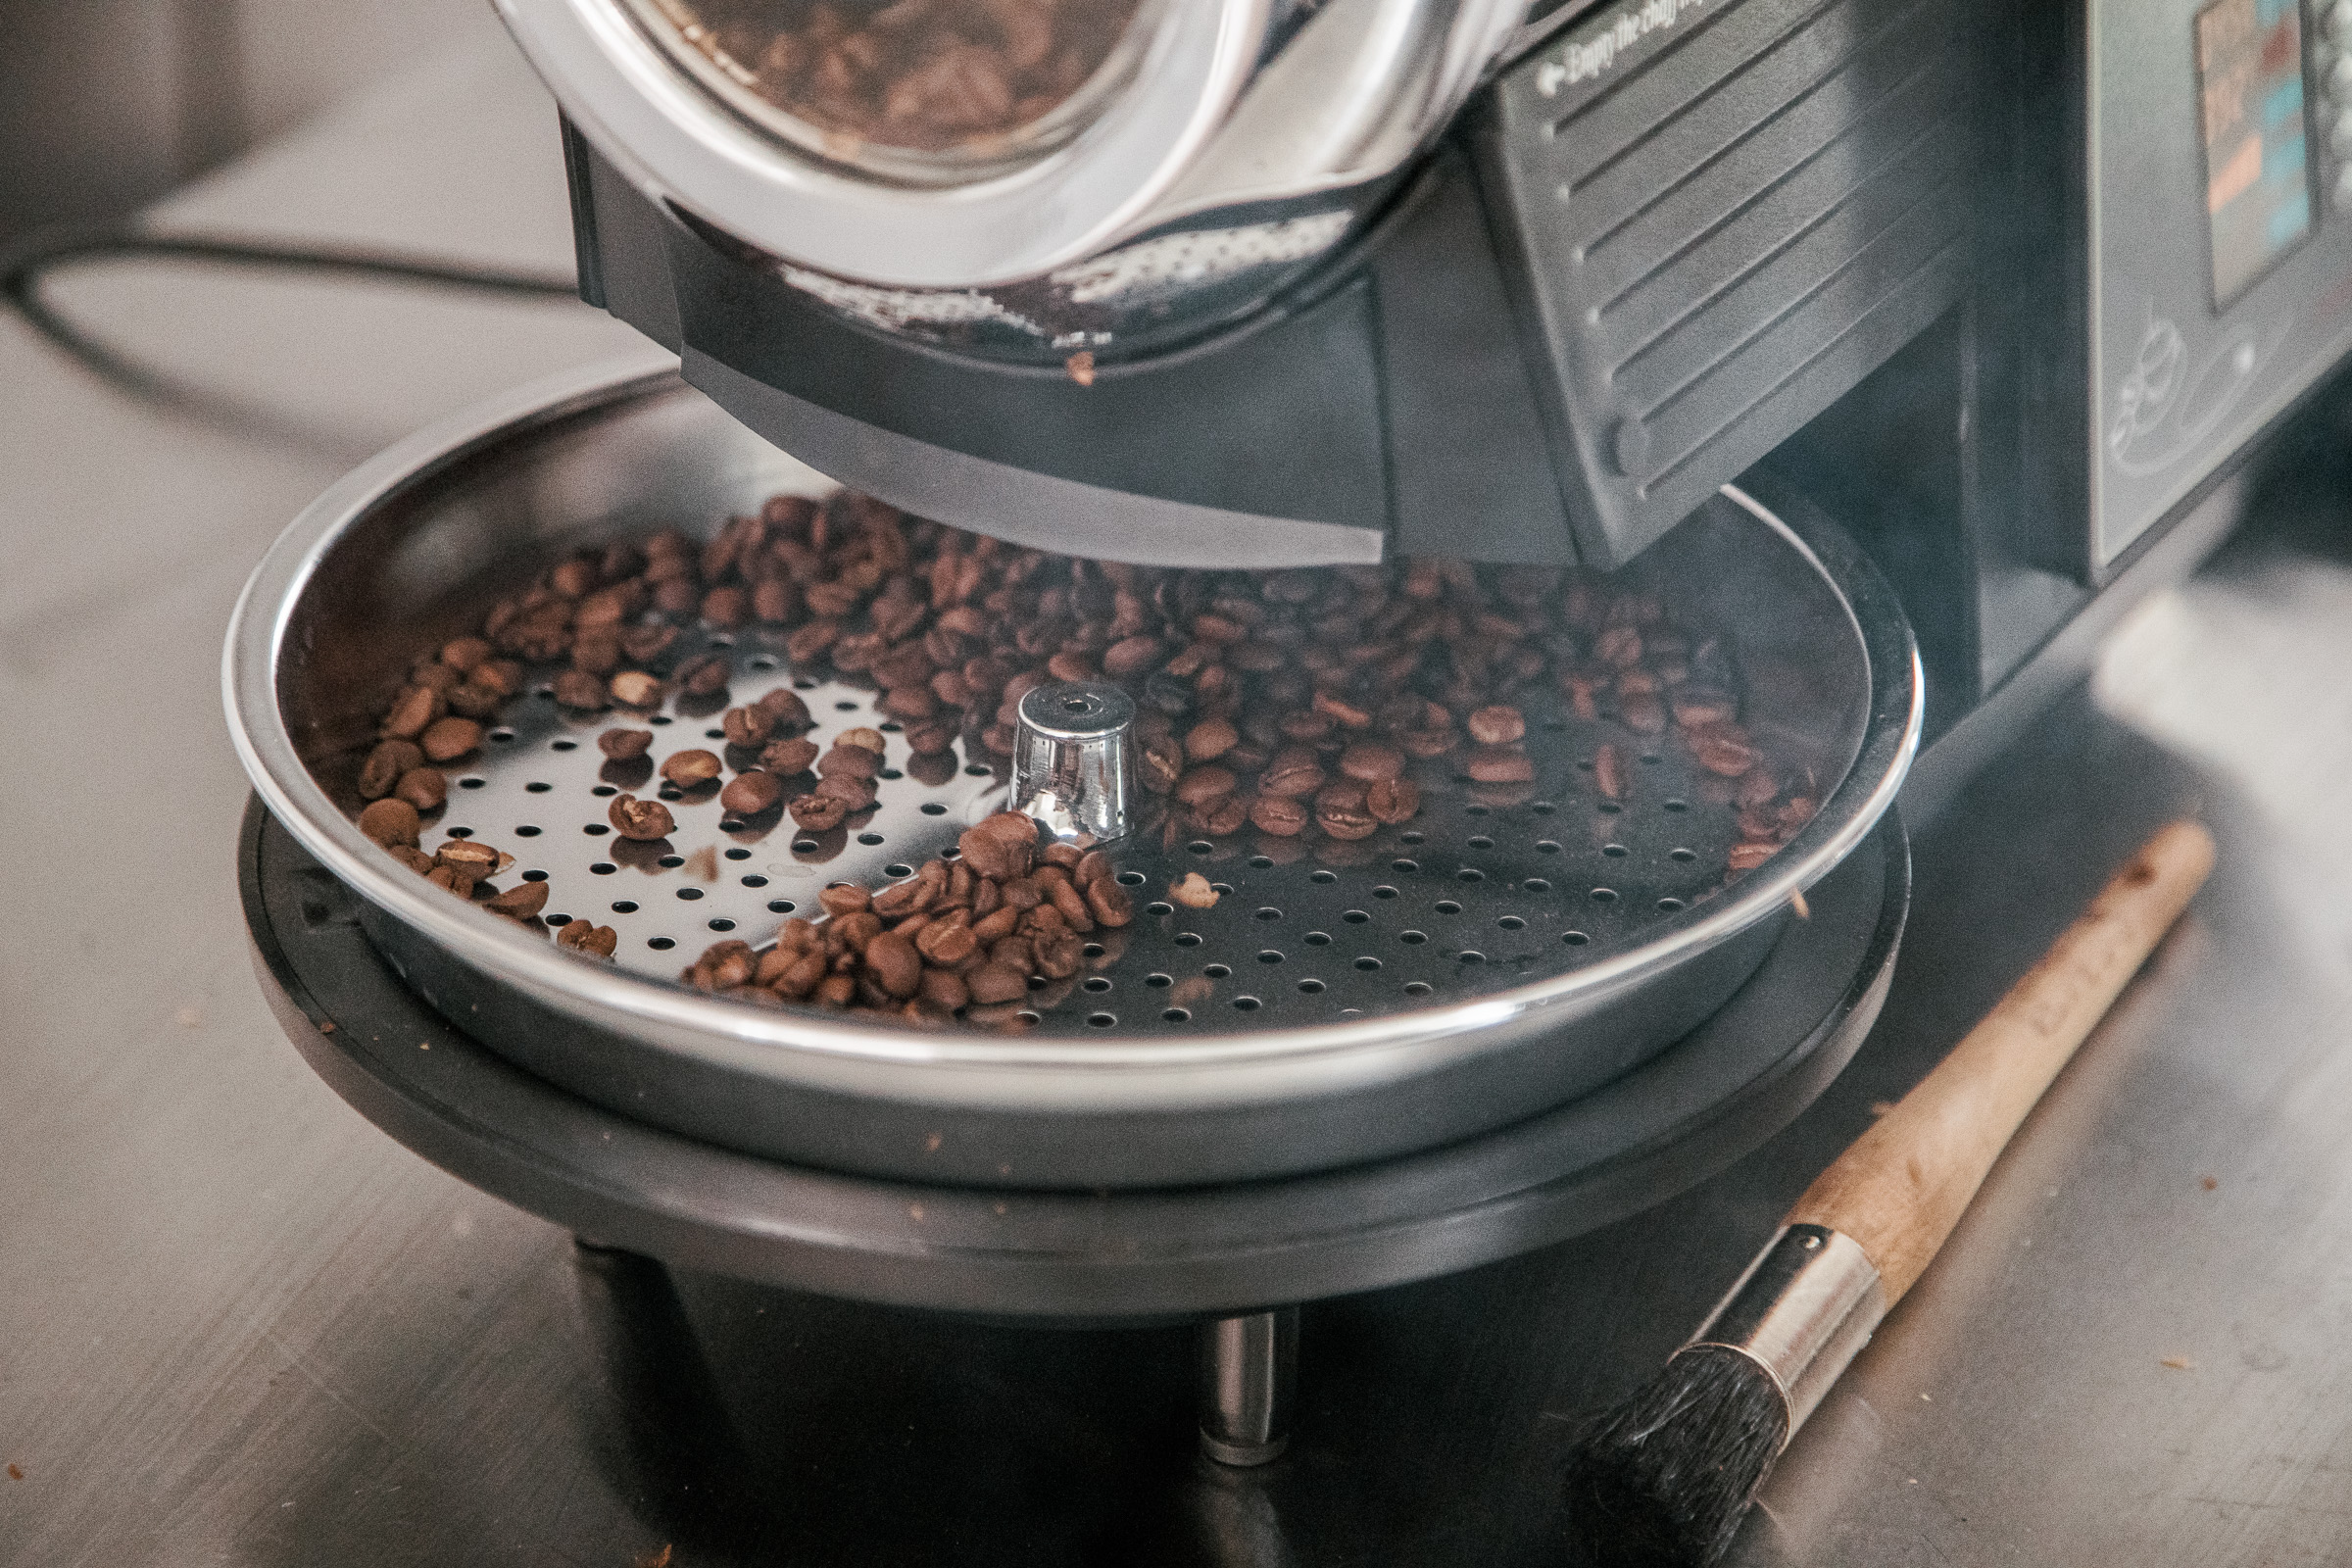
When your beans have roasted for about 1 minute and 30 seconds after First Crack (around 385 F), hit eject to drop the beans into the cooling tray. The built-in cooling process lasts 5 minutes (ending with a beeping sound for the last 10 seconds).
Step 10
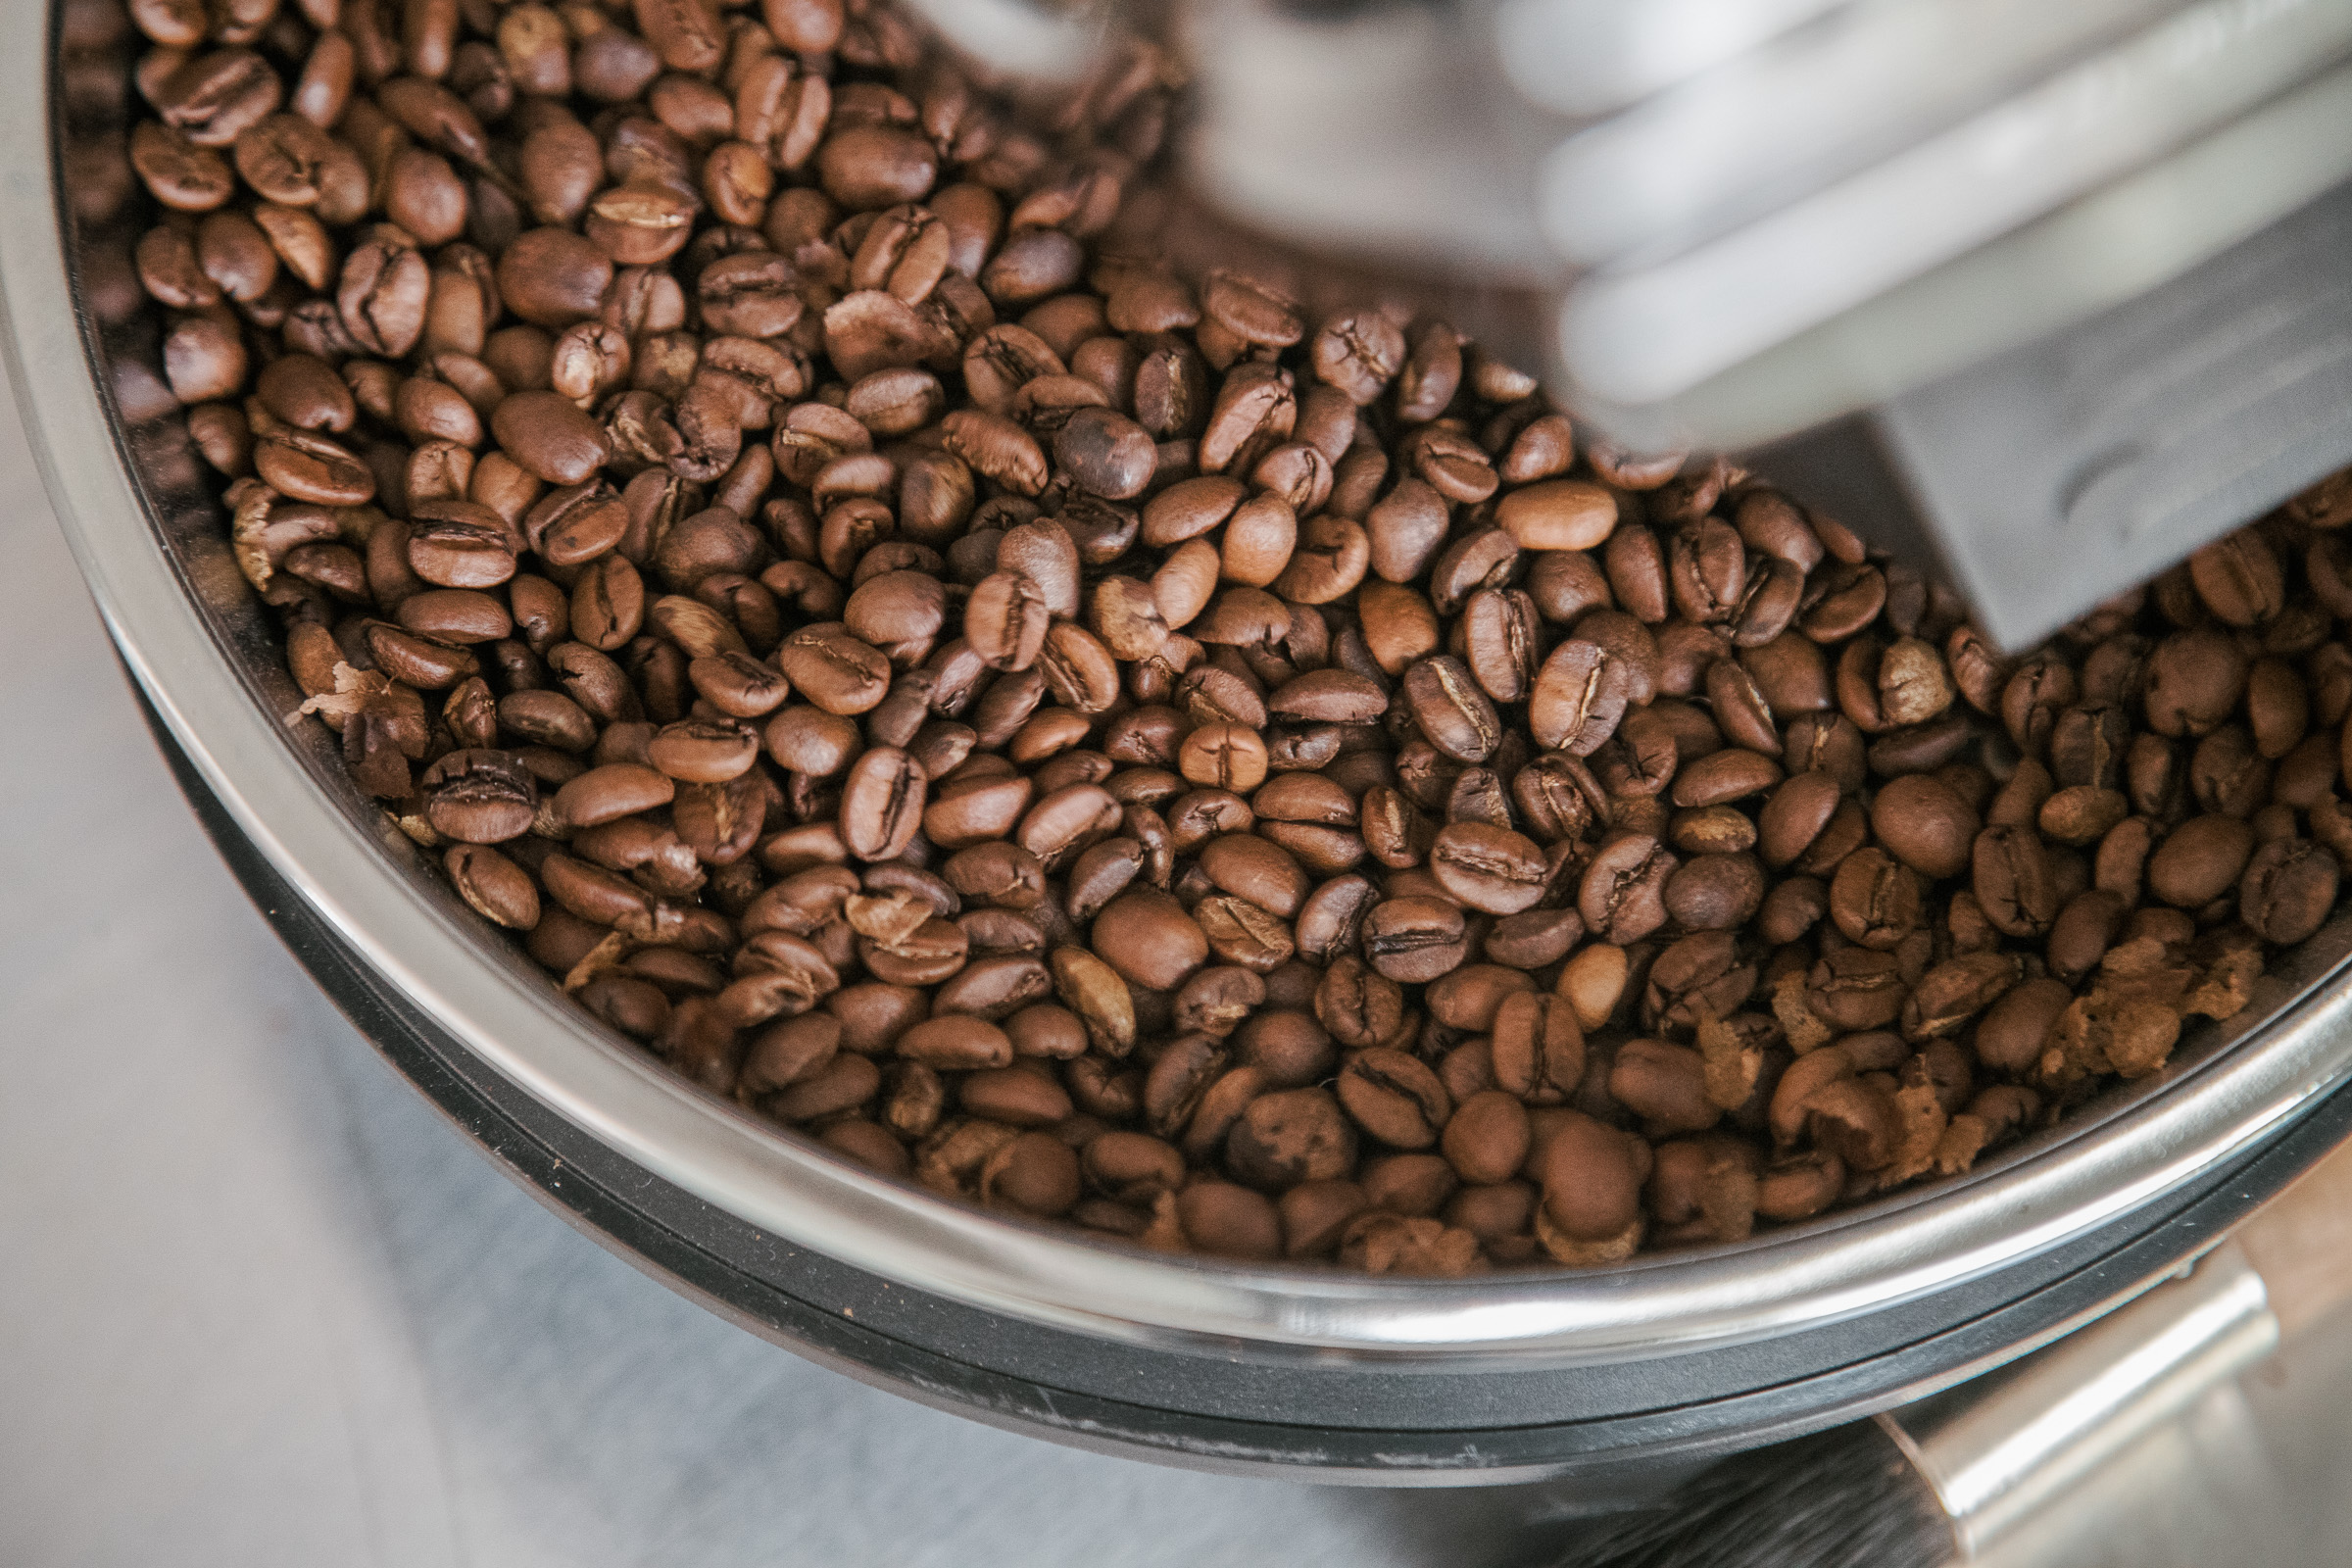
Shake the cooling tray over your sink or outside and blow some air over them to remove as much chaff as possible. Then, pour them into a plastic bag or glass jar to let them rest for at least 2-3 days before trying them out. (If you’re able to tell, the beans in the picture above are natural processed, resulting in a batch that looks a little less even and not much chaff.)
As I have mentioned, there is not a one-size-fits-all roast profile. This is simply an example starting point for finding a roast profile that best fits your specific coffee. You may find that you need a more consistent decreasing of heat, or that you need to increase airflow sooner. You may also find that you want your beans to cool more quickly, so you may want to aim a fan at the cooling tray. Again, play around with it, and have fun!
For quick reference, here is a chart of the guide above:
| Example Roast Profile | |
|---|---|
| 380 F | Charge 200g |
| ~ | Heat off for 1 minute, then full heat until 320 F |
| 320 F | Heat = 90%; Fan = 25% |
| 340 F | Heat = 80%; Fan = 50% |
| 360 F | Heat = 70% |
| 370 F | Heat = 50%; Fan = 75% |
| 380 F | Heat = 30%; Fan = 100% |
| ~385 F | Drop 1 minute and 30 seconds after First Crack |
Conclusion
In the end, roasting coffee is not like following instructions to put together a LEGO Millennium Falcon. It’s more like developing the perfect birthday cake recipe: you have to tweak certain things to get the best possible outcome, and the more experience you get, the better you will become.
The Hottop is a great roaster to get your feet wet. Not only is it safer than using a homemade roaster, but you also have the ability to both roast with an auto-roast profile and customize profiles on your own.
When it’s all said and done, I am really thankful for this opportunity. I’ve learned a lot about the process of roasting, and I’ve become even more grateful for the work that roasters do every day. I also want to say thanks to those who have helped bring this post to life. Thanks to all of you at Prima who were brave enough to try out all of my batches. At first, I got responses like, “Eh, well, I’d drink that over gas station coffee.” to responses like, “Wow, that’s actually really good!” And a big thanks to Houston over at Quills for walking me through his roasting processes; a lot of what I learned from him is within the words of this article.
Good luck! Let us know how it goes!


