
Dialing in the Lagom P64
Thanks to certain YouTube personalities and chatter on the social media (not to mention the coffee forums), the Lagom P64 from Option-O has become a force in home espresso. And rightfully so. Every detail of this grinder has been thought through multiple times. We know this because we have been lucky enough to see the evolution. Even the portafilter fork, which could have been an afterthought, has been redesigned multiple times to find the sweet spot for holding portafilters and centering doses. The grinder comes with tools, too, for minimizing errors in the shots (goodbye, channeling!) and even static. Plus it is just plain beautiful and fits in perfectly in the contemporary kitchen.
But the one thing the Lagom cannot do for you is make the espresso. It includes all the tools and is itself the ultimate tool for making great espresso; but it still needs you, home barista, to do the work. Otherwise the grinder will just sit there on the counter looking beautiful and the whole bean coffee will go stale. The question, then, is “How do we make great espresso with the Lagom?”
Preparation
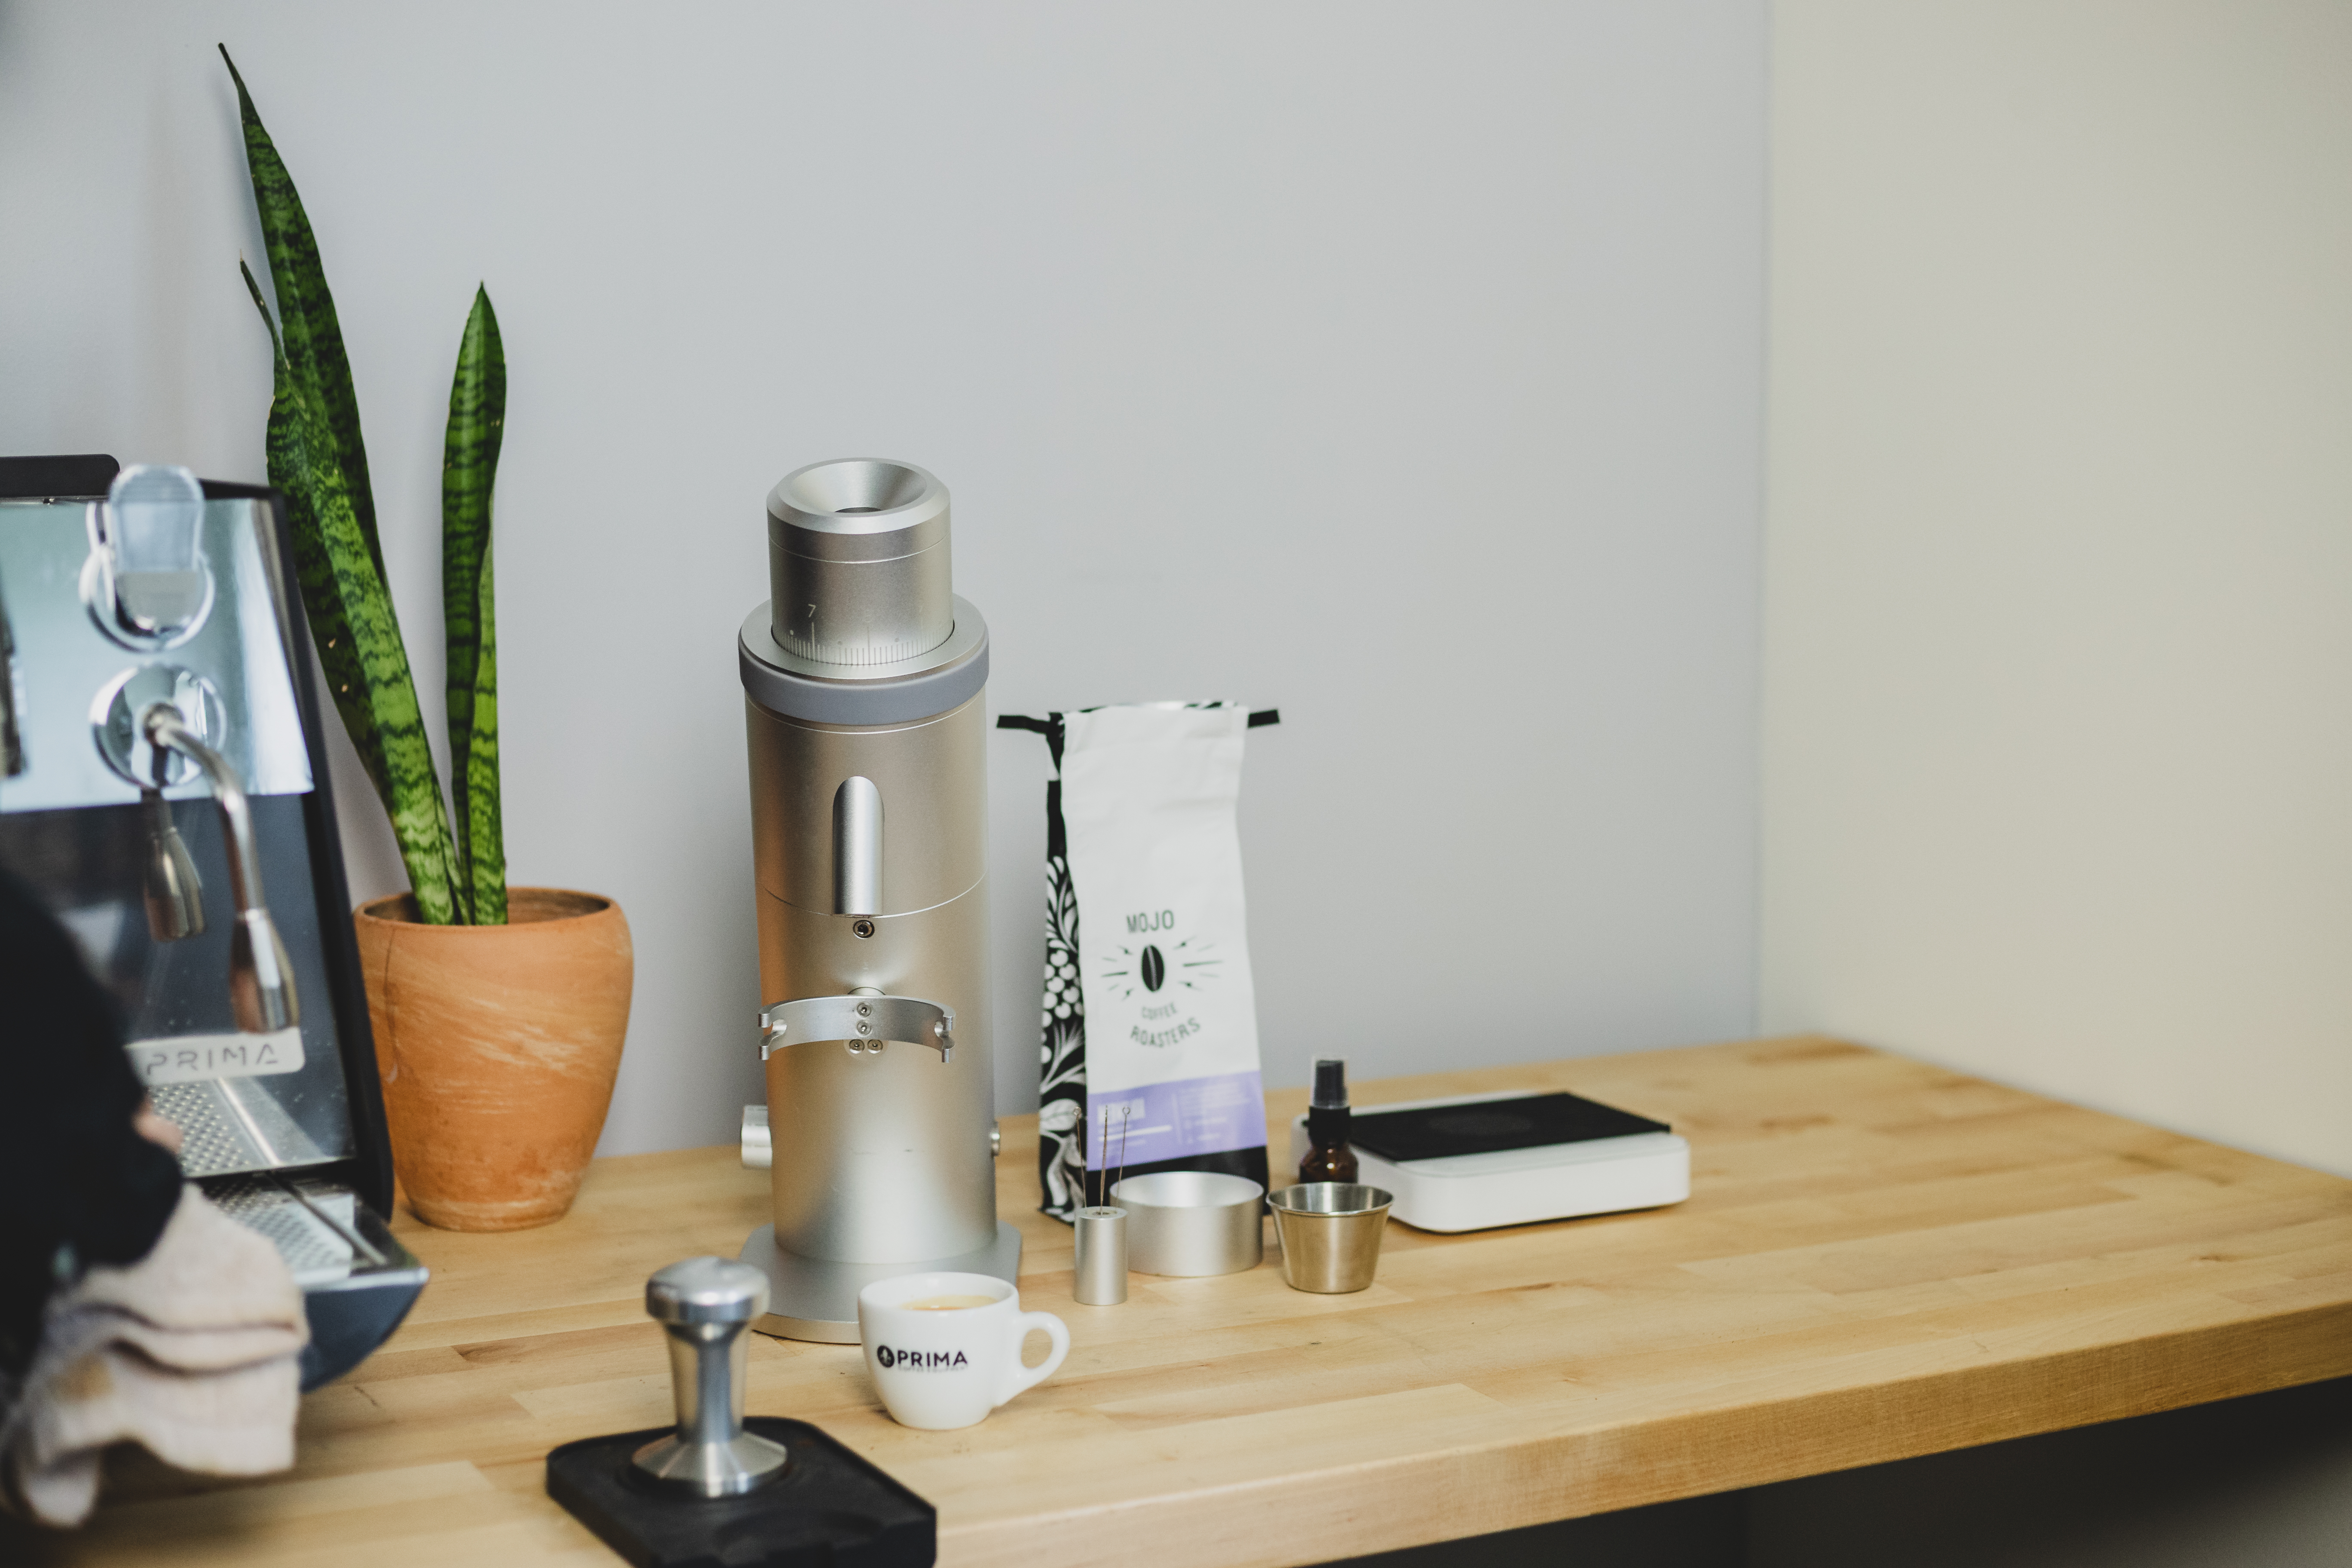
The first step is to gather all the tools. The Lagom comes with a dosing cup and spray bottle (RDT), which are useful, and a funnel and miniature whisk (WDT), which are essential. You will also need a scale for weighing the dose, a precision tamper, and a portafilter; and it helps to have a tamping mat. Don’t forget the coffee without which this whole exercise is moot. And because you are using the Lagom, you might as well make it something special.
The exercise of dialing in a coffee on any grinder is tedious but ultimately rewarding. You grind the coffee, tamp, pull a shot, stir, taste, and, if it leaves something to be desired, you adjust the grind size and repeat. In the best scenarios, this takes only one or two adjustments; and it will get easier with experience. The general rule is: if the coffee tastes too “bright” (think sour or salty), it is too coarse; and if it tastes too bitter (think oversteeped black tea where all the nuance is lost), it is too fine. The WDT, which stands for Weiss Distribution Tool, is essential because it ensures that the coffee in the filter is evenly distributed and without clumps. These two things, which sound small, are huge for minimizing, at worst, and eliminating, at best, channeling. Channeling means water is exploiting a particular zone of the coffee puck and ignoring others, causing some coffee particles to be overextracted and others to be underextracted, and causing the shot to end before it should; i.e., to be fast. Fast shots mean the time, which is one of the variables to control, is inaccurate. This means it is impossible to know what the time actually is because the “true” duration is unknown. Not to mention the shot will probably taste both under- and over-extracted. When you remove channeling from the equation, the math checks out, and you can make the proper adjustments without questioning their validity.
A good espresso shot requires control of the variables: dose (how much coffee in the basket), yield (how much coffee in the cup), and time (duration of the shot). A good starting place is 18g dose, 36g yield, in 30 seconds. This is called a 1:2 ratio and is fairly popular. If any of the variables is unknown, it is impossible to dial in a coffee. You might make delicious espresso, but if you don’t know how it was achieved, you won’t be able to recreate it. Dialing in means knowing all the variables so you can do it again whenever you want. This is especially useful for baristas who need to get the coffee tasting on point before the day begins and keep it that way all day. If they don’t know the recipe, they will make wildly inconsistent espressos and make some customers unhappy, others confused. This is useful to home baristas, too, with a Lagom, because coffee isn’t cheap; best to get it right with trial and error, record the variables, and have great espresso at will. The Lagom, unlike most espresso grinders, has an RPM dial to control the RPMs, which adds another variable, but let’s save that for the end.
Step 1: Find the Grind Size
Dialing in always begins with an educated guess. Taking into account the settings for previous coffees, especially ones with a similar roast profile and origin, you can set the coarseness within shouting distance of the correct one. It is fair to assume, in other words, that one light-roast Ethiopian coffee will have similar settings to another. Not that they are identical; just that it will likely be similar. Same for dark roasts or medium roasts, coffees from Colombia, etc. It is much easier to dial in a coffee if you are close.

But what if you have never before used the Lagom? This is your first time. If you have the high-uniformity burrs, start with one number (or ten lines) from zero; and if you have the multipurpose burrs, start with 12 lines from zero. Zero is the point at which the burrs touch. This is often referred to as chirping because when the burrs are brought together, the impact creates an unpleasant chirp. To find your zero point, turn on the grinder and screw down the adjustment collar clockwise until you hear the chirp at which point you should back off one line (you don’t want to grind the discs against each other for too long or they will wear unnaturally). Note the zero point.
Once you have found the zero point, turn the collar counterclockwise 10 lines (12 lines for multipurpose burrs). This is a good starting point. Depending on the coffee, this may be spot on or way off. There is only one way to find out.
Step 2: Grind
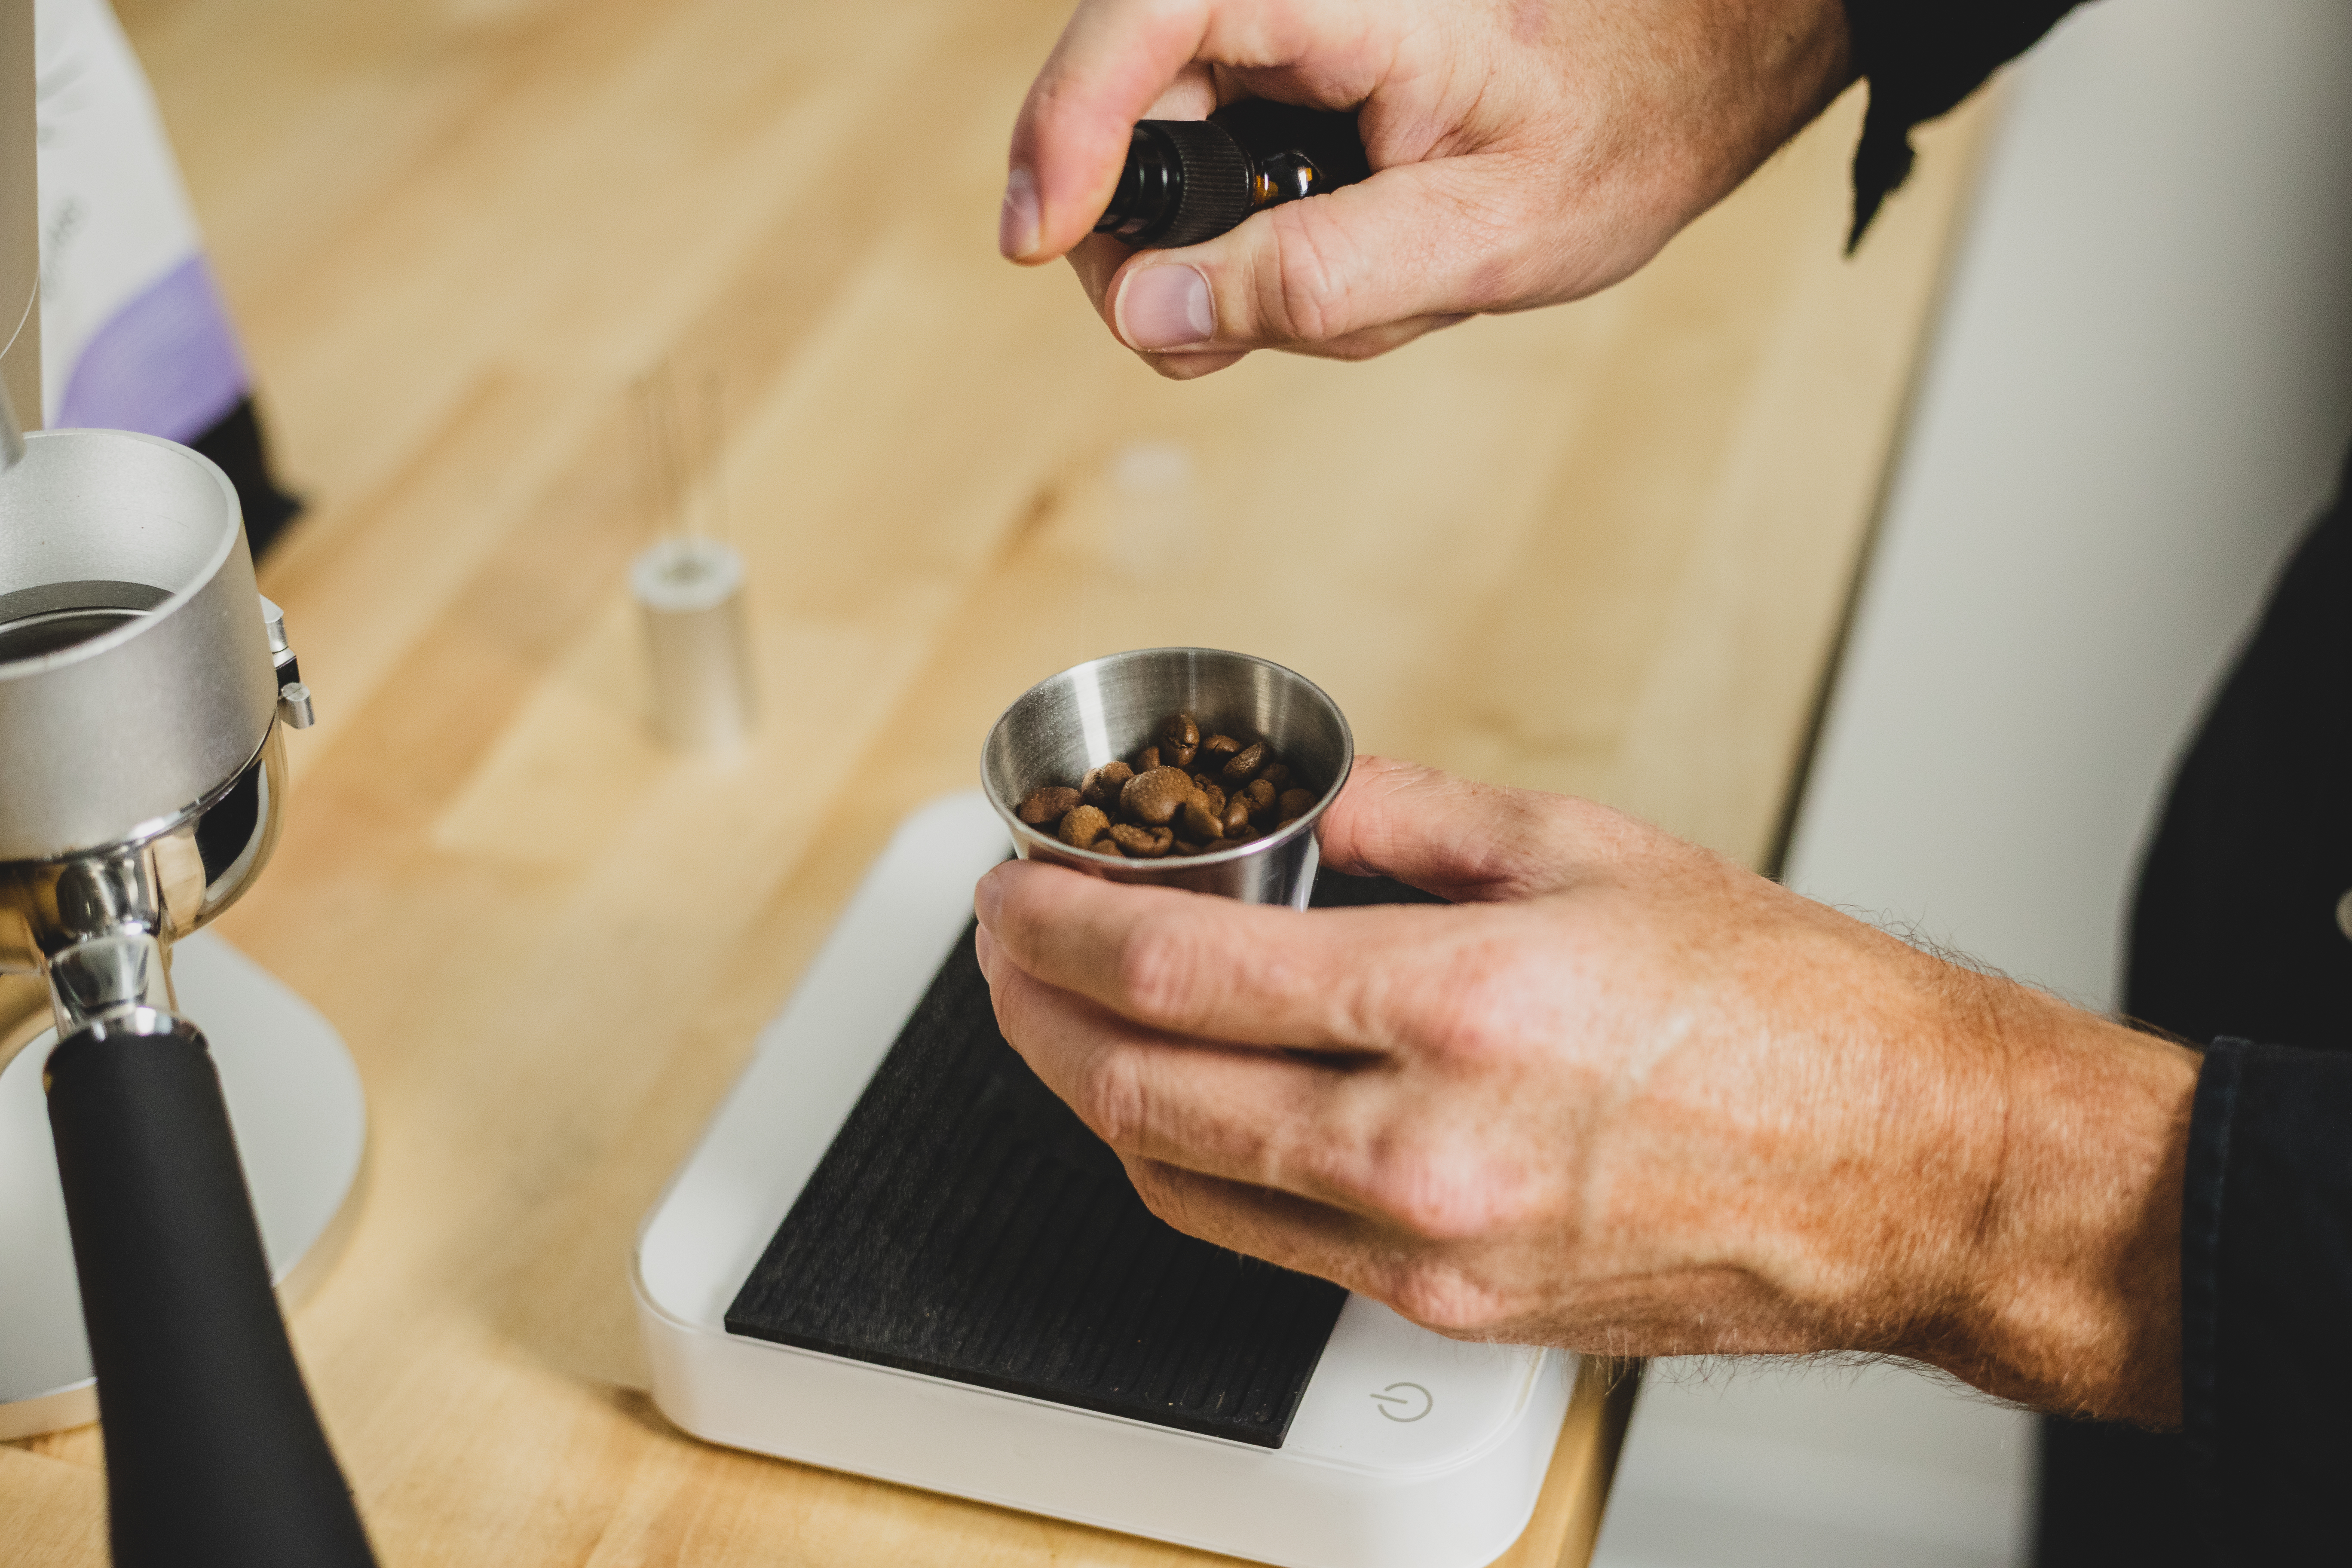
We use an 18g VST basket, so we use 19g of coffee. We have a habit of dosing up. Yours might be different, but you have to use the same dose every time. We generally start with a 1:2 ratio and look for a shot that finishes in 30 seconds. This is a good starting point. Once we hit this, we know from experience that we will be able to tell if the grind size setting should be finer or coarser, the duration shorter or longer. We generally do not go below 25s or above 35s, both of which are rare (unless you have the multi-purpose SSP burrs, in which case, shots can be tasty below 25), given what happens to the flavors in under- and over-extracted coffee. (As always, following your taste buds. If you find the sweet spot at 5 seconds, hey, how could we argue?) This is all on a commercial espresso machine, without pre-infusion, at 9 bars of pressure. If you have a Lelit Bianca or something like it (in which flow or pressure control is a feature), use this article as a starting place and then experiment from there.

The Lagom has a portafilter fork for dosing directly into the filter basket. Place the funnel on the portafilter or the grounds will go everywhere. For dialing in, precise dosing is important.
Put the portafilter in the fork, add the funnel, and turn on the grinder; drop the dose into the hopper and watch the grounds pile up into a perfect little mountain peak. If you see a lot of debris collecting on the side of the funnel or chute, use the spray bottle (next time) to wet the beans before dropping them in the hopper. This sounds a little unusual, especially if you have never done so, because it involves water and burrs, two things that should generally never meet. We assure you, though, that it is completely safe. Just don’t overdo it with the spraying. One spritz and a stir to coat every bean is enough.
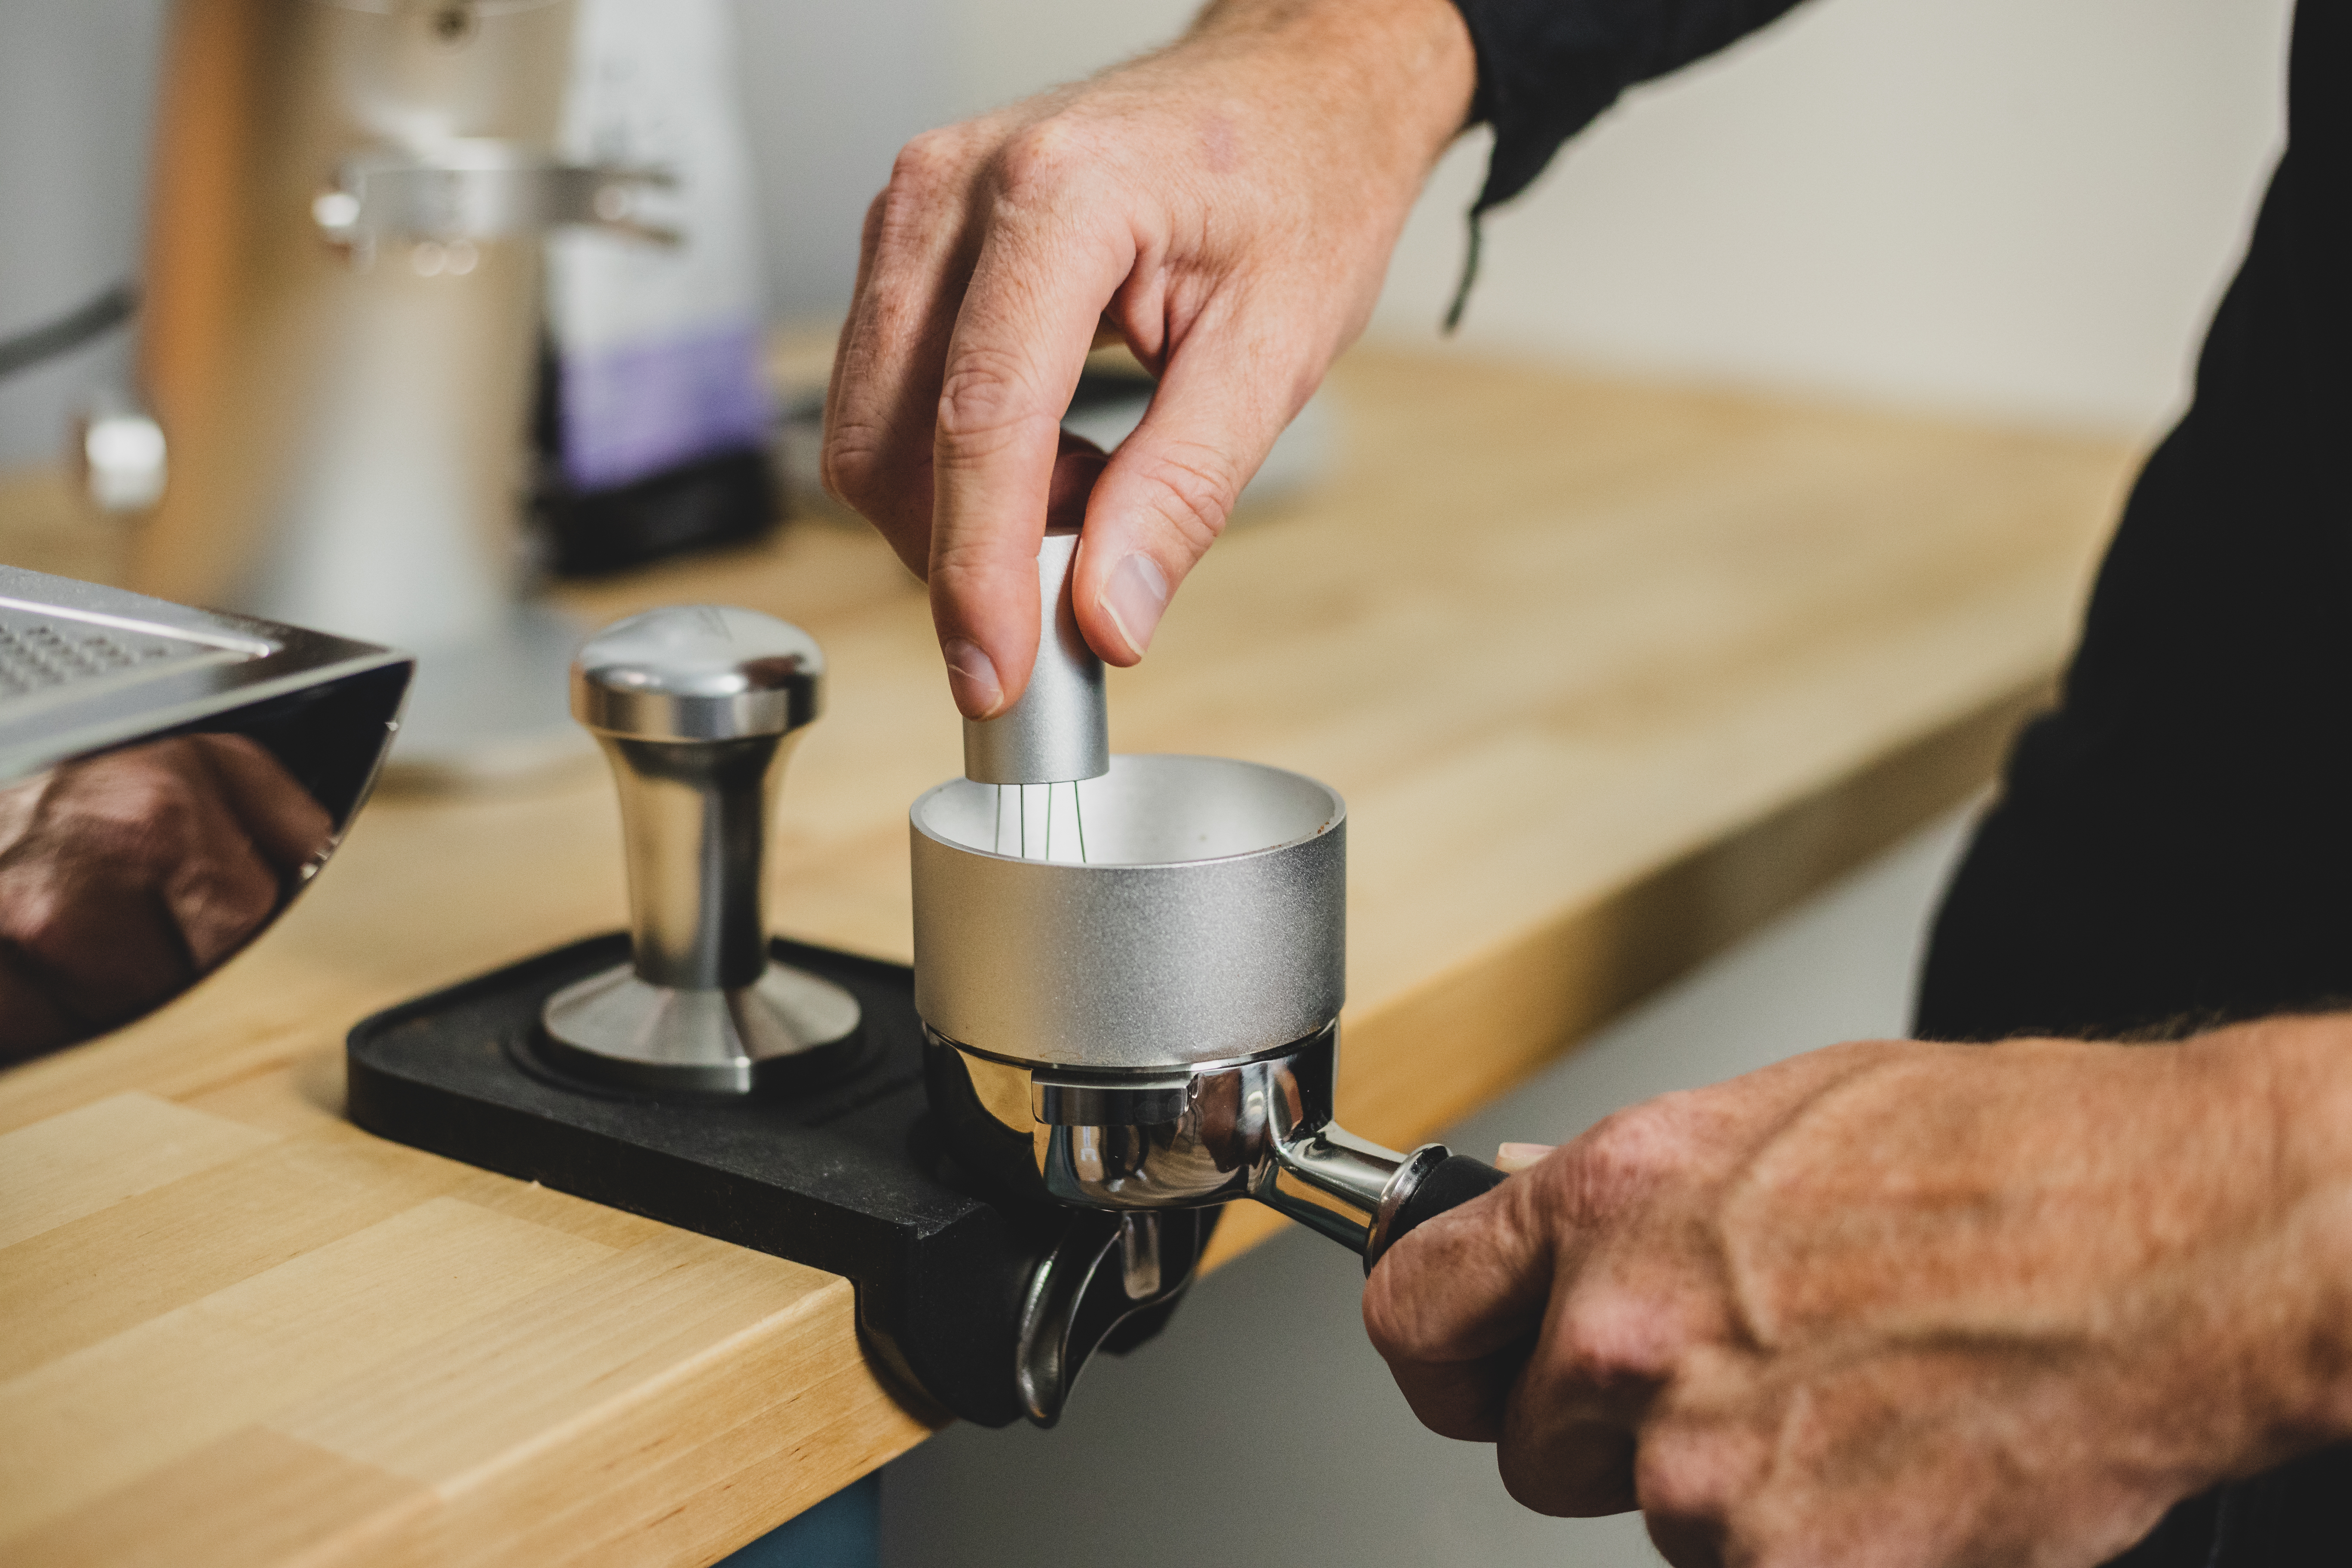
Carefully remove the portafilter from the fork and use the WDT to gently whisk the grounds in concentric circles; make sure to hit the outside and inside, bottom and top. Once the coffee looks clump-free and uniformly distributed, remove the funnel, tamp the puck, and settle the grounds by firmly but gently knocking the bottom of the portafilter against the counter. Keep the funnel on until the tamp to make sure no grounds are lost. If there is a spill, the dose will be less than exact, which makes it hard to repeat. Imagine getting the perfect shot and not knowing how it was done and never being able to repeat it!
Now it’s time for the good stuff: to pull a shot. To taste. You will need a scale on the drip tray to weigh the dose and a timer, if one is not integrated into the espresso machine, to clock each shot. Add a cup, tare the scale, begin the timer, and hit go.
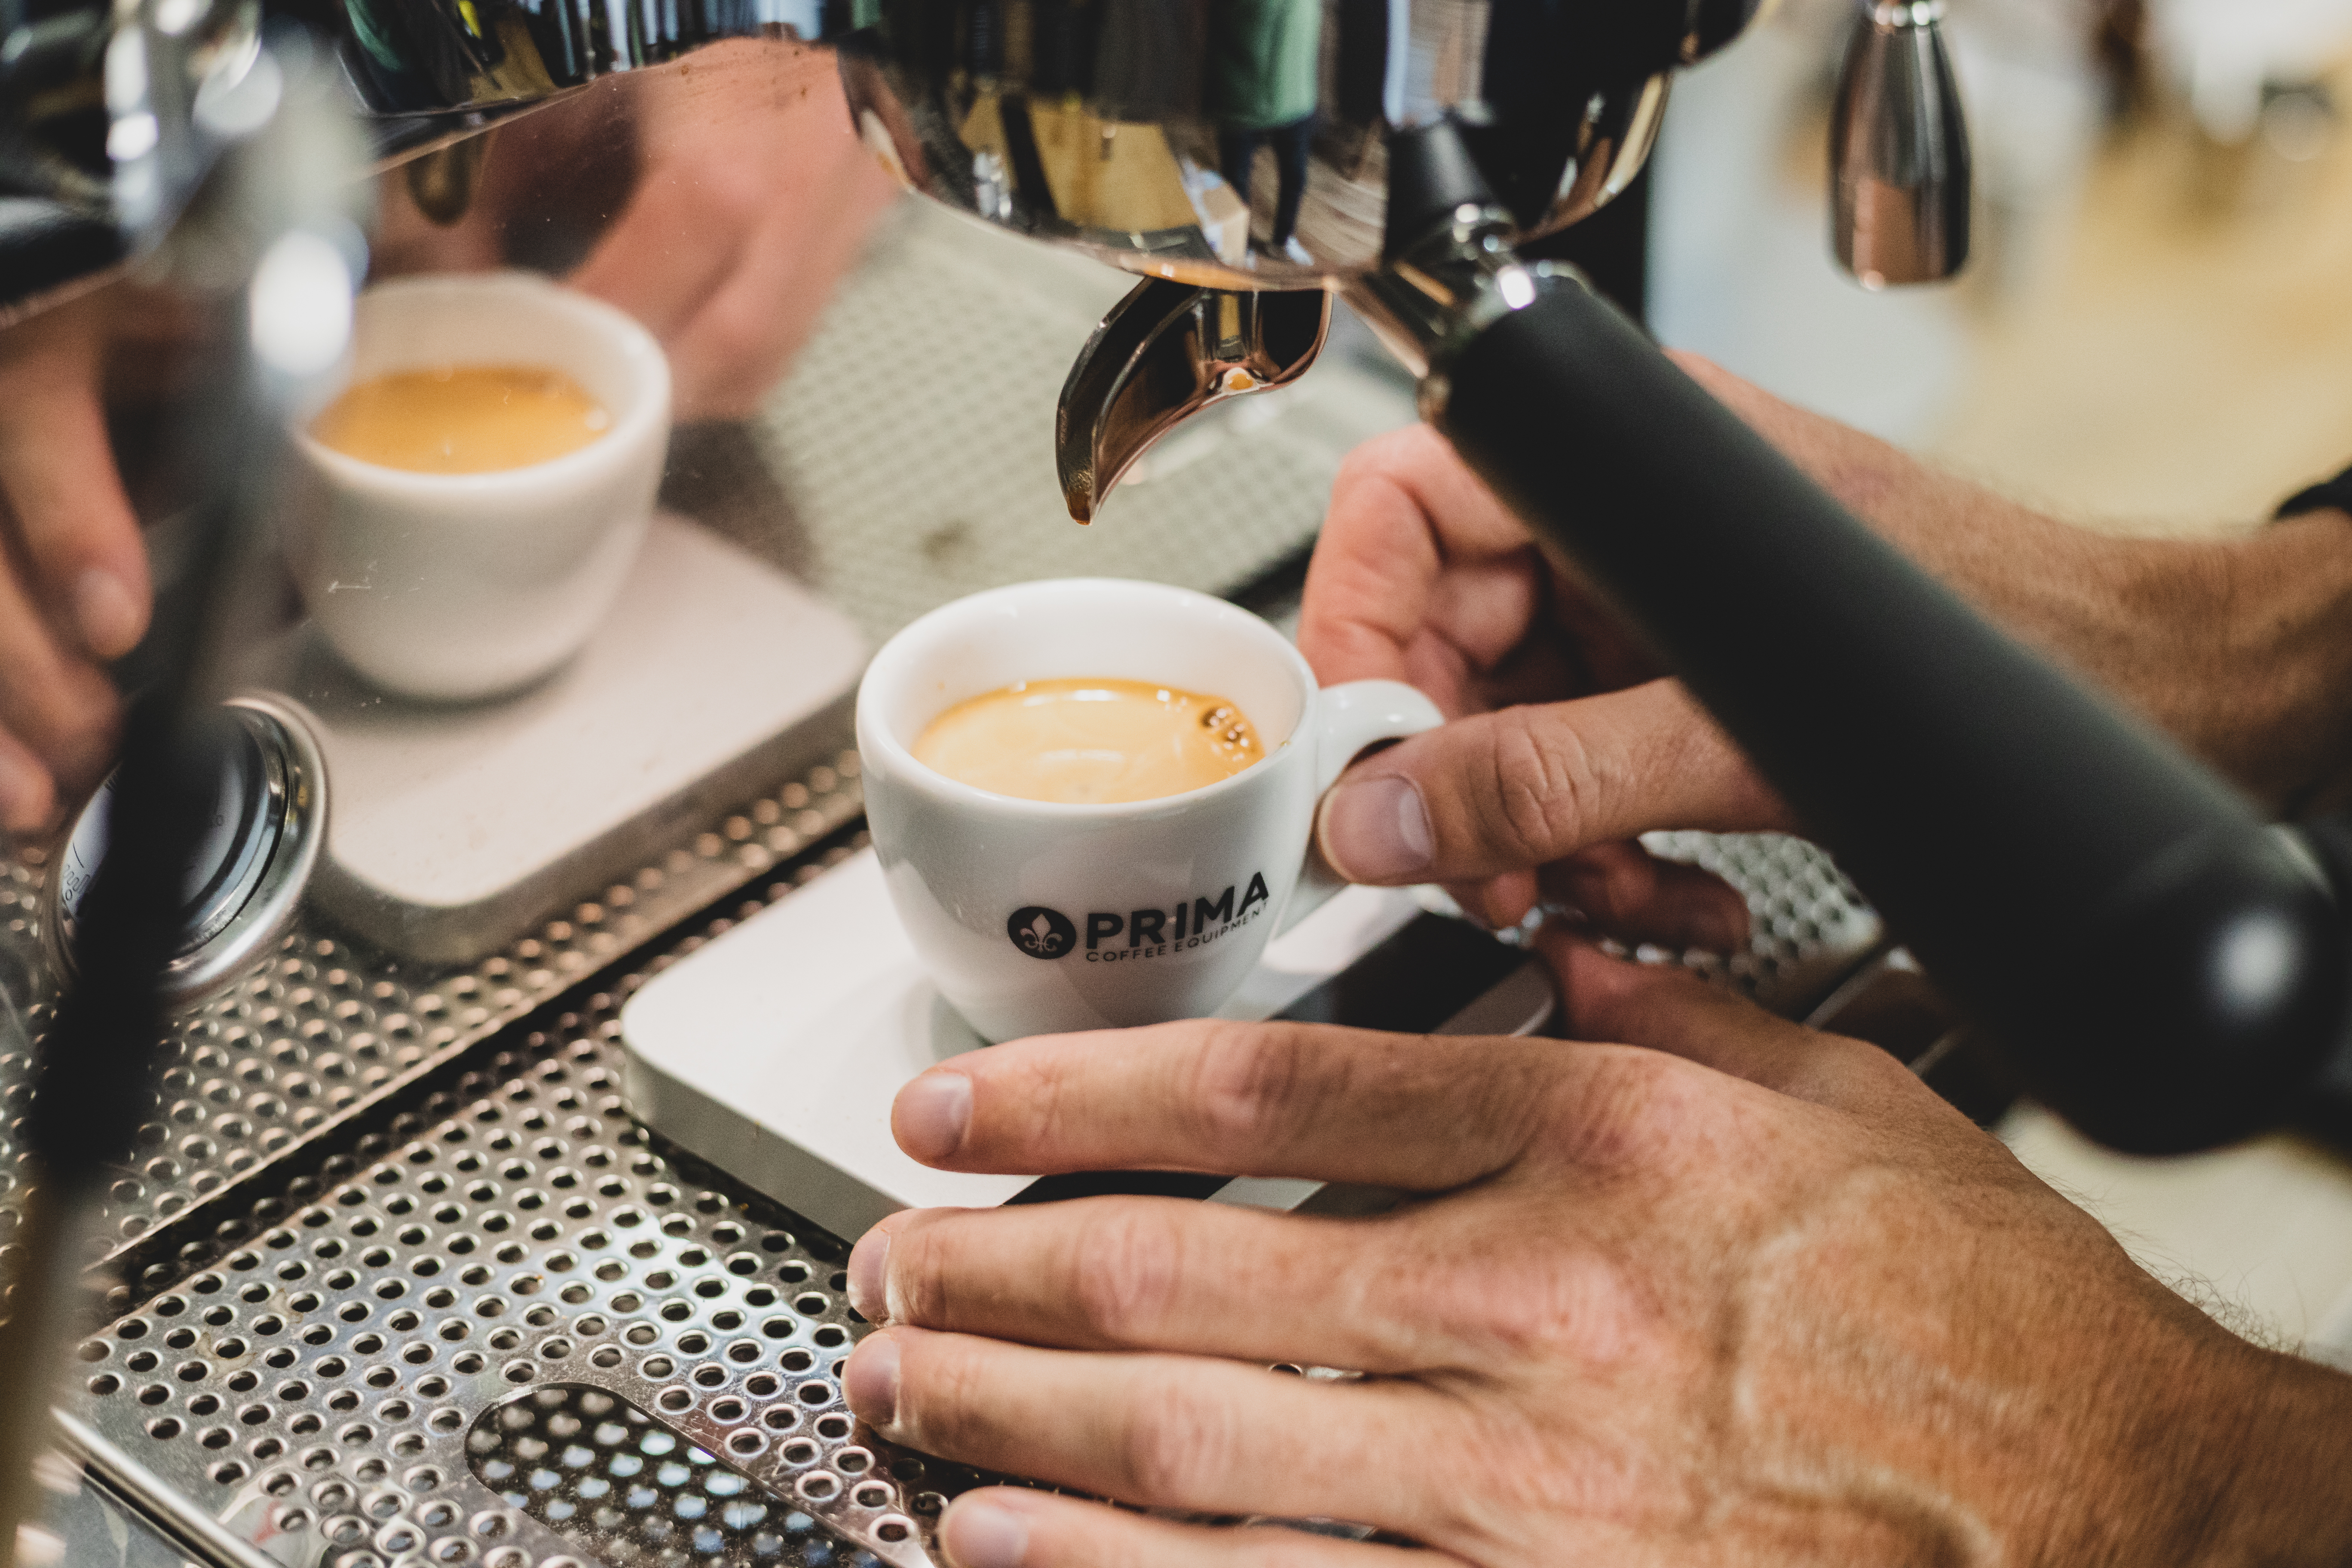
When the scale reads 38 grams, stop the shot, move the cup out of the way of any extra drips, and record the time. In fact, for each shot record the three key data points: dose, yield, and time. Record, if you feel so inclined, the tasting notes. You can start with simple descriptions like "sour" or "bitter" or the dualistic "good" and "bad"; and graduate to more comprehensive evaluations, especially of characteristics you enjoy ("cherry juice") or dislike ("oversteeped tea"), making it clear to your future self what it was exactly about the recipe you do or do not want to replicate. (Why not get a book in which to record all these notes?)
Step 3: Fine-Tune
What we are shooting for is balance: acidity, sweetness, and bitterness. The first shot with any new coffee will be off in some way. It is impossible to know exactly which grind setting will produce the most desirable flavors without some experimenting. That’s okay. Dialing in is an iterative process. In order to know what adjustments to make, which variable to adjust, for instance, though, you must taste the coffee. Stir the espresso (because it stratifies and because the bitter crema, far from being benign, overpowers the flavors of the coffee) first. Do this even if the duration was too long or too short, i.e., less than or more than 30 seconds. This is how you can train your brain to know what is what.

Let’s assume for our purposes that the shot was too fast. It was stopped at 22 seconds. The shot likely tastes sour. You probably wrote "sour apples!" in the notes. Is that a frowny face, too? We have to grind finer. Finer increases the resistance and thus the time; and coarser reduces the resistance and the time. The question is: how many lines finer? The collar has numbers and lines. Numbers denote large steps; and lines denote small steps. With espresso, a tiny move makes a big difference. Eight seconds is not nothing, though, so we would probably move two lines finer. Our educated guess is that one line will move the needle only a few seconds with the high-uniformity burrs. With the multipurpose burrs, there is less room for maneuvering, so one line will do as a first adjustment.
So let’s try again. Dose. Grind. WDT. Tamp. Pull shot. This time, let’s assume the shot runs to 32 seconds. This is where it gets interesting! Remember that time is not everything. We are using 30 seconds as an arbitrary marker for finding what is generally the sweet spot area. Area, not exact location. Imagine that this shot at 32 seconds tastes a little unbalanced. It is missing something, something that the 22-second shot had, let’s call it the acidity reminiscent of apples. You liked that a little. Not the sour part but the apples part. But now it is gone, or rather subdued under a blanket of unsweetened chocolate. Perfect. By identifying the factor you like and the factor that you dislike, we know that we have gone too far. We have lost the fruit. In order to get it back, we simply need to go back toward what you liked: coarser. But by very little. At this point, we know that 2 lines will probably put us back where we were; one line is probably a good move, but that too may put us too far into the sour. We did, after all, like some of the chocolate and don’t want to lose it. This is going to sound petty, but move the dial a half line. Yes: half. Little changes, remember, go a long way. And if you have the multipurpose burrs—and this is going to sound totally impracticable—move a quarter of a line. The general rule is make smaller adjustments with a Lagom that has the multipurpose burrs installed than one that has the high-uniformity burrs.

Ahh, but there is a caveat. This is the Lagom. Option-O has included an RPM adjustment dial on the side of the grinder, which allows us to choose the speed of the burrs, from 200 to 1400 RPM. We can ignore it no longer. We have found that lower RPMs produce fewer fines and less resistance; and higher RPMs produce more fines and thus more resistance. We have been grinding most espresso shots at the max RPM and using the lower RPMs for filter. For espresso, we could grind a little coarser to decrease the contact time and adjust the flavor profile, but we could also experiment with RPMs. If we move the dial from 9 (max) to 5 (middle), for example, we may find that the shot produces the perfect amount of resistance on the current grind settings and we don't have to adjust the grind at all. We have found the ideal contact time (of water and coffee particles). Or maybe 7 is the answer. 6? 2? This is where the fun comes in and where things get totally complicated and nearly impossible to talk about. Not only can you adjust the grind settings to find or remove any one flavor note; you can also adjust the RPMs to bring up or play down notes. Naturally, this is where we leave you. We have brought you to the well. Now it is time to drink espresso.
Dialing in is fun but also an exercise in caffeine tolerance. We recommend having a lot of water on hand to counteract the constant sipping of espresso. The good news is that you only have to dial in once per coffee. Sure, there will be little tweaks as the coffee ages or as your palate demands difference, but generally those are minor and won’t involve making and tasting several espressos back to back. Once you find the sweet spot, record all the variables, including RPMs if you decide to mess with that dial, and rest assured knowing you can have that shot whenever you want.


