
A Beginners Guide to Pour Over Coffee Brewing
Manual brewers have become commonplace all over the coffee world, so where do you start if you want to get brewing on your own? In this article we cover brewing tips and as many pour over brewers as we can.
Manual brewers have become commonplace all over the coffee world—from cafes to restaurants to your friend's kitchen counter it's likely that you've seen at least one recently. The explosion in the popularity of manually brewed coffee through the last handful of years has brought forth a whole host of different brewers (both new designs as well as time-tested classics), each working just a little differently from the next one. Pour over drippers especially have grown in popularity, becoming the easiest brewers to find and also becoming increasingly diverse with different shapes, sizes, filter materials, and usage recommendations. So then, where do you start if you want to get brewing on your own? Have no fear, The Beginner’s Guide to Pour Over Coffee Brewing is here! In this article we’ll cover general brewing tips and as many pour over brewers as we can, and if you’re more of an immersion kind of coffee drinker we’ve got a whole guide for you to check out too.
Brewing Tips
With a few guidelines, a couple of gadgets, and a willingness to experiment to learn what you love, you can become a master brewer in no time. These recommendations should get you headed in the right direction with almost any brewer you choose, but remember that the fastest way to learn will be to brew, taste, adjust, and record results while you’re getting a handle on your new gear.
A note: it’s most efficient to adjust one variable at a time as you’re updating your recipe. The relationships between the variables below gets complex and wildly unpredictable even for professionals if you adjust too many details too quickly. Take your time and make it easy on yourself—a little patience will go a long way.
The Gear: You don’t need a hundred accessories to make good coffee, but there are some items that are necessary for consistent quality. A good burr grinder, a slow-pouring kettle, and a gram scale, are must have items for pour over brewers. We also recommend a thermometer to keep an eye on temperature stability if you choose a kettle that doesn’t have a temperature display built in.
The Grind: Grind consistency and uniformity is the single most important variable in brewing consistently quality coffee. Luckily, it’s also one of the easiest coffee problems to solve with the right equipment. Once you have a good burr grinder it will be easier to experiment with what works for you, but the general guideline to bear in mind is that the finer the grind the shorter the contact time that brew should require (and vice-versa). So, that medium-coarse ground Chemex will need a longer brew time than a medium-fine ground V60 brew. Ideal grind size will also be dependent on batch size for many brewers, so your small 01 size V60 will need a finer grind than your larger 02 size V60. This is a good variable to experiment with as you’re dialing in your process—if your coffee is coming out consistently thin, weak, or sour, try a finer grind setting; if your coffee is coming out consistently bitter, harsh, or brothy, try a coarser grind setting.
The Ratio: Your coffee brew ratio will be the basis of your recipe. Many professionals say 60g of coffee per every 1 liter of water used, or to rephrase those numbers, approximately 1g of coffee per every 16.7g of water. Any brew ratio from 1:15 to 1:17 will fall within specialty coffee standards, but adjusting this ratio will have drastic effects on other variables in your brew, so I recommend finding one you like and sticking with it until you feel confident about the other variables you control.
The Water: You’ll see it over and over again on this website, but the importance of quality water for brewing cannot be overstated. It will keep your gear in good shape, and it will help your coffee shine to its fullest potential. You won’t need in-line filtration at home (unless, of course, you’re into that idea), but mixing up your own high quality water is getting easier and easier all the time. These options from Global Customized Water, Third Wave Water and Peak Water Pitcher are tough to beat for low cost, high grade brew water.
The Temperature: If you try hard enough you can brew coffee with any temperature water you like (hello, cold brew), and it can be difficult to nail down a singularly agreed upon “best temperature” for brewing. The SCA says that the ideal temperature range for brewing coffee is 195°F–205°F (90.5°C–96°C) when water contacts ground coffee. Other professionals say water right off the boil (212°F/100°C) works best, while numerous Aeropress Championship recipes call for water at 176°F/80°C. What we can say for sure is that stability is important no matter which brew temperature you choose, so preheating your brewer thoroughly to make sure that you don’t lose too much heat too quickly will be very important for your consistency as a brewer.
The Brewers
Hario Switch
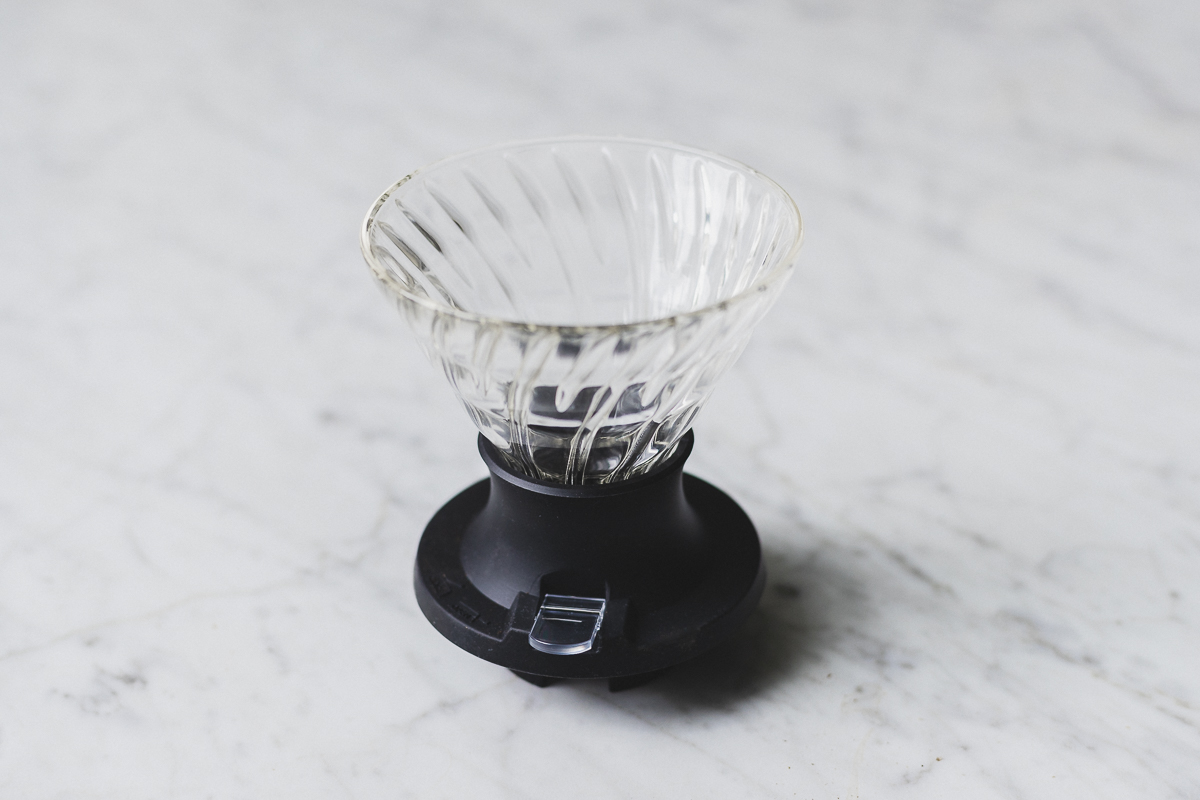
Design
The Hario V60 remains one of the most well-known and widely recognizable manual coffee brewers, but Hario Switch takes the classic design to a whole new level. The classic cone design fits securely in the silicone base that, with the help of a stainless steel ball and a switch, transforms the pour over into an immersion brewer. It uses V60 02 filters and provides the option to brew coffees with different flavors and mouth feels using the same brewer.
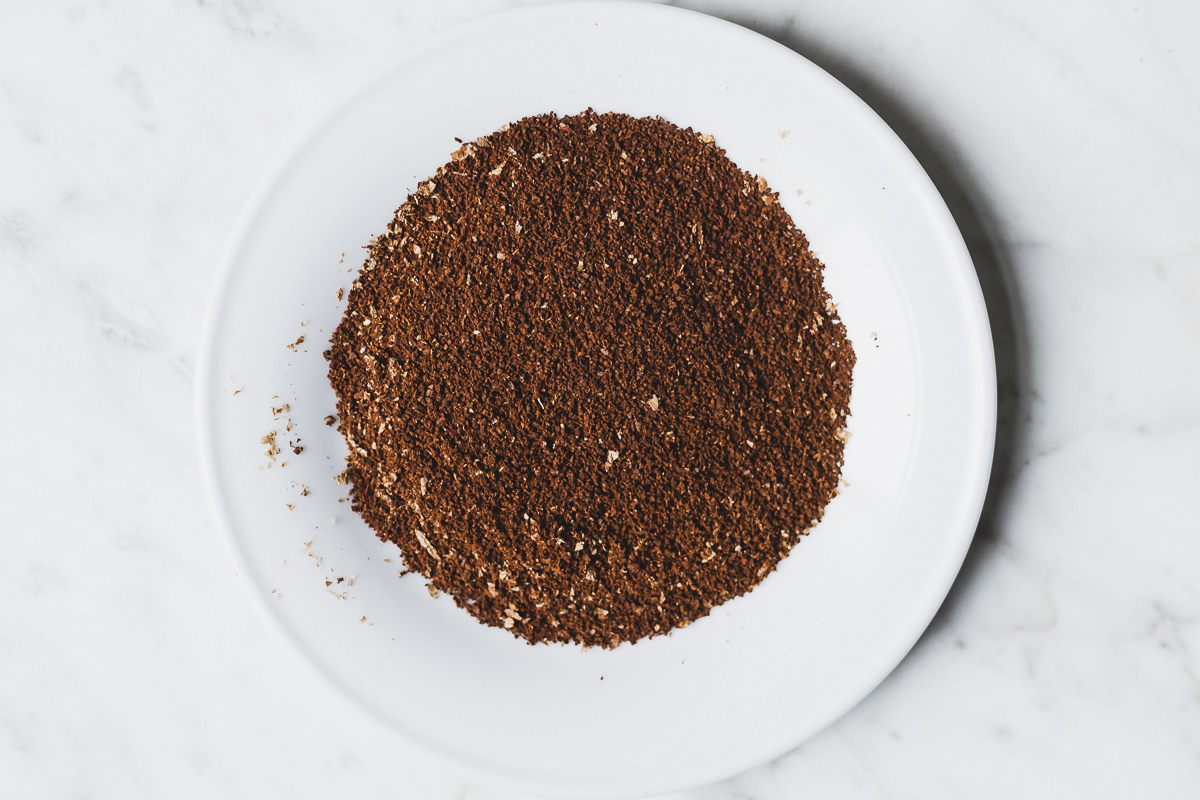
Grind
We suggest a medium grind for a 20 gram dose using the Switch. This grind size works well when using it as both an immersion and pour over.
Technique
Start by placing your filter in the brewer and rinsing it thoroughly. To use the Switch as an immersion brewer, make sure the switch is in the “closed” position to ensure the drawdown doesn’t begin. Pour 240 grams of water and allow to steep for 2:30-3 minutes and give it a twirl. After the time is up, flip the switch and let the drawdown begin. The entire brew takes about 3 minutes to complete. To use the Switch as a pour over, make sure the switch is flipped down so the hole is not blocked, and brew like you would a normal V60. The Switch provides the ability to manipulate the bloom by flipping the switch into the close position allowing the water to remain in direct contact with the coffee grounds before flipping the switch into the open position and beginning the drawdown.
Advantages
With the Hario Switch comes the option to choose. Enjoy either pour over or immersion with a single brewer. When brewing an immersion using Hario V60 filters, you’ll brew a cleaner cup than say a French Press, but enjoy the mouth-feel expected from an immersion dripper.
Considerations
When in the open position, the hole at the bottom of the Switch is slightly obstructed due to the stainless steel ball. Although it doesn’t have a huge effect on the flavor of the coffee, there does seem to be a decreased flow rate.
Espro Bloom
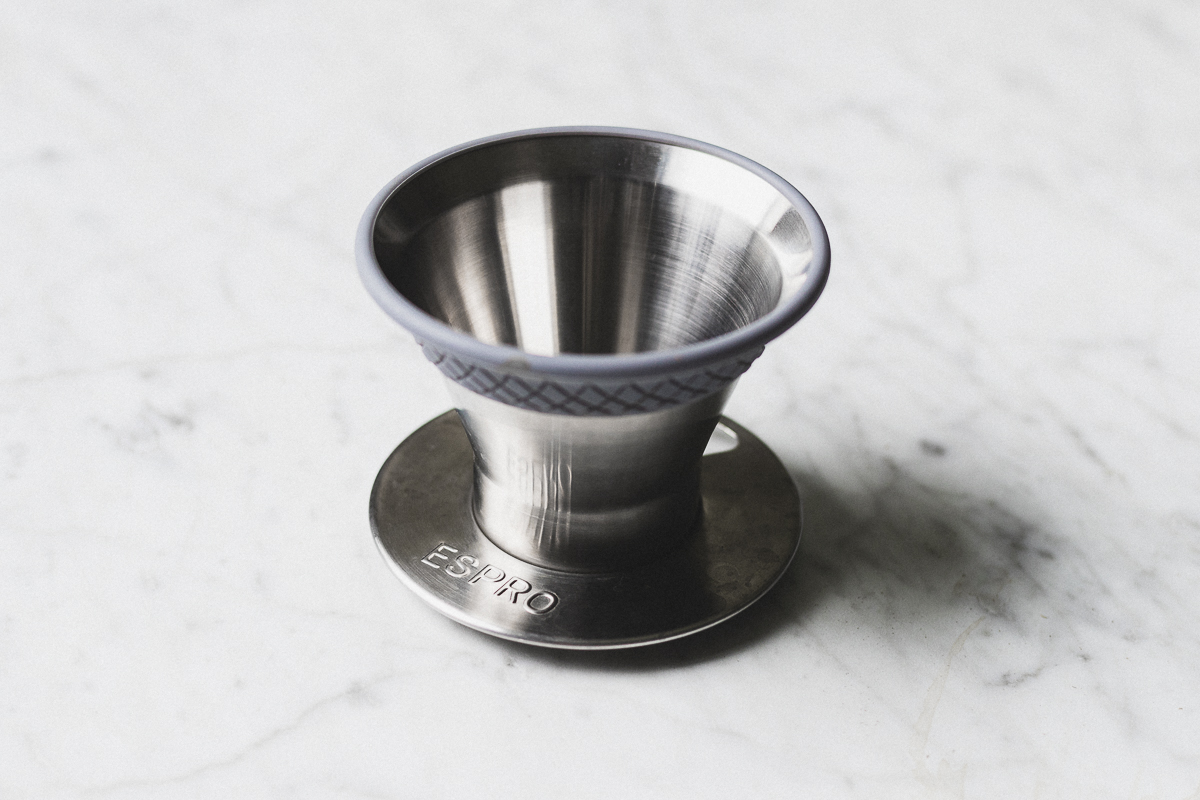
Design
From the outside, the Bloom looks a little like the December Dripper. It has a stainless steel body and a gray silicone ring along the mouth. On closer inspection, though, the Bloom reveals itself to be a completely new kind of pour over vessel. The steep slope of a cone dripper like the V60 gives way to a flat bottom like the Kalita Wave; but this bottom has 1,502 holes, giving it a look like an espresso basket, that facilitate an even extraction in a speedy 2-3 minutes, regardless of the grind size. Moreover, the chlorine-free filters have a wide top for easy pouring and perforations sized for fast brewing.
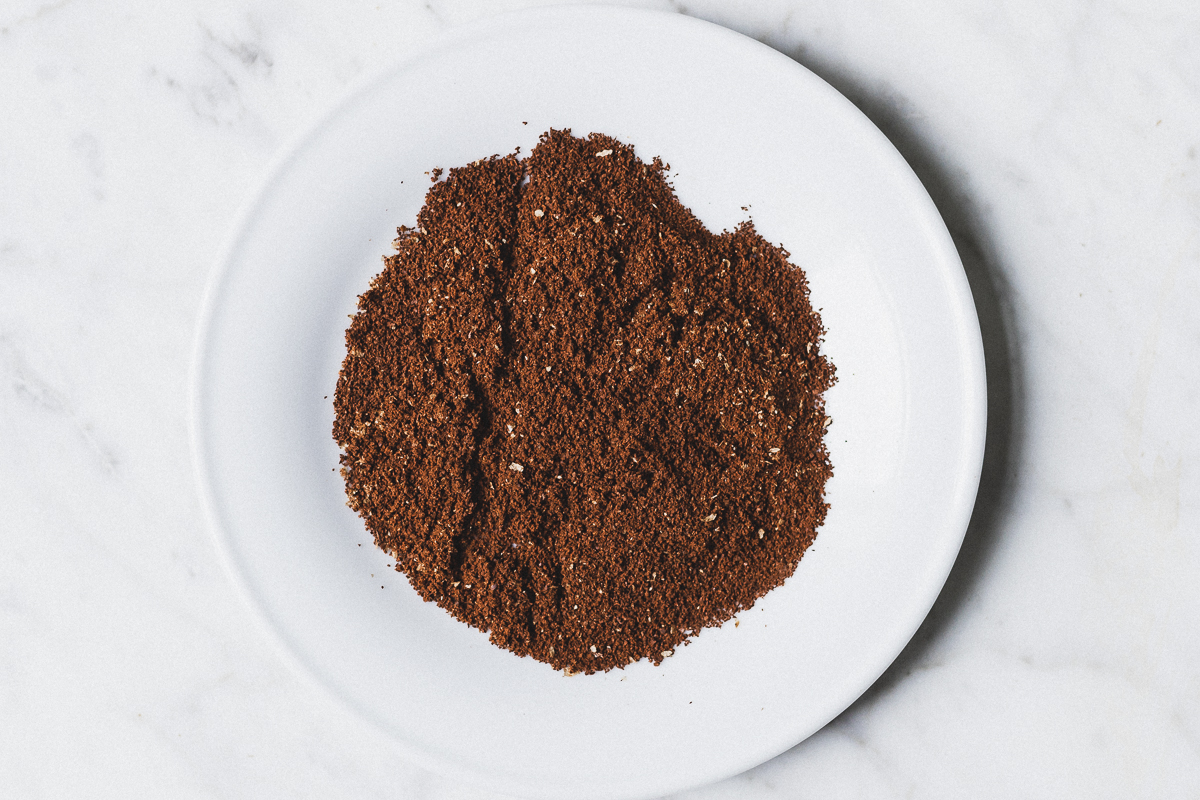
Grind
A fine grind is best for any size brew on the Bloom. Start a little finer than V60 and adjust from there. Don’t be surprised to see relatively fast brews (~3:00) even on very fine grind settings.
Technique
The first step, and a surprisingly difficult one, is to extricate one filter from the stack of 10. Pull gently at a single point on the edge of the outermost filter until it comes loose; then work around the perimeter, pulling gently as you go until the filter is completely free of the stack. You might have to scrunch and smooth various points along the filter to return it to its original shape. After that, using the Bloom looks a lot like using the other drippers on this list. Rinse the filter; add the ground coffee; and begin the brewing. Start the timer and pour enough water to cover the coffee or about 15% of the total water to be added. Give the Bloom a gentle twirl. After 30 seconds, add the second helping of water, about 50% of the remaining dose, pouring slowly and from a reasonable height (without splashing), and moving in concentric circles. Give the Bloom another gentle twirl. Once the water has drained enough to reveal the top of the coffee bed, add the remaining dose in the same way as before (slowly and in concentric circles), finishing with one last twirl for good measure.
Advantages
The Bloom does a great job at producing a chewy, sweet, well-rounded cup of coffee in very little time. The unique shape and holes of the Bloom are responsible for its ease: the wide top for pouring; and the 1,502 holes in the flat bottom for even extraction.
Considerations
The Bloom can also be used without a filter, but the results are less impressive for two reasons. For one, the recommended grind is coarser, which results in a lower extraction. Too, the holes have a tendency to clog and stall or slow the brew, especially with dense coffees.
Tricolate


Design
The Tricolate is a new kind of brewer based on two old and simple truths: 1. a shallow, flat coffee bed helps make an even extraction; and 2. bypass weakens the brew. Essentially, the Tricolate is a cylinder, not a cone like other drippers, with a wide body (making possible that shallow bed), a flat bottom that has evenly distributed holes (making possible that even extraction), and a shower screen on top to do the hard work of evenly distributing the water. The filter fits perfectly against the bottom, allowing no water to pass around it, which means no bypass to dilute the final brew. All the water must first pass through the coffee bed and then through the filter and down into the cup. This no-bypass design, which means more coffee solids get into the brew, opens up possibilities for experimentation with ratios beyond the traditional 1:16.
Grind
The Tricolate, more than other brewers, is subject to stalling with very dense coffees, such as those grown at high altitudes. As such, the coffee will determine the coarseness of the grind. Start with something resembling a medium-fine V60 grind size and adjust from there. Be prepared for brew times between 5 and 10 minutes.
Technique
This is the best part of brewing on the Tricolate. There is no technique. Simply pour the entire helping of water onto the shower screen, give the brewer a little swirl, and wait. You can play around with bloom, too, starting with enough coffee to cover the brew bed, and then adding the rest after 30 or 45 seconds. Ultimately, this is an easy brewer to use, one much like an immersion brewer but without that final step of releasing or filtering the coffee.
Advantages
The greatest advantage of the Tricolate is its shallow learning curve. You don’t have to know the physics of kettle streams or the ideal flow rate for pouring. Any kettle, even one without a gooseneck, will work. Just pour and wait. You don’t even need to be in the room while it brews.
Considerations
On the other hand, the Tricolate is not a fast brewer like the Espro Bloom or Hario V60. Instead, brews tend to take about 7 or 8 minutes, so some patience is required.
V60
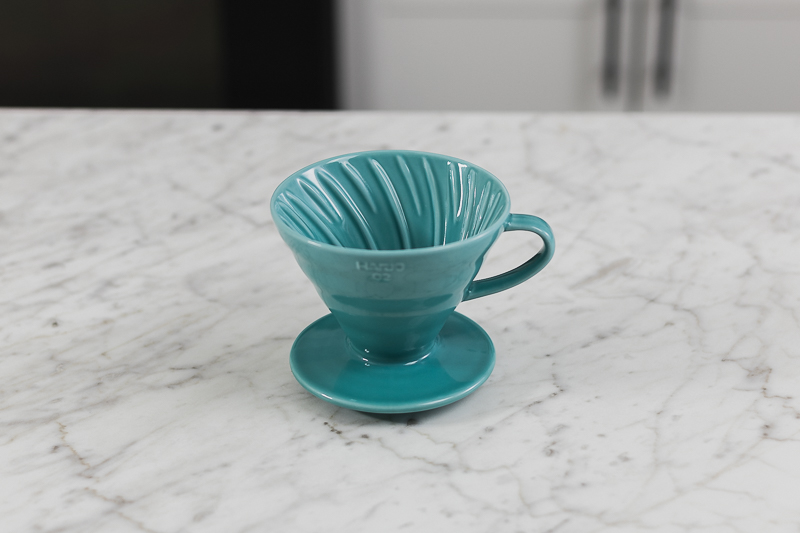

Design
A classic now in modern coffee, the V60 is the standard for a cone-shaped pour over dripper. Notably, its spiraled ridges inside of the brewer promote even extraction through the entire bed of coffee, and its availability in 5 different material options (glass, ceramic, plastic, copper, and steel), 3 different sizes (01, 02 and 03, intended for approximately 350ml, 600ml, and 1L brews respectively), and loads of colors means that you can find a brewer that works (and looks) perfect for you.
Grind
A medium-fine grind is typically best for a brew around 400ml. Plan to adjust finer or coarser depending on your batch and brewer size.
Technique
Start by placing your filter into the brewer and rinsing your filter thoroughly with hot water. Add your coffee, start your timer, and pour 10-15% of your total brew water evenly over the grounds. After 30 seconds have elapsed on your timer begin adding the rest of your water to the brewer; keep a slow and even pour, moving in concentric circles from the center outward (up to ~¼” from the edge of the brewer). Continue until you’ve added water to your desired brew ratio and let all of the water finish flowing through the brewer. Total brew time should be around 3 minutes for a brew around 400ml; expect faster brew times around 2 minutes for smaller brews, and brew times getting as long as 5–6 minutes for 1L brews in your 03 size V60.
Advantages
Hario’s V60 Filters do a great job at producing clarity in the cup without getting in the way with much of the paper flavor that can be difficult to avoid with other paper-filtered brewers. The unique ridged design of the brewer also helps facilitate even extraction better than most conical drippers, reinforcing why the V60 is so popular all over the coffee world.
Considerations
While the V60 does a better job than most at encouraging even extraction it will still require care in brewing; the large single outlet, fast flow time, and a finer grind setting than is required by many other brewers will all contribute to the delicate balancing act necessary to really control your results. The rewards of mastery will be great, but the learning curve might take little time.
Chemex
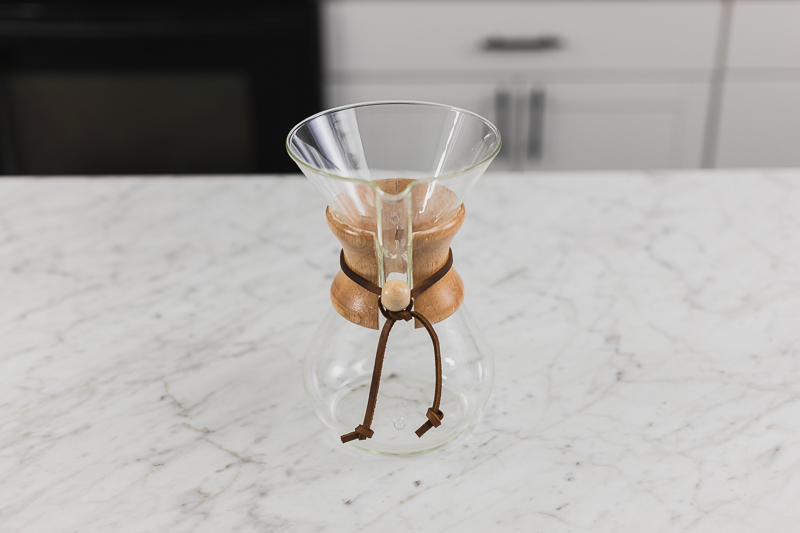

Design
Arguably the most classic piece of brewing equipment still available today, the Chemex marries science and design with its unibody borosilicate glass brew cone and decanter, Chemex-Bonded® filter paper, and museum-worthy styling. Available in 3, 6, 8, and 10 cup sizes, detailed with either a sleek glass handle or a light colored wooden collar the Chemex does well at giving you enough variety without getting in the way of the simplicity that has sustained the brewer for three-quarters of a century.
Grind
Medium to medium-coarse is recommended for most brews. Plan to adjust according to batch size, following that a 400ml brew will need to be a bit finer than a 1L brew.
Technique
Insert your Chemex filter into the brewing cone with three layers of filter paper against the side of the brewer with the spout, rinse thoroughly with hot water and dispose of the rinse water. Add your coffee, start your timer, and pour 10-15% of your total brew water evenly over the grounds. After 30 seconds have elapsed on your timer begin adding the rest of your water to the brewer in stages; keep a slow and even pour and ensure that you don’t pour water directly down the sides of the filter. Continue pouring water in pulses until reaching your target brew ratio; allow all of the brew water finish flowing through the coffee bed before discarding your filter. Total brew time should be 4–5 minutes for most brews in your 6, 8, or 10 cup Chemex.
Advantages
Thanks to its proprietary filters, the Chemex brews the lightest bodied and cleanest cup of coffee of any paper filtered brewer available. Slower flow rate and a longer contact time than other brewers helps to facilitate a good extraction easily, which helps to showcase the full spectrum of flavor that particular coffees have. And (very importantly) you can trust that this time-tested design isn’t going out of style any time soon.
Considerations
The upsides can be downsides though, as the Chemex will always lack body compared to other brewers—if you’re looking for a full and rich tactile experience then this brewer isn’t for you. Also, the all-in-one brewer + decanter means that if you break one part you really break them both (as I’ve tried to explain to my cat on more than one occasion).
KONE


Design
This stainless-steel filter is designed to be used in place of the Chemex paper filters in any of the 6, 8, and 10 cup Chemex brewers. Photo etched holes allow coffee oils and some solids into your brew, filling out the body and texture while keeping your coffee from having too much sediment.
Grind
A medium grind will be a great starting point for the KONE.
Technique
Insert the KONE into your Chemex brewer and preheat with hot water, disposing of the rinse water before moving on (with the KONE this mostly serves to preheat your Chemex to help your brewed coffee stay warm in the server). Add your coffee, start your timer, and pour 10-15% of your total brew water evenly over the grounds. After 30 seconds have elapsed on your timer begin adding the rest of your water to the brewer in stages; keep a slow and even pour, ensuring that you don’t pour water directly down the sides of the KONE. Continue pouring water in pulses until reaching your target brew ratio; allow all of the brew water finish flowing through the coffee bed before pulling your filter and discarding the grounds. Be sure to rinse the KONE thoroughly with hot water after use. Total brew time should be around 4 minutes.
Advantages
More than just a reusable alternative to the paper filters, the KONE changes the sort of coffee you have the potential to make with your Chemex. Highlighting body and acidity in a way that the classic paper filters can’t—paired with its improvement in your brewing sustainability and a Made in the USA stamp—this is a great option for people who love their Chemex but are ready to take the relationship to the next level.
Considerations
Buying a KONE is going to cost you though, and for that reason it’s worth considering it an investment in a new brewer, rather than just an accessory for your beloved Chemex.
Bee House

Design
The Bee House dripper features a ceramic body and a wedge-shaped cone which fits the standard #2 and #4 filters. It sits comfortably on top of most mugs, as well as the Hario and Kalita servers. While the Bee House is in effect a cone dripper, its bottom is flat and sports two small holes through which brewed coffee flows, as well as a little window that lets you see your brew filling your mug or server while you work.
Grind
A medium grind setting works well with the Bee House.
Technique
Fold the seam of your filter over to fit flush in your brewer (this also prevents tearing of the filter during brewing), insert into the brewing cone, and rinse thoroughly with hot water. Add your coffee, start your timer, and pour 10-15% of your total brew water evenly over the grounds. After 30 seconds have elapsed on your timer begin adding the rest of your water to the brewer; keep a slow and even pour focusing on trying to keep the water level consistently ~2cm below the top of the brewer. Continue until you’ve added water to your desired brew ratio and let all of the water finish flowing through the brewer. Total brew time should be around 3:30.
Advantages
The Bee House offers an easier learning curve than most other conical brewers; its design encourages a slower flow rate and permits a coarser grind, which contributes to the forgiving nature of the brewer. The filters are easy to find in any grocery store, making this a lower maintenance brewer than drippers that require specialty filters.
Considerations
The ease of use for the Bee House does mean that you have a little less control than with many other conical drippers though, so its flexibility as a brewer suffers just a touch for its user-friendly design.
Kalita Wave

Design
Growing over the years to be nearly as ubiquitous as the Hario V60, the Wave dripper is the standard by which all flat-bottomed brewers are measured. Available in 2 sizes and 3 different materials there’s a Wave for more than one application. Three small outlets on the bottom, sloping walls, and Kalita’s wave-shaped filters come together to make a brewer that is hearty, easy to use, and rock-steady.
Grind
A medium-coarse grind is ideal for both sizes of the Wave dripper. You’ll need to grind finer if you brew less than the intended amount of coffee for the brewer though, meaning less than a 20g coffee dose in the 155 size, or less than a 30g dose in the 185.
Technique
Place your filter into the brewing cone and rinse thoroughly with hot water. When rinsing, be sure to pour only into the center of the filter, avoid pouring onto the ridges as the filter may collapse if you pour directly onto them. Add your coffee, start your timer, and pour 10-15% of your total brew water evenly over the grounds. After 30 seconds have elapsed on your timer begin adding the rest of your water to the brewer; keep a slow and even pour focusing on trying to keep the water level consistently 1–2cm below the top of the brewer. Continue until you’ve added water to your desired brew ratio and let all of the water finish flowing through the brewer. Total brew time should be around 3:30.
An important note: because of its flat design and medium-coarse grind, the Wave does best with a deeper bed of coffee grounds than some other brewers require. The 155 size brewer will perform well for brews up to ~14 fl oz, while the 185 size should be reserved for 16 fl oz and greater.
Advantages
Consistent and maybe as easy as a pour over dripper gets, the Kalita Wave has become an industry standard that has spurred the production of more than one brewer borrowing from its design. The variety of sizes and materials means there’s a Wave for everyone, and the stainless steel version seems to be particularly indestructible under any circumstance.
Considerations
The Wave’s proprietary filters are great, but run a touch more expensive than most coffee filters you can find for other brewers. Also, while the dripper produces good coffee for brewers at any skill level, it struggles to be as dynamic as some of its cone-shaped counterparts.
Walkure

Design
A brewer unlike any other on this list, Walkure’s brewers are entirely porcelain, including the filtration set up. Moving away from cloth, paper, or metal, the Walkure brewers work by using the bed of coffee itself as a filter, resting atop a dual-layer porcelain grid to separate the ground coffee from the carafe. A self-contained server at the base, filter in the brewing chamber, dispersion plate for consistent water introduction, and lid for heat retention make these into functional little German packages that are easy to use for almost anyone.
Grind
Medium to medium-coarse should work well for this brewer. Grind consistency can be especially important here because a grinder that produces too many fines (super-fine coffee particles) will result in an unpleasantly silty brew.
Technique
Start by thoroughly (and I mean thoroughly) preheating the brewer. Add ground coffee to the brewing chamber and top it off with the dispersion plate. Start your timer and pour 10–15% of your total brew water, let the coffee bloom until reaching 30 seconds on your timer. Continue adding your remaining brew water steadily, aiming to maintain a consistent water level in the brewing chamber, until reaching your target brew ratio. Let all of the brew water flow through the grounds, reaching a total brew time around 4:00, then dispose of your spent grounds and thoroughly rinse your brewing chamber.
Advantages
At its best, the Walkure brewing system produces drip coffee free of sediment and silt, but full of flavor, coffee oils, and luxurious texture. No paper (or even cloth) filter means less waste when brewing and fewer items to keep on hand for your caffeine routine. The flat bed shape of the brewer and dispersion plate make even extraction achievable with little effort. And no matter which style of the Walkure you get, you end up with either a beautiful modern take on German ceramics or a beautiful classic look at German ceramics.
Considerations
At its worst, the Walkure can be a heat sink and produce a gritty brew depending entirely on the user’s input. Requiring substantial preheating and a grind consistency beyond the tolerance of most brewers, there are certainly a few considerations to bear in mind.
Woodneck

Design
The only pour over brewer on our list made to be used specifically with a cloth filter, the Woodneck stands alone. A wire hoop to hold the filter, glass body including decanter, and a wooden collar is all you need for clean and crisp brews.
Grind
A medium-fine to medium grind should be a good starting place for the Woodneck.
Technique
Start by placing your filter into the brewer and rinsing thoroughly with hot water. Add your coffee, start your timer, and pour 10-15% of your total brew water evenly over the grounds. After 30 seconds have elapsed on your timer begin adding the rest of your water to the brewer; keep a slow and even pour, moving in concentric circles from the center outward up to ~¼” from the edge of the brewer. Continue until you’ve added water to your desired brew ratio and let all of the water finish flowing through the grounds and filter. Total brew time should be around 3:30 on your timer.
Advantages
If you love cloth filtered coffee then this is the brewer for you. Super clean coffee and less waste than a paper filtered brewer, the Woodneck produces coffee like few other brewers can.
Considerations
Of course, all of that clarity comes with a lack of body and texture in the cup, and the cloth filter means active upkeep after every brew if you want it to stay clean and pristine.
December Dripper


Design
Borrowing heavily from the Kalita Wave’s design, the December Dripper sets itself apart by making itself the right brewer for any size batch of manually brewed coffee. With a 4-stage variable flow rate adjustment built into the base of the brewer this stainless-steel dripper can brew up to a liter comfortably, and still has the flexibility to execute a 6 fl oz drip brew no problem.
Grind
Thanks to the variable flow rate, a medium to medium-coarse will work for nearly any brew you’re going for regardless of batch size (assuming that you’re using the right flow rate!).
Technique
Place your filter into the brewing cone and rinse thoroughly with hot water; be sure to only pour in the center of the filter to pre-heat and not into the ripples, this helps to avoid collapsing the filter’s shape. Add your coffee, start your timer, and pour 10-15% of your total brew water evenly over the grounds. After 30 seconds have elapsed on your timer begin adding the rest of your water to the brewer; keep a slow and even pour focusing on trying to keep the water level consistently 1–2cm below the top of the brewer. Continue until you’ve added water to your desired brew ratio and let all of the water finish flowing through the brewer. Total brew time should be around 3:30.
Advantages
Geometry to encourage even extraction, slick looking stainless-steel construction, and the couldn’t-be-easier-to-adjust flow rate highlight some of what sets this brewer apart from the pack. Need a big brew to share? A little brew for an afternoon pick-me-up? A brewer that lets you experiment with immersion steeping before percolation brewing? The December can do any of it.
Considerations
Despite its stainless steel construction the December Dripper can be a bit fragile—the seal between the brewer’s cone and base can leak if knocked askew, and if the flow-rate gasket becomes misaligned it will take an allen wrench and a little patience to get everything back ship shape.
We want to hear from you! Which pour-over brewers do you love? What techniques and parameters are you using? Are there any brewers that you’d love to see on our list? Join the Prima Coffee Community to share or to learn more about brewing.
Happy (pour-over) brewing, y’all.


