
A Beginners Guide to Immersion Coffee Brewing
Manual brewers have become commonplace all over the coffee world, so where do you start if you want to get brewing on your own? In this article we cover brewing tips and as many immersion brewers as we can.
Manual brewers have become commonplace all over the coffee world—from cafes to restaurants to your friend's kitchen counter it's likely that you've seen at least one recently. While many of the brewers you're likely to come across these days are pour over drippers, we'd be remiss to not take some time to talk about the time-tested and well loved cast of immersion brewers. Often lending themselves to rich brews and even extractions immersion brewers are user-friendly tools with few other gadget requirements, making them great for folks new to manually brewing coffee or people looking for a simple solution for making great coffee on their own. So then, where do you start if you want to get brewing on your own? Have no fear, The Beginner’s Guide to Immersion Coffee Brewing is here! In this article we’ll cover brewing tips and as many immersion brewers as we can, and if you’re more of a pour over kind of coffee drinker we’ve got a whole guide for you to check out too.
Brewing Tips
With a few guidelines, a couple of gadgets, and a willingness to experiment to learn what you love, you can become a master brewer in no time. These recommendations should get you headed in the right direction with almost any brewer you choose, but remember that the fastest way to learn will be to brew, taste, adjust, and record results while you’re getting a handle on your new gear.
A note: it’s most efficient to adjust one variable at a time as you’re updating your recipe. The relationship between the variables below gets complex and wildly unpredictable even for professionals if you adjust too many details too quickly. Take your time and make it easy on yourself—a little patience will go a long way.
The Gear: You don’t need a hundred accessories to make good coffee, but there are some items that are necessary for consistent quality. A good burr grinder and a gram scale are must have items. We also recommend a thermometer to keep an eye on temperature stability, and a slow-pouring kettle for increased pouring consistency (especially if you have a pour over brewer, or might get one in the future).
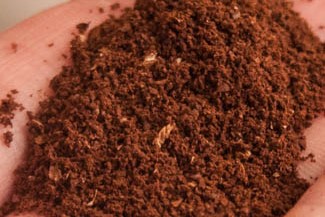
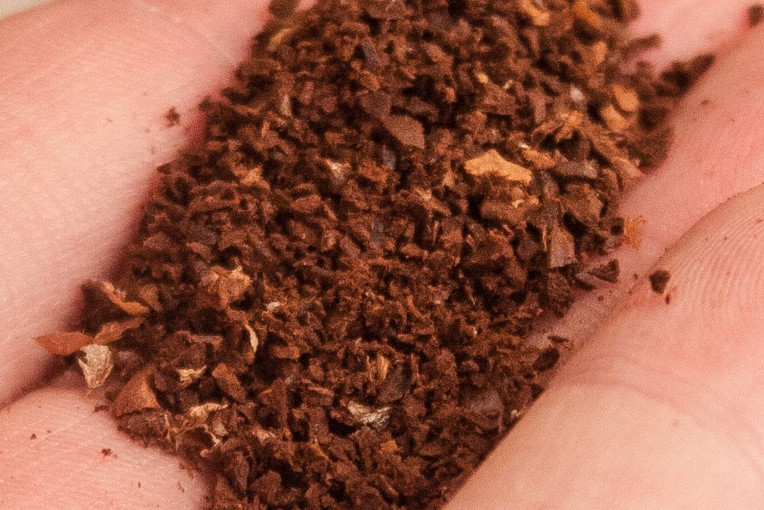
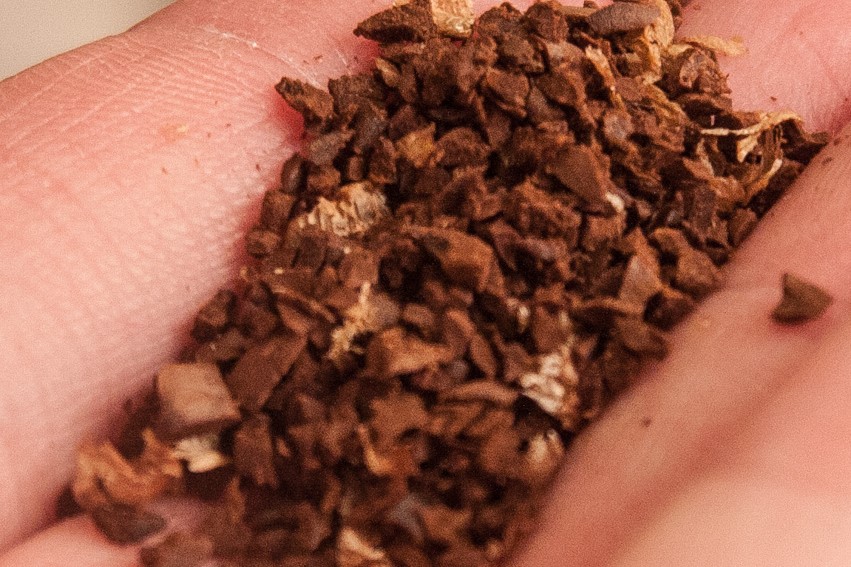
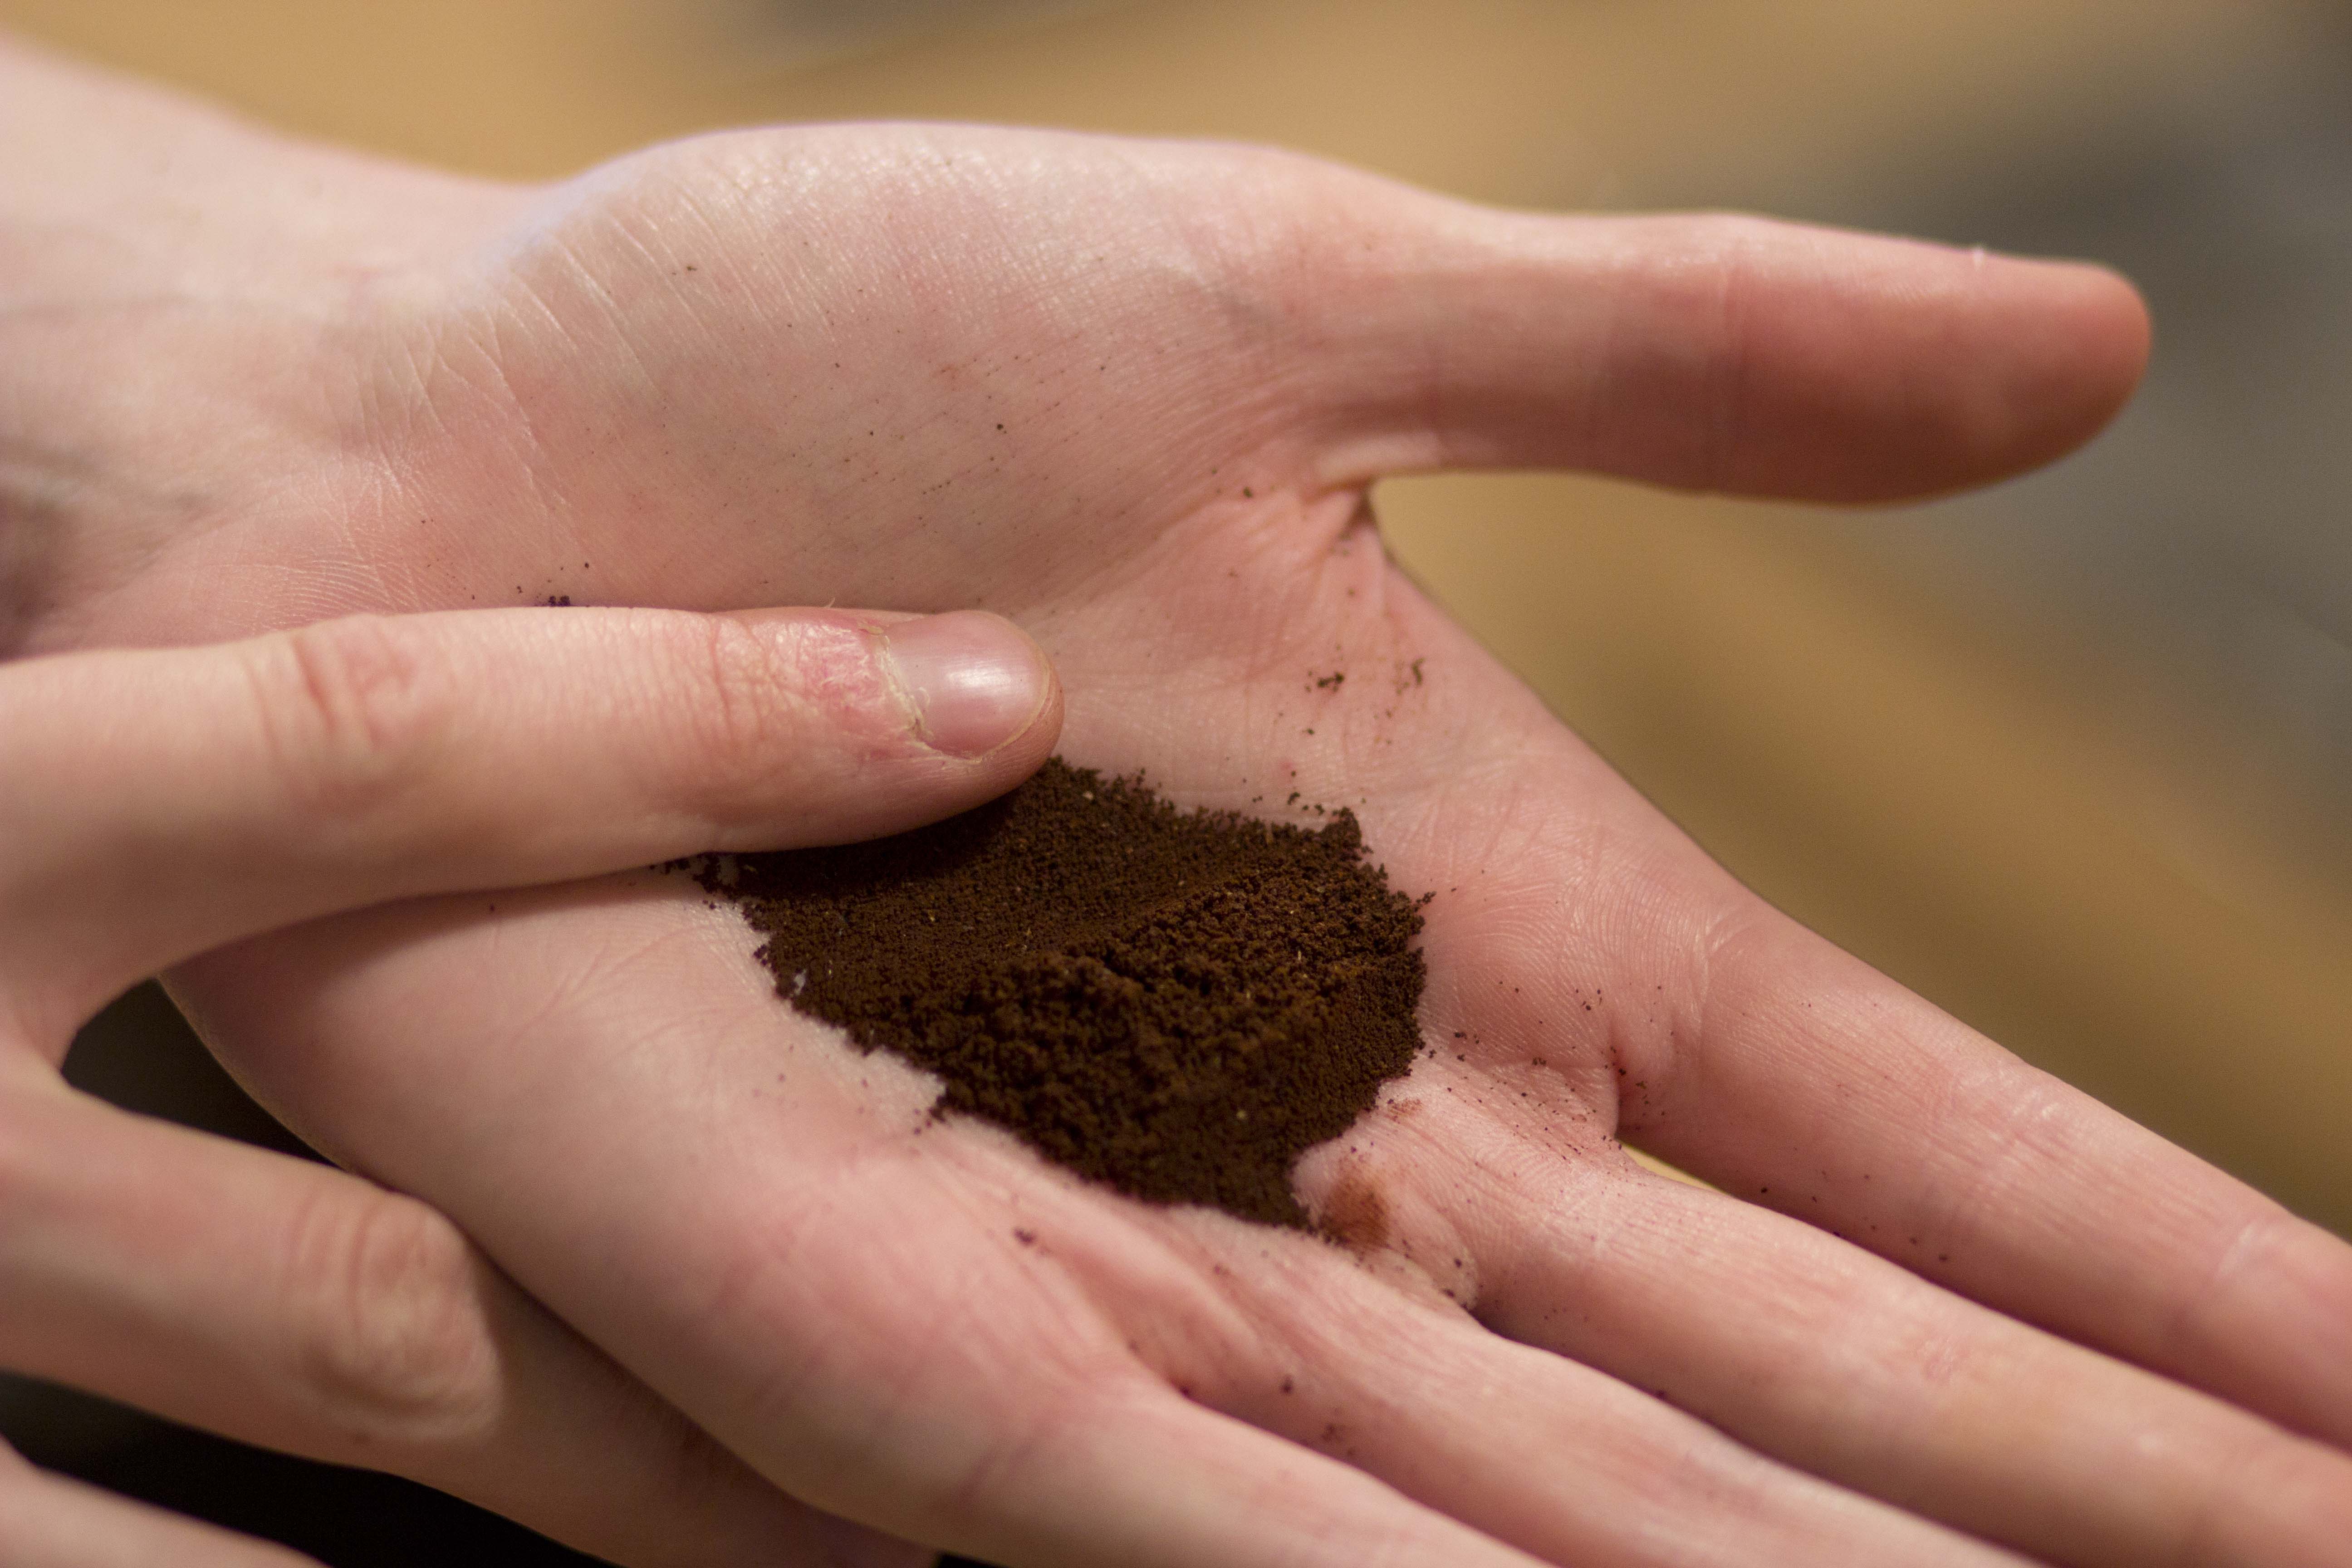
The Grind: Grind consistency and uniformity is the single most important variable in brewing consistently quality coffee. Luckily, it’s also one of the easiest coffee problems to solve with the right equipment. Once you have a good burr grinder it will be easier to experiment with what works for you, but the general guideline to bear in mind is that the finer the grind, the shorter the contact time that brew should require (and vice-versa). So, that coarse ground french press will need a longer brew time than a medium-fine ground siphon brew. Ideal grind size will also be dependent on batch size for many brewers, so your 18 fl oz. french press brew will need a finer grind than your 32 fl oz. french press. This is a good variable to experiment with as you’re dialing in your process—if your coffee is coming out consistently thin, weak, or sour, try a finer grind setting; if your coffee is coming out consistently bitter, harsh, or brothy, try a coarser grind setting.
The Ratio: Your coffee brew ratio will be the basis of your recipe. Many professionals say 60g of coffee per every 1 liter of water used, or to rephrase those numbers, approximately 1g of coffee per every 16.7g of water. Any brew ratio from 1:15 to 1:17 will fall within specialty coffee standards, but adjusting this ratio will have drastic effects on other variables in your brew, so I recommend finding one you like and sticking with it until you feel confident about the other variables you control.
The Water: You’ll see it over and over again on this website, but the importance of quality water for brewing cannot be overstated. It will keep your gear in good shape, and it will help your coffee shine to its fullest potential. You won’t need in-line filtration at home (unless, of course, you’re into that idea), but mixing up your own high quality water is getting easier and easier all the time. These options from Global Customized Water, Third Wave Water and Peak Water Pitcher are tough to beat for low cost, high grade brew water.
The Temperature: If you try hard enough you can brew coffee with any temperature water you like (hello, cold brew), and it can be difficult to nail down a singularly agreed upon “best temperature” for brewing. The SCA says that the ideal temperature range for brewing coffee is 195°F–205°F (90.5°C–96°C) when water contacts ground coffee. Other professionals say water right off the boil (212°F/100°C) works best, while numerous Aeropress Championship recipes call for water at 176°F/80°C. What we can say for sure is that stability is important no matter which brew temperature you choose, so preheating your brewer thoroughly to make sure that you don’t lose too much heat too quickly will be very important for your consistency as a brewer.
The Brewers
Hario Switch
Design
The Hario Switch is two parts: the first is the recognizable V60 body in glass form; and the second is a silicone base with the eponymous switch, allowing the flow to be turned on or off at any time during the brewing process. It works by controlling the position of a tiny stainless steel ball at the base of the V60 cone. Moving the switch moves the ball. It is either blocking the flow (off) or held out of the way (on). This design makes the Hario Switch a hybrid brewer: both pour over and immersion. It can be a steep and release brewer like the Clever, function entirely as a classic V60, or, and this is the fun part, it can be a mix of the two, allowing for experimentation.
Grind
Like the AeroPress, the Switch's grind depends on many factors, including immersion duration, water temperature, and coffee. Start with a medium grind and adjust to taste.
Technique
The Switch uses V60 02 filters. The technique will depend on the brewing method. For immersion, add the coffee, add the water, and let the brew steep for about two to four minutes. For pour over, follow your favorite V60 recipe. One hybrid method involves steeping a portion of the water weight with the coffee grounds for about thirty seconds and then opening the flow and finishing the brew as a pour over.
Advantages
The Switch is a two-in-one brewer. It combines the V60 pour over with a Clever-like immersion. Unlike the Clever, though, it allows a mix of methods. Plus, by removing the ball from the base, it becomes a V60.
Considerations
The Switch doesn't bring anything new to manual coffee brewing. Instead, it simply adds another dimension to the already popular V60 brewer. Unlike the V60, though, which has many different material options (glass, plastic, ceramic), the Switch comes in glass only.
Check out our Switch listing and the video for more information.
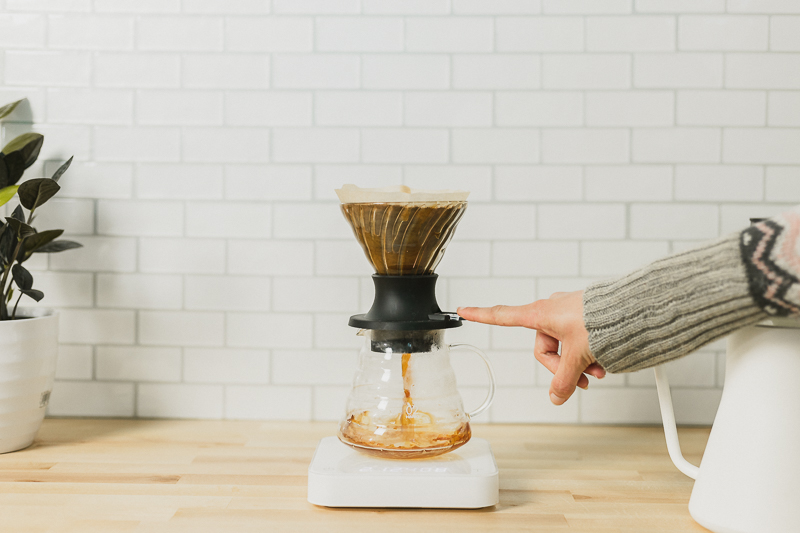
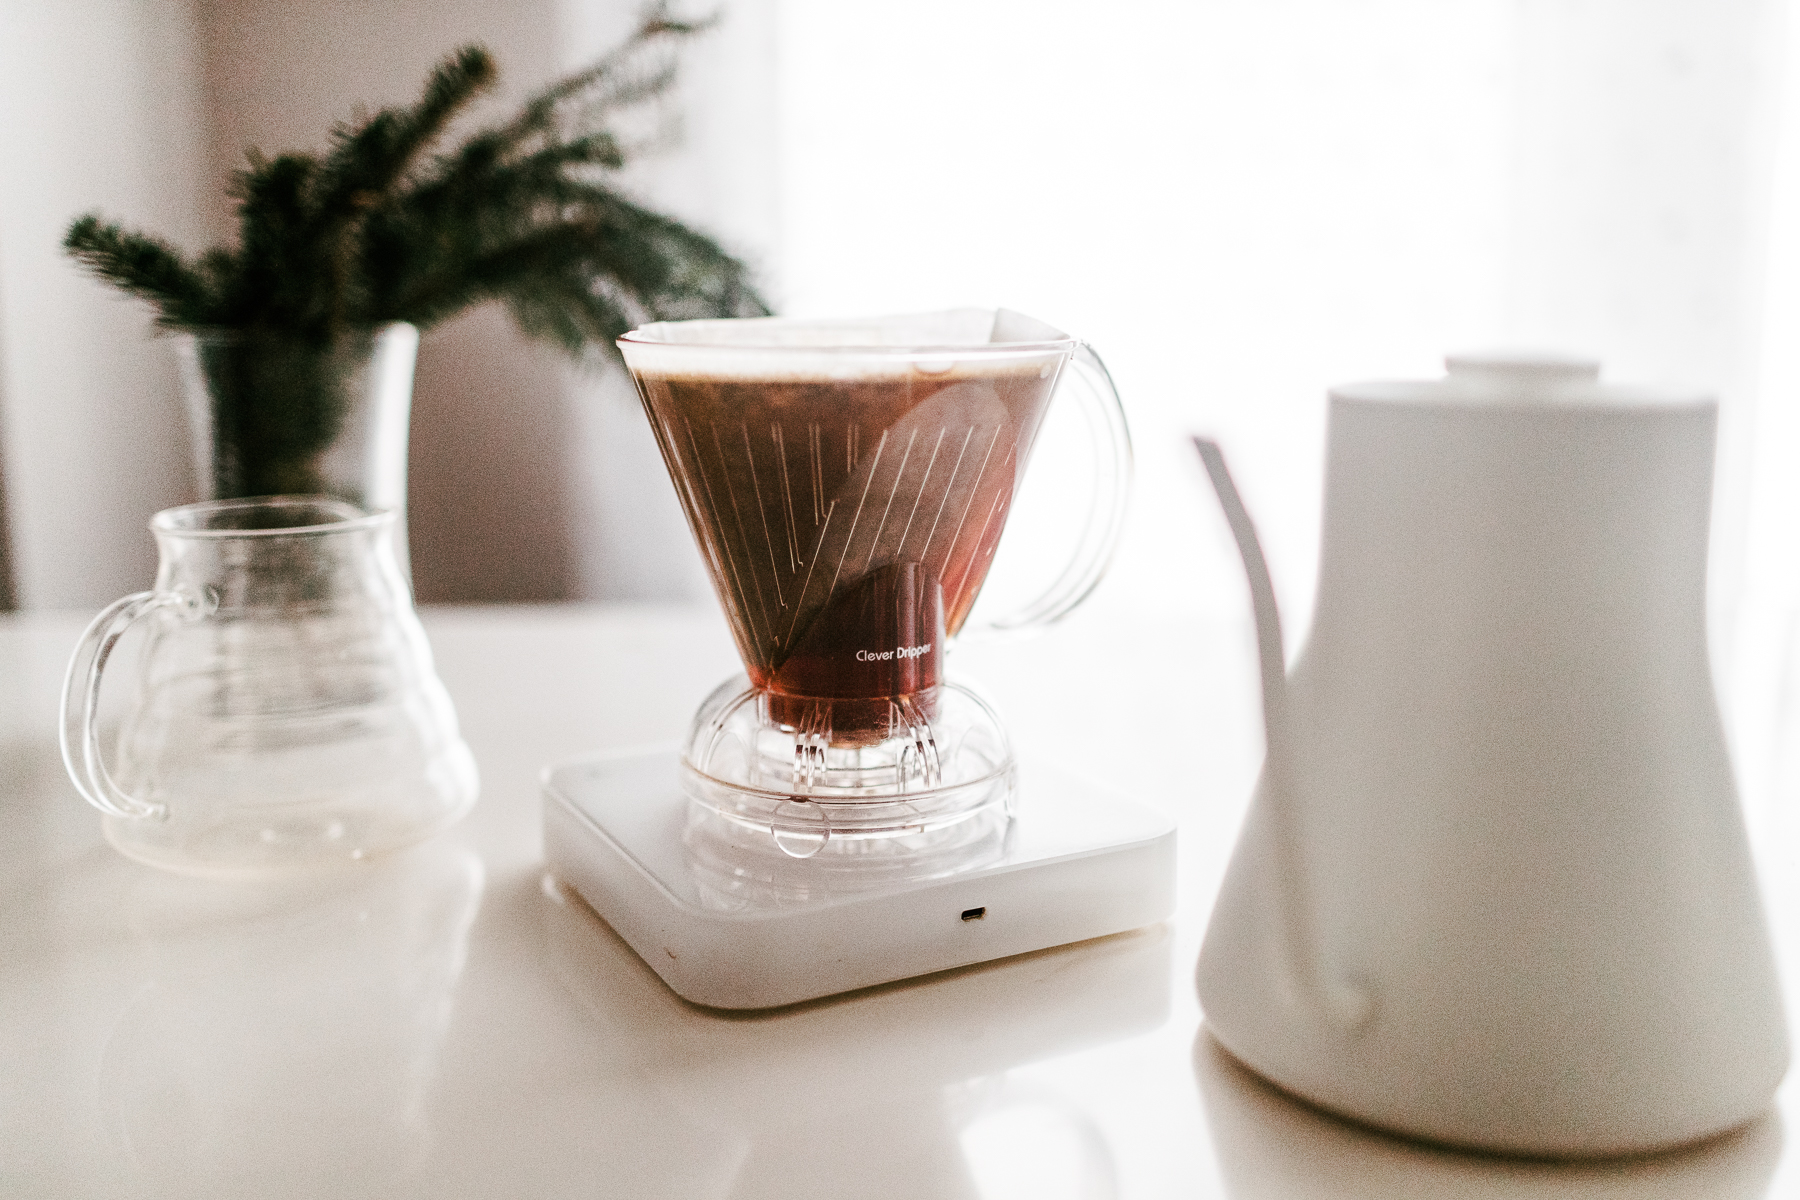
Clever
Design
The Clever is an immersion brewer with a twist—marrying a full-immersion steep with a paper filter for clarity. The brewer uses a gasket on its base with an assembly that releases your brewed coffee when you set it atop your mug. Its BPA-free plastic construction makes it lightweight and durable, meaning it’s great for travel, and its approachable price point makes the Clever a wonderful brewer for people looking to dip their toes into the coffee brewing pool.
Grind
This brewer shines when using a medium-coarse grind setting.
Technique
The Clever uses a standard #4 size paper filter, unless you happen to have the smaller model (since discontinued) which requires a #2 filter. Place the filter in the cone, give it a thorough rinse with hot water and discard the used water. Add your ground coffee to the brewer, start your timer, and pour hot water evenly over the coffee bed until you reach your desired volume and ratio. Cover the brewer with the provided lid to help keep your brewing temperature steady and let the coffee steep until 3:30 on your timer. Once you hit your steep time, set your brewer on top of your favorite mug or decanter (the Clever fits nicely on top of both the Hario and Kalita servers) and let the brew drawdown—drawdown should take about 30 seconds for a total brew time around 4 minutes. Toss the grounds and filter, and rinse the Clever with hot water.
Advantages
The Clever method is just so dang easy. It combines paper filtration and immersion brewing to consistently produce a clean and well-extracted cup—and all of this in a simple-to-use and affordable way. If you're just starting out with manual brewing we recommend the Clever as a fun and easy introduction.
Considerations
Its ease of use does mean that the Clever can be slightly less dynamic than other immersion brewers. While it consistently produces well-extracted and tasty coffee it might not be the go-to brewer if you’re seeking perfection in immersion brewer nirvana.
Check out our Clever listing and How to Brew video for more information.
French Press
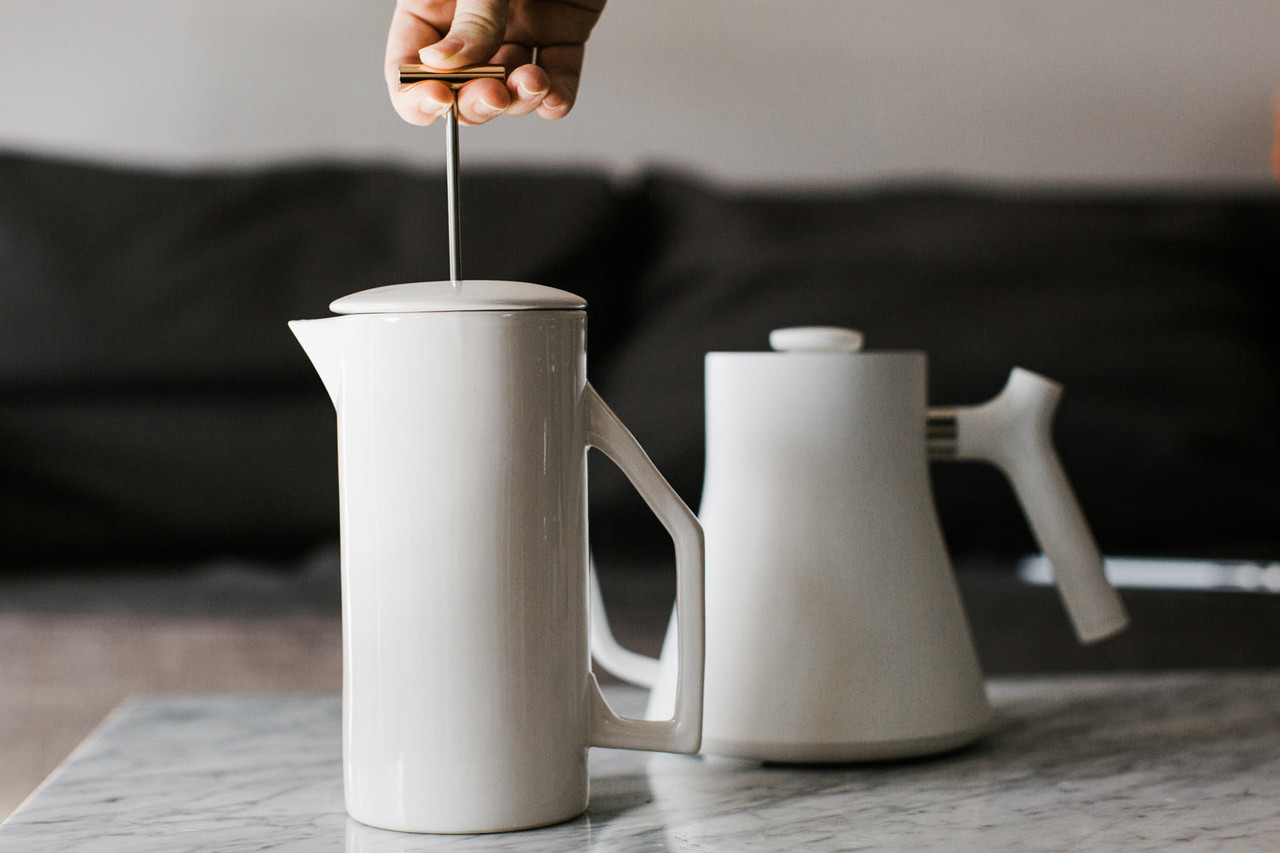
Design
The french press is a classic and remains one of the most widely recognized brewing devices available. It's comprised of a glass, metal, or ceramic body and a mesh filter plunger separating coffee grounds from brew water. There are now a handful of variations on the classic design—like the Espro Press with its barrel-shaped mesh filter designed to yield a cleaner cup than the original, or Hario's Double-Walled Olive Wood Press with its thick glass walls to provide improved heat retention—but ultimately french press coffee remains many people’s standard for rich and luxurious full immersion coffee.
Grind
A coarse or medium-coarse grind is typically best suited for french press brewing.
Technique
Preheat the press with hot water and toss that rinse water before brewing. Add your ground coffee to the press, start your timer, and add brew water evenly over the grounds. Top the press with the lid and plunger, depressing the plunger just far enough to submerge all of the grounds into the brew water. At 4:00 on your timer press the plunger down the rest of the way and decant your coffee into a mug or server.
Advantages
The french press excels at producing coffee with a full and luscious body; thanks to that attribute it does really well with coffees meant to have big mouthfeel, as well as darker roasted beans. With regular care you can expect your brewer to last for years, and with no need for paper or cloth filters you can keep your waste down as well.
Considerations
The trade off for that big bodied cup is that you won't achieve much flavor clarity with your french press. The brewer can also be burdensome to keep clean thanks to the screen filter assembly; plan on disassembling the filter parts regularly to soak and scrub with detergent to keep oil coffee oils from ruining your brews.
Check out our Comparison of French Presses for more information.
Aeropress
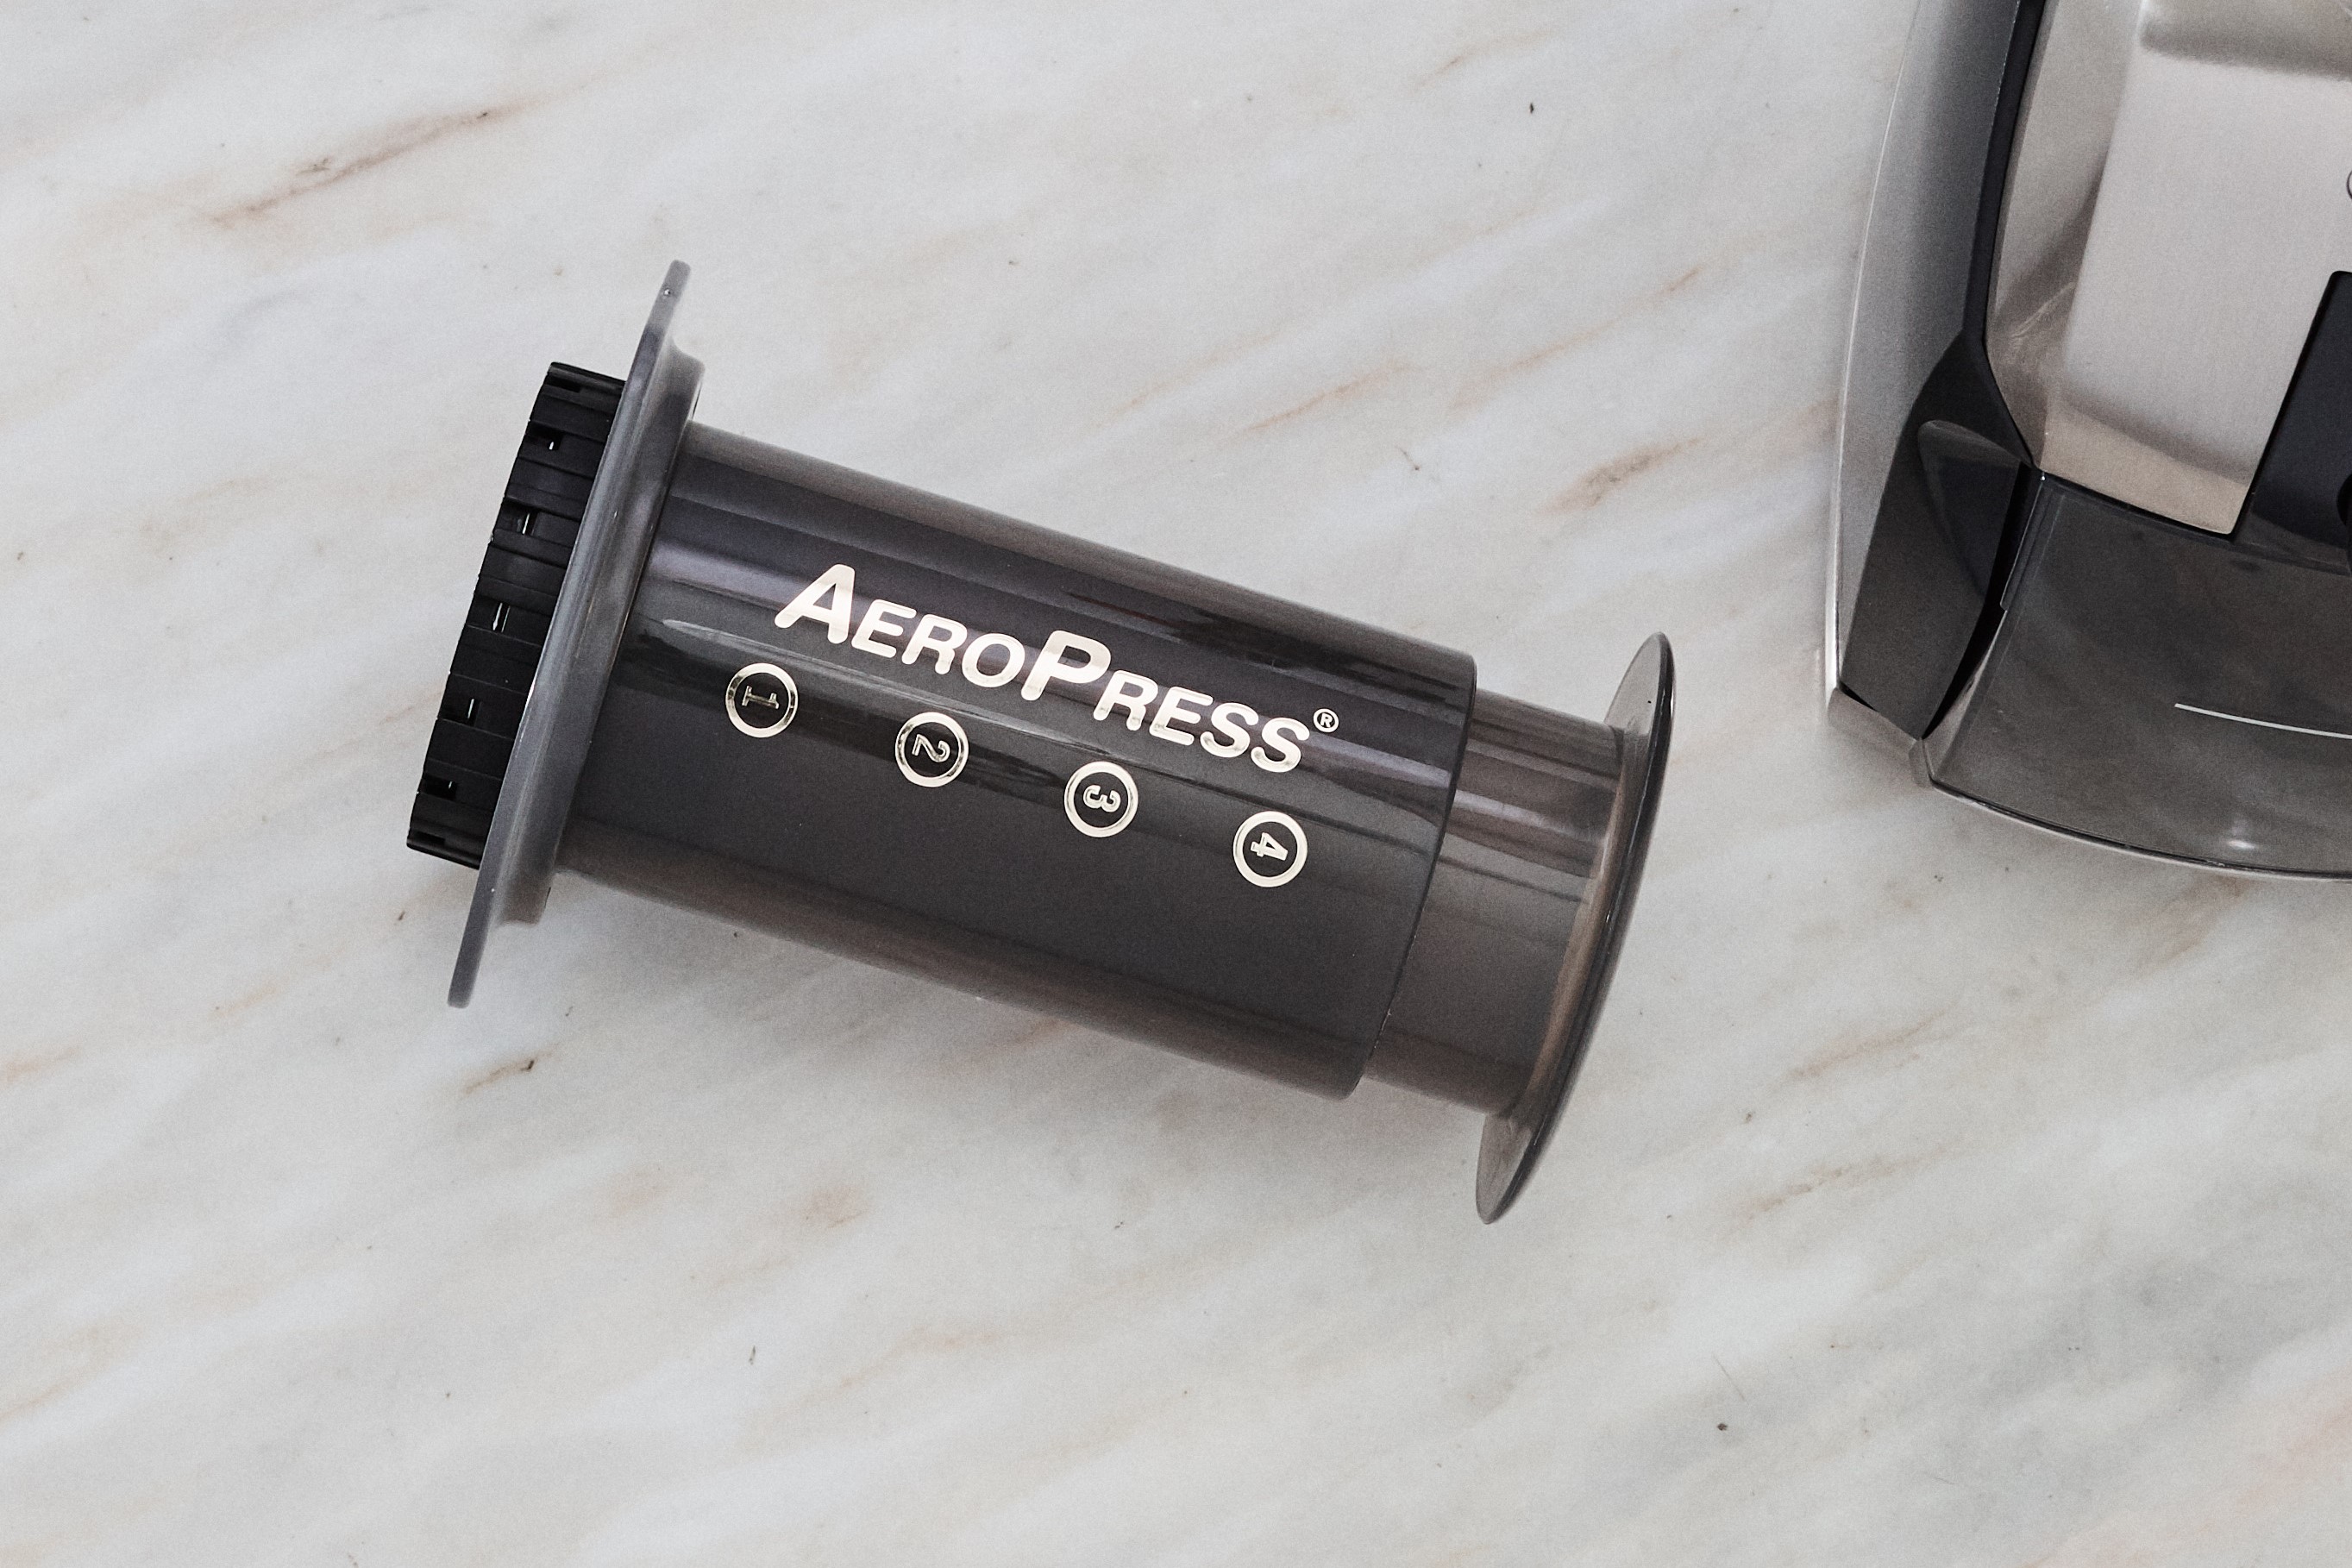
Design
Though hybrid brewers like the Aeropress have become more common since its release, the Aeropress remains a device that stands alone. Originally designed by a manufacturer of flying discs, there was little expectation that the Aeropress would emerge as a legitimate brewing option—but in the years since its release it’s been proven again and again, the Aeropress makes a great cup of coffee. It's constructed entirely from BPA-free plastics, making it virtually indestructible and ideal for travel, and its unconventional design makes it capable of a uniquely diverse array of brewing options.
Grind
It’s difficult to provide a universal grind setting recommendation for the Aeropress. Thanks to its versatility (one of the reasons we love it!) you can have great results with many different grind settings. Looking for something like a standard drip coffee? Opt for a medium grind with a 2-3 minute contact time. Or, try a fine grind with with 60 seconds of contact for a whole different experience with the same beans.
Technique
There are two basic options for brewing the Aeropress, and tons of wiggle room to experiment inside of both options.
The “standard method” has you assemble the filter, filter cap, and main body of the brewer, setting them filter down onto your mug or decanter. Then, add your fine to medium-fine ground coffee, start your timer, and pour hot water to your desired brew ratio. Give everything a stir and attach the plunger, pressing the brew with steady pressure into your vessel after 45 seconds have elapsed on your timer. This should yield a cup with syrupy body and high flavor intensity.
The “inverted method” starts with inserting the plunger just far enough into the base of the brewer to create a seal. Add medium ground coffee to the brewer, start your timer, add brew water to your desired ratio, and top off the Aeropress with your filter cap and filter. Steep until 2 minutes have elapsed on your timer, invert the brewer and press your coffee out into your vessel over 30 seconds with steady pressure on the plunger. This will yield coffee similar to a standard filter coffee. Be sure to be careful with the inverted method - hot water can leak out of your brewer if your initial seal isn’t tight, and the odd distribution of mass in the inverted brewer can lead to a slurry of coffee and boiling water all over the surface you’re brewing on if you’re not paying attention.
Advantages
The Aeropress is compact, versatile, virtually unbreakable, unreasonably easy to clean, and the most portable brewer on the market. In addition to varied techniques and parameters, you can also try a variety of different filters. The Aeropress comes standard with paper filters which work very well and can produce an exceedingly clean cup if you double them up in your filter top.
Considerations
The brewer’s small size means it isn’t ideal for coffee drinkers looking for a big mug of filter coffee in the morning, and certainly presents challenges if you intend to brew for more than one person.
Check out our Aeropress listing for more information. And if you prefer more flavor intensity and a full-bodied cup, the folks at Able Brewing created the Disk and Disk Fine, two stainless steel filters designed for use with the Aeropress. They're both reusable and will last for years with just a little bit of upkeep.
Siphon
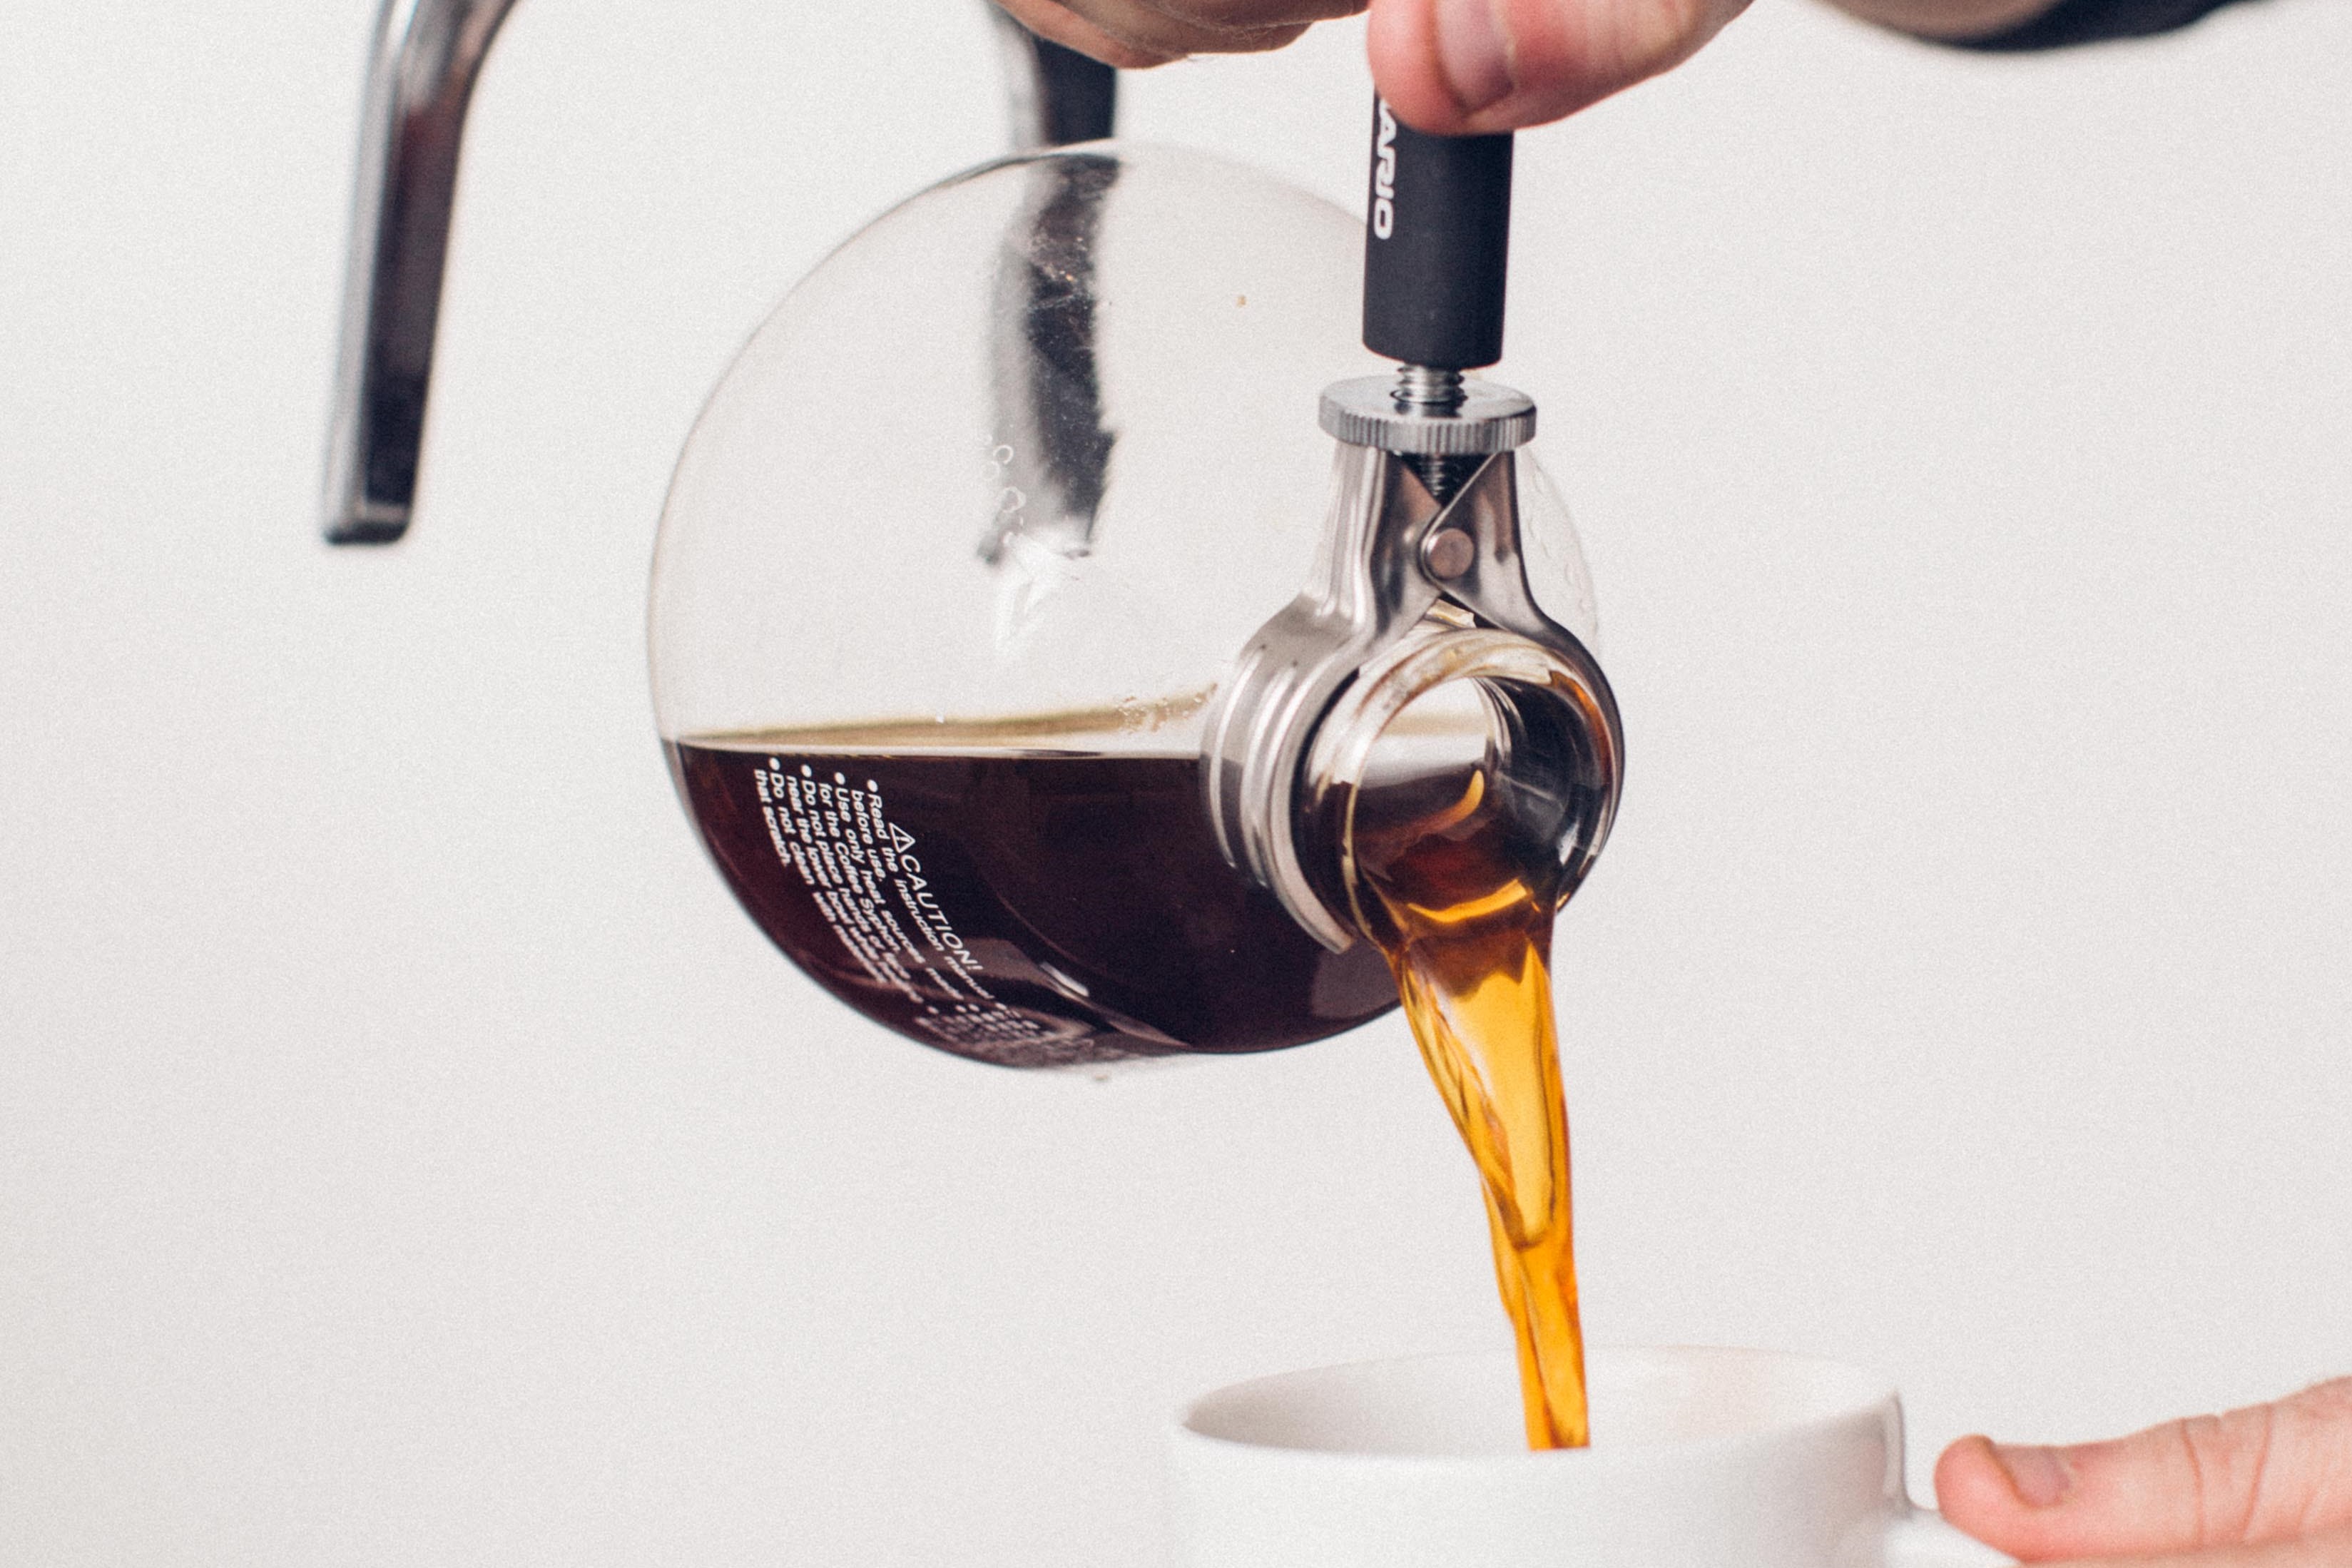
Design
The siphon (or vacpot) is the most visually captivating of all brew methods; but the design is more than just eye candy—it's driven by its fascinating function. As a "vacuum brewer" the two primary components are separate glass chambers connected by an airtight seal and a siphon tube running from the top section of the brewer into the globe shaped chamber below. This siphon tube allows brew water from the bottom chamber to rise upward into the brewing chamber when pushed by vapor pressure. The siphon brewer also includes a stand (table-top models only) and any number of filter options including cloth, metal, and paper.
Grind
The siphon, like the AeroPress, can be used with a variety of grind settings depending on your preferred technique. Generally, grinding a bit finer than you might typically use for drip coffee is a good starting point.
Technique
Start by adding hot water to the globe shaped lower chamber of your siphon and apply heat from a butane, alcohol, or halogen burner. Get your filter set up in the top chamber while your water heats, and once the water is boiling affix the top chamber and filter assembly; be sure that the fit is snug so that there are no air leaks. Water should begin rising into the top chamber and continue rising until the level of liquid in the bottom chamber is just below the siphon tube, once this happens you’re ready to start your timer and add ground coffee into the brewing chamber. Immediately give a gentle stir to saturate your grounds as quickly and evenly as possible. Depending on your grind setting, sometime between 90 seconds and 3 minutes on your timer remove the siphon from the heat source, the brewed coffee should begin to flow back through the filter shortly after that. Give a good stir to create some flow in a whirlpool motion during the drawdown phase to help even out your coffee bed. Once drawdown is complete you can remove the top chamber and serve straight from the globe.
Advantages
The siphon does a great job with temperature stability and even saturation of your coffee grounds, allowing users to focus more on controlling other variables like agitation and brew time. Because the siphon is regularly used with cloth, paper, and metal filters, it's a good brewer to experiment with the effect of each filter medium on the resulting cup of coffee. And, most importantly, you’d be hard pressed to find a brewer that looks more impressive to use.
Considerations
While the rewards can be exceptional, there is a steep learning curve to mastering vacpot brewing. If you choose the cloth filter option there’s a bit of upkeep to consider if you want to keep your filter fresh (e.g. boiling your filter in clean regularly to cut down on staining, soaking in coffee detergent to remove stains, store damp in an airtight container in your fridge to prevent molding, etc.), and the stunning mostly glass brewer is maybe not the best option for clumsy-handed home brewers (like me).
Check out our siphon listings and video overview for more information.
Café Solo

Design
With a sleek Nordic flair the Café Solo is an example of beauty in simplicity. A borosilicate glass body, snug neoprene jacket, and fine mesh stainless steel filter come together to make a brewer that looks clean and modern on any counter. The brewer holds 1 liter in volume—plenty of space to brew for a few people at a time—and the neoprene jacket helps with heat retention, impact resistance, and protecting you and your hands from getting burned.
Grind
A medium-coarse grind will serve you well here.
Technique
Preheat your Solo and dump the rinse water. Add your coffee to the brewer, start your timer, and add hot water to your desired ratio. At 30 seconds on the timer give your slurry a stir and then close up the brewer with its filter, let it sit to steep. At 4 minutes on your timer decant your brew into a mug or server, slowly rotating the Café Solo to keep the filter from clogging.
Advantages
A great option for folks seeking a cup of coffee heavy on body, a stylish kitchen accessory, or a brewer that won’t require paper waste. Exceedingly simple to use, the Solo can be a great choice for beginners and old pros alike.
Considerations
The bottle-neck design can make the brewer a challenge to clean out after use, and the fine mesh filter will require some regular soaking and scrubbing to keep your coffee fresh, but Eva Solo’s durable design should hold up well with regular care.
Check out our Café Solo listing and video overview for more information.
Bonavita Dripper
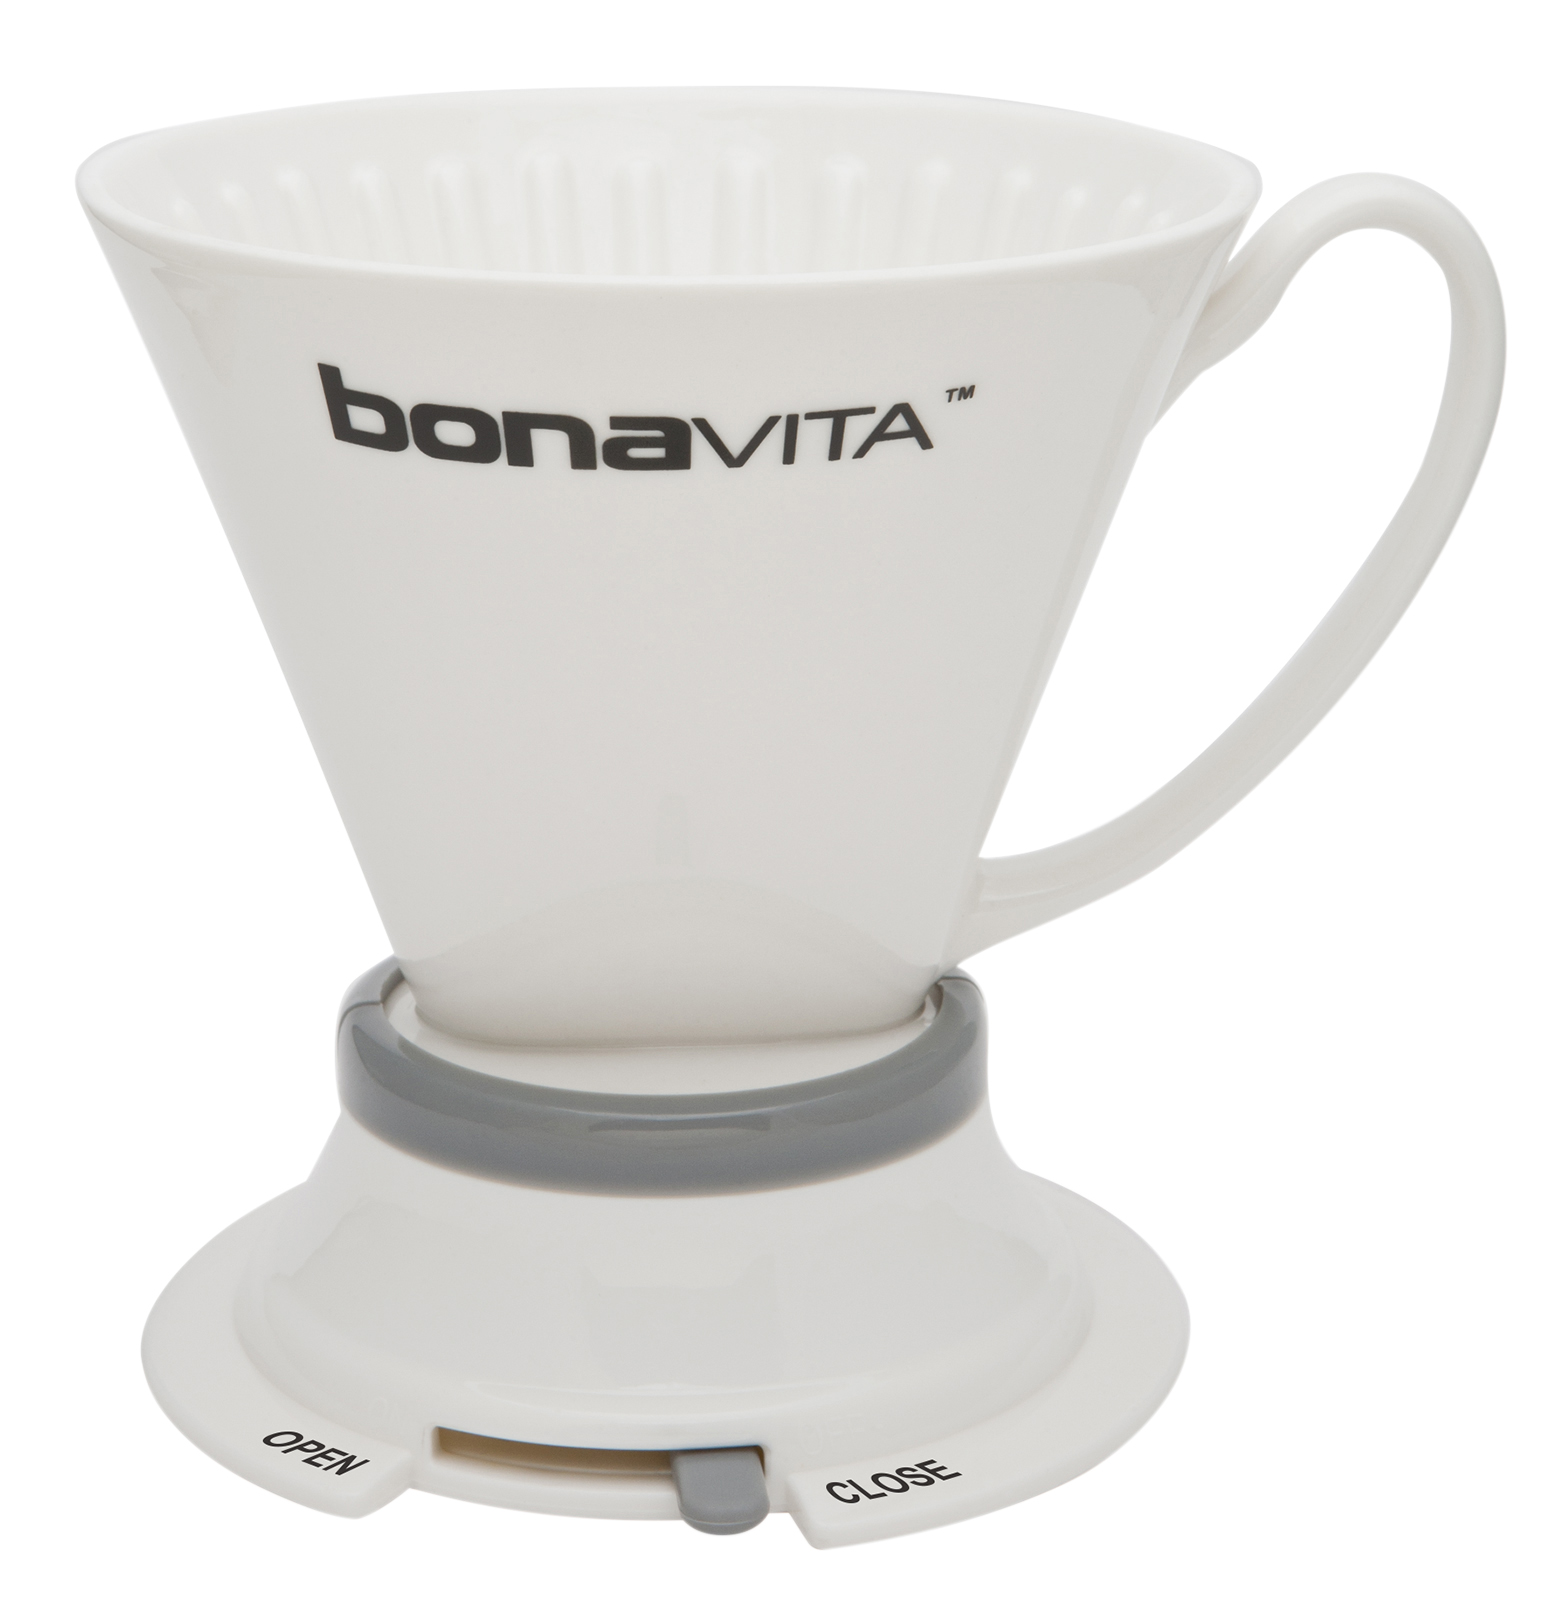
Design
A ceramic body, variable flow rate gasket, and a 25 fl oz size set this brewer apart from other steep and release brewers. Bonavita didn’t miss the little details that make a hybrid brewer a crowd favorite though—a fitted lid for heat retention, sized to use standard #4 filters, and a footprint to fit comfortably on your favorite mug or server—making this brewer a user-friendly option for enthusiasts at any skill level.
Grind
A medium-coarse grind is a great starting starting point for this brewer.
Technique
The Bonavita dripper uses a standard #4 size paper filter. Place the filter in the cone, give it a thorough rinse with hot water and discard the used water. Add your ground coffee to the brewer (after checking that your valve is closed!), start your timer, and pour hot water evenly over the coffee bed until you reach your desired volume and ratio. Cover the brewer with the provided lid to help keep your brewing temperature steady and let the coffee steep until 3:30 on your timer. Once you hit your steep time, open the gasket with the brewer over your mug or decanter (the dripper fits nicely on top of both the Hario and Kalita servers) and let the brew drawdown—drawdown should take about 30 seconds for a total brew time around 4 minutes. Toss the grounds and filter, and rinse the brewer with hot water.
Advantages
A great example of a “set it and forget it” brewer, the Bonavita dripper makes brewing coffee straight-forward and accessible to most anyone. The ceramic body makes it simple to keep your brewer sparkling clean with a little upkeep, and Bonavita even says it’s dishwasher safe (although I might still recommend a hand wash instead). The combination of paper filtration and immersion steeping makes for a clean and evenly extracted cup, and the variable flow gasket adds an extra element of control beyond some of its contemporaries.
Considerations
The heavy ceramic body can do wonders for heat retention, but if you don’t properly and thoroughly preheat the brewer it can do the exact opposite, so to be sure to monitor your brewing temperature stability while you get accustomed to the brewer. Also, because of its heavy body, the Bonavita Dripper can get dangerously top-heavy on top of mugs and servers during the draw-down time, so keep an eye out for that.
Check out our Bonavita Dripper listing for more information.
Cezve

Design
Also called an ibrik depending on where in the world you find yourself. Handmade out of copper, silver, and brass, this 3.5 fl oz brewer is specially shaped to encourage natural turbulence during the brew leading to more even extraction than traditional Turkish pots.
Grind
Espresso ground or finer is necessary for Turkish coffee. Be sure that if you’re using a home grinder that it’s meant to go this fine without issue, otherwise you could be in a world of trouble.
Technique
This brewing style will deviate from some of the brewing tips listed earlier. Start with 7g of finely ground coffee and 70ml of warm water in your brewer. Stir together completely to make sure there are no clumps before heating to promote even extraction. Place the cezve over your heat source (burner, stovetop, etc.) for approximately 2 minutes. Once a coffee foam begins to rise to the rim, but before the coffee boils, remove your pot from the heat and serve. This boil to brew can be done one to a few times to brew a larger volume of coffee. Be sure to give the coffee a few minutes for the grounds to settle before enjoying.
Advantages
This handmade brewer is absolutely beautiful—a perfect option for anyone looking to try making Turkish coffee at home.
Considerations
However, such a specialized tool will of course only be really effective at what it was designed for, and its small size makes it difficult to brew for multiple people simultaneously.
Check out our Cezve listing and Specialty Turkish Coffee’s website for more information. If you’re just getting started with Turkish coffee we have a bundle to help get you going.
American Press
Design
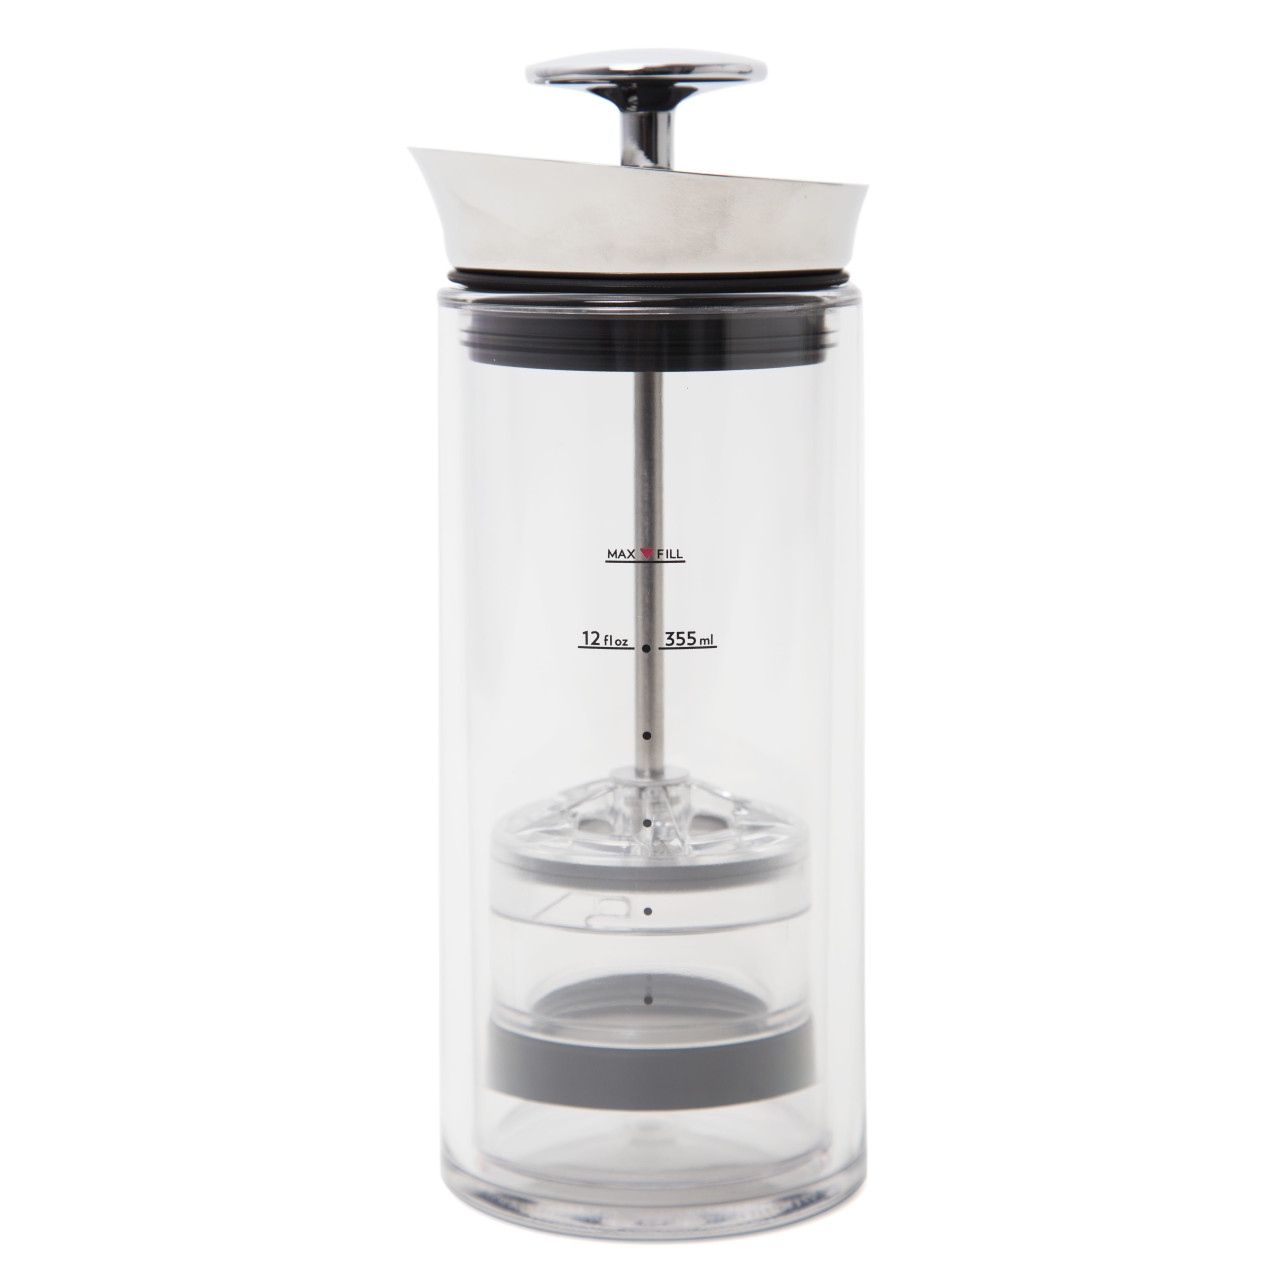
The American Press is an interesting and fairly unique press style brewer. Bringing together immersion, percolation, and pressure with a fine mesh metal filter basket, this brewer produces coffee with hefty body but little sediment. The double-walled BPA-free plastic body insulates the coffee to keep the brew temperature up, and the 12 fl oz brew volume is perfect for a good sized mug for one or two smaller mugs to share.
Grind
Because of its hybrid brewing style, the American Press can work with a variety of grinds. We found the best results with medium ground coffee.
Technique
Preheat the brewer with hot water and dump the rinse water just before brewing. Add your coffee to the brew basket and attach the basket to the bottom of the plunger. Pour your hot brew water into the brewer and attach the plunger lid to the top. Start your timer and press the plunger down slowly, pulling the plunger back up slowly once you’ve nearly reached the bottom of your brewer. Continue slowly and evenly with the up and down motion until 3 minutes have passed on your timer. Be sure to fully depress the plunger before pouring the coffee out of the brewer.
Advantages
This self-contained BPA-free plastic brewer is a great travel companion thanks to its durability and easy to clean design. The versatility you get thanks to its immersion+percolation+pressure brewing system means that you can easily make coffee similar to a french press, an Aeropress, and everything in between.
Considerations
Consistency could be an issue with this brewer until you get pretty familiar with it—the flexibility it affords you thanks to its brewing dynamics also means that there are lots of variables to keep track of.
Check out our American Press listing and video overview for more information.
We want to hear from you! Which immersion brewers do you love? What techniques and parameters are you using? Are there any brewers that you’d love to see on our list? Comment below and let’s talk about it—we’re always excited to learn something new from you!
Don’t forget to check out our Beginners Guide to Pour-Over Brewing while you’re at it!
Happy (immersion) brewing, y’all.


